
| Linux-Mandrake: |
| User Guide and |
| Reference Manual |
MandrakeSoft
January 2000 http://www.linux-mandrake.com
This manual (except appendix 21.0) is protected under MandrakeSoft intellectual property rights. This manual can be freely reproduced, duplicated and distributed either as such or as part of a bundled package under electronic and/or printed format provided however that the following conditions are fulfilled:
For any other use, authorization must be requested and obtained from MandrakeSoft S.A.. Both "Mandrake" and the "Linux-Mandrake" brand name, design and logotypes are registered. All related copyrights are reserved.
Note: The appendix 21.0 is protected by a different license, as a derived work from a work written under the GNU GPL (which you can find on the Web athttp://www.gnu.org/copyleft/gpl.html).Refer to the Copyright section for more details about this license.
The following people contributed to the making of this manual:
rpmmkdir, touch: creating empty directories and files (MaKe DIRectory)rm: deleting files or directories (ReMove)mv: moving or renaming files (MoVe)cp: copying files and directories (CoPy)chown,
chgrp: change the owner and group of fileschmod: changing permissions on files and directories (CHange MODe)//usr: the big one/var: data modifiable during use/etc: configuration files/proc filesystem/etc/smb.confroot"audio group". in '$PATH'"/var/log/security.log"root"root files check"root file MD5 check"passwd file integrity check"shadow file integrity check"auto_inst.cfg.pl fileauto_inf filemount and umount commands/etc/fstab filegrep: General Regular Expression Parserfind: find files according to certain criteriacrontab: reporting, editing your crontab fileat: schedule a command, but only oncetar: Tape ARchiverbzip2 and gzip: data compression programsroot passwordTo help you understand better what is being explained, this document uses different fonts for topics with different interpretations. Some fonts are used for different kinds of objects; either the context will tell you which type of object is being referred to, or the exact distinction is not significant.
Note that the size of the font is automatically scaled to best fit the page width in the following environments. Most of the examples in this section use programs invoked from a command line, that is to say a terminal where you type commands. Refer to the corresponding chapter for more information on how to get a terminal.
# Snippets are presented like this.
# A snippet is an interaction in a
#   terminal between the user and
#   the computer.
# Lines beginning with a "sharp"
#    sign like this one are comments.
# Lines beginning with a "dollar" sign
#    ($) are commands you should type,
#    either as yourself or as root
#    (read the context to know that).
# Lines ending with a "backslash" (\)
#    are lines that continue on the
#    next line. Some programs support
#    this syntax.
# Other lines are the computer messages
$ file /dev/null
/dev/null: character special (1/3)
$ echo Hello \
  World
Hello World
$ echo Hello World
Hello World
# Literal portions of configuration files
#   are displayed like this. Often, lines
#   beginning with a "sharp" (#) sign are
#   comments.
# assign a value to the FOO variable
FOO="My value"
command <non literal argument> [optional argument ...]
It is very important to understand how to interpret the special signs in syntaxes.
The "greater than" and "less than" signs denote an
argument not to be copied verbatim, but to interpret before you do so.
For example, <filename> refers to the actual name of the file. If
this name is foo.txt, you should type foo.txt, and not
<foo.txt> or <filename>.
The square brackets denote optional arguments, which you may or may not include in the command.
The continuation points mean that an arbitrary number of items can be included there.
The syntax used in these pages is representative of syntax you will see in the synopsis of the system's manual pages.
Material you should type literally is displayed like this.
Messages the computer spits are displayed like this.
This manual uses a number of different fonts (which can sometimes be combined) to help you distinguish the semantics or nature of the words used. They will appear in the following manner:
:)
This font is used to show commands you should type as is
in a terminal.
'This font' is used to show variable names.
This font is used to display filenames.
command <argument>. See
above to know how to read the contents of a syntax.
This font is used to display a literal message, or
something you should type literally.
This font is used to display options.
http://machine/path/.
user@domain.xyz.
comp.os.linux.
Escape.
'a'.
user.
command(section).Note: remarks to take into account are presented this way.
Warning: important remarks are displayed like this.
This manual was typeset with LaTeX. Perl and GNU Make
were used to manage the set of files involved. Pictures have been shot
with xwd and converted with convert (from the
ImageMagick package). PostScript files were produced
with dvips. All of these pieces of software are available on
your Linux-Mandrake distribution, and all are free software.
Welcome, and thank you for using Linux-Mandrake! This book is divided into two parts: a User Guide and a Reference manual. The User Guide will help you use your Linux-Mandrake system on a daily basis, and the Reference manual will allow you to go further. Here is a summary for each of these two parts:
The first chapter is purposedly biased towards the people among you who have already used Windows. Linux, is above all, a Unix system, which possesses fundamental differences from other operating systems you may be familiar with. Many new concepts will be highlighted in this chapter.
The second chapter is entirely dedicated to the use of KDE, the default graphical environment of Linux-Mandrake. You will see that it is a real working environment, very intuitive and fully configurable. You will probably be pleasantly surprised by what it can do.
You will then find four chapters dedicated to system configuration, covering the following subjects: configuring an Internet connection by modem, managing users, managing software packages and configuring your hardware with a brand new tool: Lothar.
Then you will learn how to control processes. Applications may sometimes behave badly and you will need to terminate them, this chapter tells you how.
The final section is devoted to documentation. In addition to introducing documentation you have available on your Linux system, some useful links on the Internet are provided.
The Reference Manual goes further into the system and begins with a chapter dedicated to the command line. Described here are standard utilities for manipulating files and also some useful functions provided by the shell.
A chapter is dedicated to text editing. As most Unix configuration files are text, you may need to edit them in a text editor. You will learn how to use two of the most famous text editors in the Unix world: the mighty Emacs and the modern VI.
Then you will see how the file tree is organized. Unix systems tend to grow very large, but every file has its own place in a specific directory. After reading this chapter you will know where to look for files depending on its role in the system.
A chapter will be dedicated to the Linux filesystem
ext2fs. Here you will learn about file types and some additional
concepts that may be new to you. Another chapter will introduce the
special Linux filesystem /proc.
Three chapters follow which introduce useful tools: Samba, for sharing files and printers with Windows machines; MSEC, to manage the security of your Linux-Mandrake system; and Auto Install, which allows you to save your installation parameters for future use.
You will then learn about the Linux-Mandrake bootup procedure, and how to use it efficiently.
Another section covers the topic of filesystems and mount points. Here you will learn what both of these terms mean and be shown a practical example.
The final chapter will describe how to compile and install a new kernel.
You will also want to refer to the Appendix which contains three additional chapters. The first is dedicated to building and installing free software. The second chapter introduces yet another set of command line utilities. The final chapter contains a guide to installing Linux-Mandrake using the text-mode option.
The name "Unix" will maybe say something to some of you. You may even use a Unix system at work, in which case this chapter won't be of much help to you.
For those of you who have never used it, reading this chapter is abolutely necessary. The knowledge of concepts which will be introduced here answers a surprisingly high amount of questions commonly asked by beginners in the Linux world. Similarly, it's likely that some of these concepts can answer most of the problems you may encounter in the future.
The concept of users and groups is extremely important, for it has a direct influence on all other concepts that this chapter will introduce.
Linux is a true multi-user system, so in order to use your Linux machine you must have an account on it. When you created a user at installation time you had, in fact, created a user account. You may remember you were prompted for the following items:
:) ).The two important parameters here are the login name (commonly abbreviated by login) and the password. These are what you will use in order to connect to the system.
Another action which occurred when creating a user account is the creation of a group. By default, the installation program will have created one group per user. As we will see later, groups are useful when you have to share files between several people. A group can therefore hold as many users as you wish, and it's very common to see such a separation in large systems. For example: In a university you can have one group per department, another group for teachers, and so on. The reverse is also true: a user can be member of one or more groups. A math teacher, for example, can be a member of the teachers group and also be in the group of his beloved math students.
All this does not say how you can log in. Here it comes.
If you have chosen to have the graphical interface upon bootup, your startup screen will look similar to figure 8.1.

In order to log in, you must enter your login name into the Login: text field, then enter your password into the password field. Note that you'll have to type your password blindly: there will be no echo into the text field.
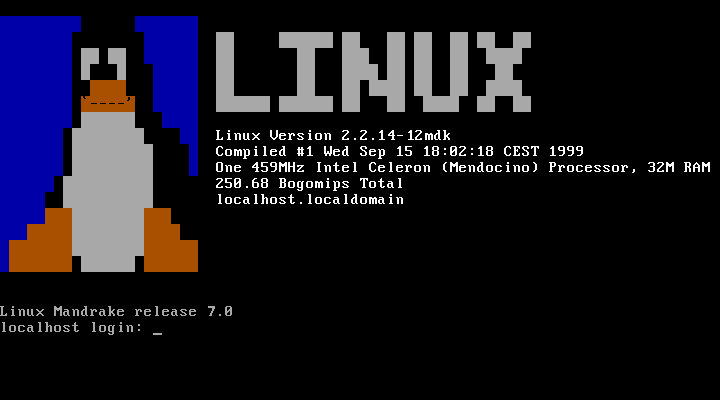
If you are in console mode, your screen will look similar to figure 4.2.
You will then have to enter your login name at the Login:
prompt and press Return, after which the login program (called,
surprise surprise, login) will display a Password:
prompt, and you will obey by typing the password for this account
-- always blindly!
Note that you can log in several times with the same account, on
additional consoles and under X. Each session that you
open is independent, and it's even possible to have several
X sessions. By default, Linux-Mandrake has six virtual
consoles in addition to the one reserved to the graphical interface. You
can switch to any of them by typing the key sequence
Ctrl-Alt-F<n>, where <n> is the number of the console which
you want to switch to. In general, the graphical interface is on console
number 7.
In addition to the creation of user accounts, you will also have noticed
that during the install, DrakX (or the program you used) will
have prompted you for the password of a very special user:
root. This user is special for a simple reason: it's the
account normally held by the system administrator which will most likely
be you. For your system's security, it is very important that the
root account always be protected by a good password.
If you regularly login as root it is very easy to make a
mistake which can render your system unusable; only one mistake can do
it. In particular, if you have not created a password for the
root account any user can alter any part of your system. This
is obviously not a very good idea.
It is worth mentioning that internally, the system does not identify you with your login name but with a unique number assigned to this login name: the user ID (UID for short). Similarly, every group is identified by its group ID (GID) and not its name.
Files are another topic where Linux differs greatly from Windows and most other operating systems. We will cover the most obvious differences here, for more info see Chapter 14.0 in the Reference manual which offers greater detail.
The first difference, and probably the most important, is related to the presence of users. We could have mentioned that every user has their own directory (called his home directory), but this doesn't say what really goes on, which is that each file on a Unix system, is the exclusive property of one user and one group. Therefore, not only does a user have his own home directory, but he's also the owner of his files in the real sense of the word.
Moreover, permissions are associated to each file which only the owner can change. These permissions distinguish three categories of users: the owner of the file, every user who is a member of the group associated to the file (also called the owner group) but who is not the owner, and others, which means every user who is neither the owner nor member of the owner group. There are three different permissions:
r): For a file,
this allows its contents to be read. For a directory, this allows its
contained files to be displayed, if and only if the execute permission is
also set for this directory;
w): For a file,
this allows its contents to be modified. For a directory, it allows the
files contained therein to be modified and deleted, even if the person
is not owner of the file;
x): For a
file, this allows for its execution (as a consequence, only executable
files should normally have this permission set). For a directory, this
allows a user to traverse it (which means going into or through
that directory).Every combination of these permissions is possible. For example: You can
allow only yourself to read the file and forbid it to all other users,
and forbid every other use of the file. You can even do the opposite,
even if it's not very logical at a first glance :) As the file
owner, you can also change the owner group (if and only if you are a
member of the new group), and even deprive yourself of the file (that
is, change its owner). Of course, if you deprive yourself of the file
you will lose all your rights to it...
Let's take the example of a file and a directory. The display below
represents entering the ls -l command from a command
line:
$ ls -l
total 1
-rw-r-----   1 francis  users           0 Jul  8 14:11 a_file
drwxr-xr--   2 gael     users        1024 Jul  8 14:11 a_directory/
$
The results of the ls -l command are (from left to right):
-) if it's a regular file, or
a d if it is a directory. There are other file types, which
we will talk about in the Reference manual. The nine following
characters represent the permissions associated to that file. Here you
can see the distinction which is made between different users for the
same file: the first three characters represent the rights associated to
the file owner, the next three apply to all users belonging to
the group but who are not the owner, and the last three apply to
others. A dash (-) means the permission is not set;
Let's now look closely at the permissions associated to each of these
files: first of all, we must strip off the first character representing
the type, and for the file a_file we get the following rights:
rw-r-----. The interpretation of these permissions is as
follows:
rw-) are the rights of the file owner,
in this case francis. The user francis therefore has the
right to read the file (r), modify its contents (w)
but not execute it (-);
r--) apply to any user who is not
francis but who is a member of the group users: such a
user will be able to read the file (r), but neither to write
nor to execute it (--);
---) apply to any user who is not
francis and is not member of the users group: such a
user will simply have no rights on the file.For the directory a_directory, the rights are
rwxr-xr--, and as such:
gael, as the directory owner, can list files contained
inside (r), add or remove files from that directory
(w), and he can traverse it (x);
gael, but a member of the
users group, will be able to list files in this directory
(r) but not remove or add files (-), and he will be
able to traverse it (x);
r--).Remember, there is one exception to this rule.
The root account can change the attributes (permissions, owner
and group owner) of all files, even if he's not the owner. Which means
that he can also grant himself the ownership. He can read files on which
he has no read permission, traverse directories which he normally has no
access to, and so on. And if he lacks a permission, he just has to help
himself...
In conclusion, we will mention a final distinction regarding filenames. They are indeed much less limited than under Windows:
'/'), even non-printable ones. A consequence is that you
should be careful about case: the files readme and Readme
are different, because r and R are two different
characters;
A process defines an instance of a program being executed and its environment. As for files, here we will only mention the most important differences, and you will want to refer to the Reference manual for a more in-depth discussion on this subject.
The most important difference is, once again, directly related to the
concept of users: each process is executed with the rights of the user
who launched it. Therefore, if we get back to the example of the file
a_file mentioned above, a process launched by the user
gael will be able to open this file in read-only mode,
but not in read-write mode, as the rights associated to the file
forbid it. Once again, the exception to the rule is root...
You will have guessed from the above discussion that one of the parameters of a process' environment is the UID and GID of the user who has launched it. This allows for the system to know whether what the process is asking for is "legal" or permitted.
One consequence is that Linux is mostly immune to viruses. In
order to operate, viruses need to infect executable files. As a user,
you don't have access to vulnerable system files so the risk is greatly
reduced. Add to this that viruses are very rare in the Unix
world in general. So far there have been only three known viruses for
Linux, and they were completely harmless when launched by a
normal user. Only one user can damage a system by activating these
viruses, and once again, it's... root!
Interestingly, anti-virus software does exist for Linux, but for DOS/Windows files... The reason for it being that, more and more, you will see Linux file servers serving Windows machines with the help of the Samba software package (see chapter 30.0 in the Reference manual).
Internally, the system identifies processes in a unique way by, once again, a number. This number is called the process ID, or PID. Moreover, all processes can receive signals which is how you can control them (well, only the processes that you have launched, not another user's process, the exception to this rule being again who you know...): you can stop a process, kill it if it's causing you trouble and so on. In a following chapter, you will learn how to track down a PID and send signals to it. This is useful to terminate and suspend problem processes.
The command line is the most direct way to send commands to the machine. If you use the Linux command line, you'll soon find that it is much more powerful and capable than command prompts you may have previously used. The Linux command line offers direct access to thousands of utilities which don't have graphical equivalents. The reason for it is that you have a direct access, not only to all X applications, but also to thousands of utilities in console mode (as opposed to graphical mode) which don't have their graphical equivalent, or the many options and possible combinations of which will never be showable in the form of buttons or menus.
But, admittedly, it requires a little help to get started. This is what this chapter is for. The first thing to do, if you're using KDE, is to launch a terminal emulator. You have an icon which clearly identifies it in the panel (figure 4.3).
What you have got in this terminal emulator when you launch it is actually a shell. This is the name of the program which you interact with. You find yourself in front of the prompt:
[joe@localhost] ~ $
This supposes that your username is joe and that your machine
name is localhost (which is the case if your machine is
not part of an existing network). All what appears after the prompt is
what you will have to type. Note that when you are root, the
$ of the prompt turns into a #. (All these are only
true in the default configuration, since you can customize all the
details). The command to "become" root when you have
launched a shell as a user is su:
# Enter the root password; it will not appear on the screen
[joe@localhost] ~ $ su
Password:
# exit will make you come back to your normal user account
[root@localhost] joe # exit
[joe@localhost] ~ $
Anywhere else in the book, the prompt will be symbolically represented
by a $, whether you be a normal user or root. You
will be told when you have to be root, so remember su
:) A # in the beginning of a code line will represent a
comment.
When you launch a shell for the first time you
normally find yourself in your home directory. To display the directory
you are currently in, type the command pwd (which stands for
Print Working Directory):
$ pwd
/home/joe
There are a few basic commands which we are now going to see, and you will soon find you cannot do without them.
cd: Change DirectoryThe cd command is just like the one of DOS, with a few
extras. It does just what its acronym says, change the working
directory. You can use . and .., which stand respectively
for the current directory and its parent directory. Typing cd
alone will bring you back to your home directory. Typing cd -
will bring you back to the latest directory you were in. And lastly, you
can specify the home directory of a user john by typing
john (' ' on its own or followed by '/' means
your own home directory). Note that as a normal user, you normally
cannot go into other people's personal directories (unless he explicitly
authorized it or this is the default configuration on the system),
except if you're... root, so let's be root and
practice:
$ pwd
/root
$ cd /usr/doc/HOWTO
$ pwd
/usr/doc/HOWTO
$ cd ../FAQ
$ pwd
/usr/doc/FAQ
$ cd ../../lib
$ pwd
/usr/lib
$ cd ~joe
$ pwd
/home/joe
$ cd
$ pwd
/root
Now, become a normal user again :)
echo commandProcesses have their environment variables and the shell
allows you to view them directly, with the echo command. Some
interesting variables are:
'HOME': This environment variable contains a string
representing your home directory.
'PATH': This variable contains the list of all
directories in which the shell should look for executables when you type
a command. Note that unlike DOS, by default, a shell
will not look for commands in the current directory!
'USERNAME': This variable contains your login name.
'UID': Contains your user ID.
'PS1': Contains the value for your prompt. It is often a
combination of special sequences, you may read the bash(1)
manual page for more information (also see
chapter 11.0).To have the shell print the value of a variable, you must put a
$ in front of its name. Here, echo will help you:
$ echo Hello
Hello
$ echo $HOME
/home/joe
$ echo $USERNAME
joe
$ echo Hello $USERNAME
Hello joe
$ cd /usr
$ pwd
/usr
$ cd $HOME
$ pwd
/home/joe
As you can see, the shell substitutes the value of the variable before
it executes the command. Otherwise, our cd $HOME would not
have worked here. In fact, the shell has first replaced $HOME
by its value, /home/joe, therefore the line became cd
/home/joe, which is what we wanted. It is the same for echo
$USERNAME and so on.
cat: print the contents of one or more files to the screenNothing much to say, this command does just that: print the contents of one or more files to the screen:
$ cat /etc/fstab
/dev/hda5 / ext2 defaults 1 1
/dev/hda6 /home ext2 defaults 1 2
/dev/hda7 swap swap defaults 0 0
/dev/hda8 /usr ext2 defaults 1 2
/dev/fd0 /mnt/floppy auto sync,user,noauto,nosuid,nodev 0 0
none /proc proc defaults 0 0
none /dev/pts devpts mode=0620 0 0
/dev/cdrom /mnt/cdrom auto user,noauto,nosuid,exec,nodev,ro 0 0
$ cd /etc
$ cat conf.modules shells
alias parport_lowlevel parport_pc
pre-install plip modprobe parport_pc ; echo 7 > /proc/parport/0/irq
#pre-install pcmcia_core /etc/rc.d/init.d/pcmcia start
#alias car-major-14 sound
alias sound esssolo1
keep
/bin/zsh
/bin/bash
/bin/sh
/bin/tcsh
/bin/csh
/bin/ash
/bin/bsh
/usr/bin/zsh
less: a pagerIts name is a play on words related to the first pager ever under
Unix, which was called more. A pager is a
program which allows a user to view long files page-by-page (more
accurately, screen-by-screen). We speak about less rather than
more because its use is much more intuitive. Use
less to view large files, which do not fit on a screen. For
example:
less /usr/doc/HOWTO/PCMCIA-HOWTO
To navigate the file, just use the up and down arrow keys. Use
'q' to quit. less can do far more than that, indeed:
just type h for help, and look. But anyway, the goal of this
section is just to enable you to read long files, and this goal is now
achieved :)
ls: listing files (LiSt)This command is equivalent to dir in DOS, but it can
do much much more. In fact, this is largely due to the fact that files
can do more too :) The command syntax for ls is as
follows:
ls [options] [file|directory] [file|directory...]
If no file or directory is specified on the command line, ls
will print the list of files in the current directory. Its options are
very numerous and we will only cite a few of them:
-a: List all files, including hidden files (in
Unix hidden files are files whose names begin with .);
the option -A lists "almost" all files, which means
every file the -a option would print except "." and
"..";
-R: List recursively, i.e. all files and subdirectories
of the directories mentioned in the command line;
-s: Displays the file size in kilobytes next to each
file;
-l: Displays additional information about the files;
-i: Displays the inode number (the file's unique
number on a filesystem, see chapter 14.0) next to each
file;
-d: Displays the directories as normal files instead of
listing their contents.Some examples:
ls -R: lists the contents of the current directory
recursively;
ls -is images/ ..: lists the files in directory
images/ and in the parent directory, and prints for each file its
inode number and size in kilobytes;
ls -al images/*.gif: lists all files (including any
hidden files) in directory images/ with names ending in
.gif. Note that this also includes the file .gif if one
exists.Many keystrokes are available which can save much typing and this
section will present some of the most useful ones. This section assumes
you are using the default shell provided with Linux-Mandrake,
Bash, but these keystrokes should work with other shells too. In
this section, C-<x> means Ctrl+<x> (hold down
Ctrl key, press key <x>, release both keys).
First: the arrow keys. Bash maintains a history of previous
commands which you can view with the up and down arrow keys. You can
scroll up to a number of lines defined in the 'HISTSIZE'
environment variable. Moreover, the history is persistent from one
session to another so you will not lose the commands you have typed in
a previous session.
The left and right arrow keys move the cursor left and right in the
current line, so you can edit your lines this way. But there is more to
editing: C-a and C-e, for example, will bring you
respectively to the beginning and to the end of current line. The
Backspace and Del keys will work as expected. An equivalent
to Backspace is C-h and an equivalent to Del is
C-d. C-k will delete all the line from the position of the
cursor to the end of line, and C-w will delete the word before the
cursor.
Typing C-d on a blank line will make you close the current
session, which is much shorter than having to type exit.
C-c will interrupt the currently running command, except if you
were in the process of editing, in which case it will cancel the editing
and get you back to the prompt. C-l clears the screen.
Finally, there is the case of C-s and C-q: these keystrokes
respectively suspend and restore the flow of characters on a
terminal. They are very seldom used, but it may happen however that you
type C-s by mistake. So, if you strike keys but you don't see
any character appearing on the terminal, try C-q first and beware:
all characters you have typed between the unwanted C-s and
C-q will be printed to the screen all at once.
Before we introduce KDE, it is useful to understand the basis of the graphical interface in Linux and Unix on which KDE is based: X Window System.
X Window System (abbreviated to X) is a project initiated by MIT (Massachusetts Institute of Technology), whose aim was to supply a graphical interface to Unix systems. Today all Unix and Linux systems (with XFree86) use it. X Window System is based on the client/server model. X servers drive the hardware -- graphics card, monitor, keyboard, mouse, pen tablets etc. X clients are all graphical applications. This model provides numerous advantages:
The X Window System itself cannot manage windows: this role is left to a special X client called a window manager. Without a window manager, windows would have no extras (title bars, operating buttons etc.); you would not be able to resize them or place them in the foreground or background, or even hide them (iconify them) unless the application itself asks for it, which would not be very practical. The number of existing window managers is impressive, as is always the case with free software. Some come with Linux-Mandrake, for example, Fvwm, AfterStep, WindowMaker, and the utmost simple, old and venerable Twm.
There remains the most serious problem for the final user: coherence. In fact, the applications communicate to the X server but are totally unaware of each other. A window manager is only aware of the applications in so far as they are windows: it does not know whether the application is a word processor, a terminal or something else. X in itself does not know about Drag'n'Drop, it does not even know icons. And this is where KDE comes in.
KDE provides coherence which is lacking in the X Window System. KDE is a free[1] project initiated by Matthias Ettrich, whose goal is to provide a complete desktop environment for Linux. This goal has been so successful that today KDE is the most widely used desktop environment in the Linux world. It has even penetrated the commercial Unix world where some administrators are happy to use it instead of window managers supplied with their systems!
KDE comes with its own window manager. It also provides all the tools expected by users accustomed to graphical interfaces: a toolbar, a very efficient file manager, contextual menus, balloon help, and drag'n'drop functionality.
KDE also brings some new ideas. The web-oriented desktop is one example, and the possibilities provided by the icons are another. It is also highly intuitive and very configurable. It is a complete working environment that can save you lots of time.
You can see in figure 5.1 a typical KDE desktop with its main components:

Each of these items can be configured. Before going on, we would like to point out a special feature: virtual desktops. This function is widely used in the Unix world and KDE is no exception. In the KDE panel you will find a pager as seen in figure 5.2.
This pager enables you to access all the virtual desktops with one click. Each virtual desktop can have its own windows and settings, and some parameters are unique to each desktop -- for example, the background color or image.
The panel is one of KDE's main features. It is the main application starter and it contains KDE's main menu -- the K menu, which you will easily recognize as shown in figure 5.3.
This menu is divided into three separate sections. From top to bottom you will see:
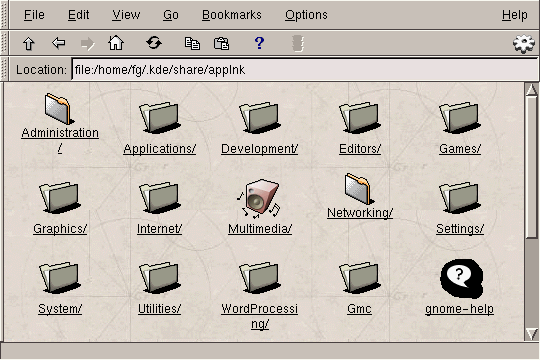
/usr/share/applnk directory;
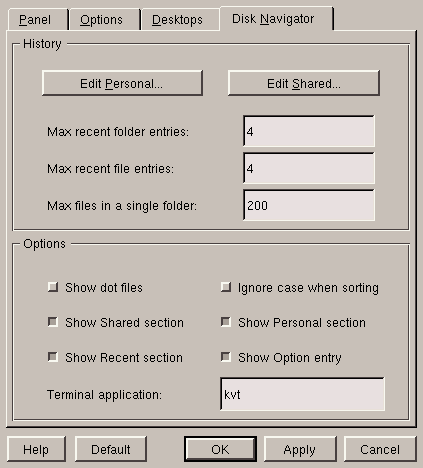
Located in the Panel section of the K menu, you will find many ways to customize the panel and menus. Select Edit Menus to change the KDE menu to your liking, and try Add Application to add your favorite application to the panel. The Configure submenu is sufficiently explicit, but we will come back to the Disk Navigator tab which configures the application of the same name. The Desktops tab only allows you to change the name of the various desktops and the pager size -- you cannot make changes to the desktop numbers here.
The Disk Navigator enables you to quickly navigate through the filesystem by using a menu. This tool can prove to be very practical... if there are not too many files in the directory!
The configuration menu for Disk Navigator
(figure 5.4) can be accessed by choosing
Options... menu. It speaks for itself, as do almost all
KDE's configuration menus. Note that the files which are hidden
in Linux and Unix in general apply to files whose names
begin with the character '.'. If you decide to change your personal
links, you will have to create your entries in a classic KFM
window; we will come back to how to create these entries. You can only
change the overall entries from root!
When you select a directory using Disk Navigator, it will open the directory in a new KFM window. If you select a file, KFM will determine the file type and launch the appropriate application.
If, on the other hand, the type of file is unknown to KFM, you will then have to tell it how to open it, as shown in figure 5.5.
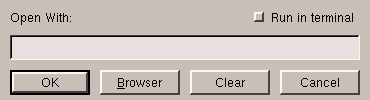
If you select Browser, you will see the list of
KDE menus from which you can select an appropriate program.
Otherwise, you can always enter by hand the name of the program in which
you want to open the file, but you will have to specify the location of
the file in the command line by %f; this is shown in
figure 5.6.
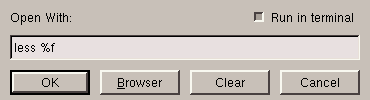
In this case, less, being a program in console mode, you will
also have to tick the option Run in a terminal. You will
also be able to associate a program with a type of file which is unknown
to KFM; we will see how to do so later on in the chapter.
With the control panel, this is the second basic component of KDE. It is an extremely powerful tool, and its possibilities go way beyond those of any existing file managers. It naturally shares all the functions of similar tools:
There are several additional functions which make it extra useful:
You can open a KFM window in at least two ways:
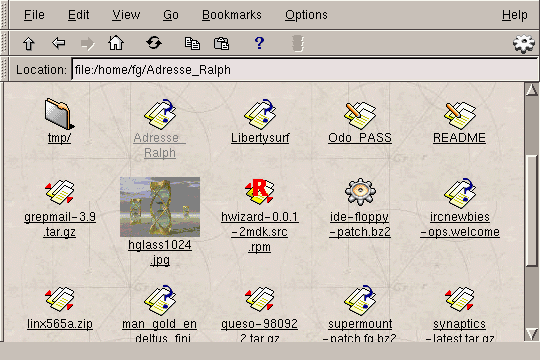
The figure 5.8 displays an example of a KFM window.
This is probably not the view you will get by default because the
configuration for this window has been changed from the "basic"
configuration. However, some things do not change: you still have a
Location text zone where you can enter the URL to be
consulted, the toolbar and the menu bar. The local files are represented
by URLs whose prefix is file:, so here you can see the contents
of the /home/fg directory. You can already see some of the
characteristics of the manager:
When looking at the window you will have guessed that there is an icon
for the types of files it does not know (in fact, the file
ircnewbies-ops.welcome is a simple text file, but the
.welcome "extension" which, in fact, is not one, makes
it try to find a MIME type corresponding to this sort of file). If
you click on the grepmail-3.9.tar.gz file in this window, for
example, KFM will start the application associated with the
MIME type of the file associated with the "extension"
.tar.gz -- an archiving program.
Let us now look at the basis for configuring KFM -- which can be found in two menus. The first is the View menu, as shown in figure 5.9.

The following options are available:
'.';
enabling this option will display these files (in general, these are
files and/or directories for configuring applications in the user's
personal directory);
index.html in a directory, if one exists. For example, try to
display the contents of the directory /usr/doc/mandrake. If,
however, you do not want to display the HTML directly, you will have
to deactivate this option. To view an HTML file you then have to
click on it with the left button.
The Options menu allows you to customize how the window itself appears. To make any of these changes permanent, choose Save Settings.
Finally, you have a dialogue box where you can configure other aspects of the window manager, obtained by selecting Options/Configure File Manager.... The option titles speak for themselves. In the Other menu, the Allow per-URL settings option applies to the window's options: its size, the display of the various components, etc.
KFM can also browse the Web. Some of the links present on the Linux-Mandrake basic desktop in fact point to web sites: for example, try a right-click on the icon called news and select the URL tab; you will then see the tab of figure 5.10 which is, in fact, a URL designating a web site. After closing this window, now left-click on this link, and you will obtain a KFM window which will load the web site, as shown in figure 5.11!


You can see from the appearance of web pages viewed through KFM that it may not be your primary browser choice, but it could come in handy as it uses far less memory than many other web browsers.
For the moment there is no plugin support for KFM, but it does know how to work with MIME types. An example of MIME types is when you click on a link, such as a MPEG file, and the web browser starts the appropriate program to play the file. Or you can save the link to disk by selecting it and dragging it to another KFM window, or even to your desktop!
A very interesting feature of KFM is its ability to function as
an FTP client. A window displaying an FTP site will appear very
similar to how it looks when displaying local files, except that the
Location field will begin with ftp://. Or you can enter
a site address directly -- if it begins with ftp,
KFM will then automatically give it a prefix...
For example, if you enter ftp.ciril.fr in the URL field,
KFM will automatically give it the prefix ftp:// at the
beginning and will effectively then open the corresponding FTP site,
as shown in figure 5.12.

You can see that KFM associates icons in the same way as local directories, and can carry out the same operations for the file types, except that it will first download a copy of the file locally. The directory icons "surrounded with a belt" mean that you do not have access to them, as applies to local directories.
From this sort of window, you can drag and drop and therefore download a file from the FTP site to your personal directory using the icon corresponding to the file!
However, the way that we have structured the URL naturally means that the FTP directory is anonymous, so that you do not have write access to the remote directory. If you have write access to a remote directory via FTP (for example, your ISP provides you with space for a web site, and gives you FTP access to the directory containing your HTML files), you will have to specify your user name on this server, together with the FTP site address, in the form:
ftp://login@remote.site.com/
For example, if your login name is john and the site
name my.isp.com, you will then enter
ftp://john@my.isp.com/ as the URL. A window will appear,
asking you for your password. You can not only drag and drop from your
local directory to the remote directory, but you can also edit your
files on the remote directory locally. After making the changes,
KFM will ask for confirmation before upgrading the file on the
remote site.
The options for configuring these two functions of KFM can be accessed via the menu Options/Configure Browser.... You will see the picture displayed in figure 5.13.
The Proxy screen configures what its name suggests: if you are connected to the Internet and your ISP has a proxy, this is where you can configure it for both FTP and HTTP. The HTTP screen tells the navigator which languages it has to be able to accept from the web sites, as well as the character sets (Cyrillic, Chinese etc.). The default options are generally sufficient.

The User Agent screen is a little more "tricky": it
allows to give a false reply when a Web server asks you which
navigator you use. In fact, some sites send different contents depending
on which navigator you use! This tab allows you to get round the
problem. If a page looks different, depending on whether you use
KFM or Netscape, you can enter the name of the server in
the On server: text field, and enter the string
identifying Netscape (Mozilla 4.61) in the
login as: text field, then click on
Add...
As to the Cookies screen, it configures what its name
indicates: the attitude of KFM towards cookies, with the
possibility of specifying a different policy for one or the other site.
As you can see, KFM is a complete web navigator
:)
KDE uses two types of data to associate files with applications: applications on the one hand, and MIME types on the other. Each application is associated with one or more MIME types. When you left-click on an icon representing a recognized type of file, KFM starts the default application associated with this type of file. If you right-click on it, you will see the list of applications associated with this MIME type, below the menu items. The one at the top of the list will be started by default.
MIME is the acronym for Multipurpose Internet
Mail Extensions. At the beginning, MIME types were used to identify
the type of a file attached in an e-mail. A MIME type has the form
main-type/subtype. For example, the image/jpeg
MIME type identifies a JPEG image. Note that a MIME type is
independent of the extension!
The KFM file manager takes over the MIME types in order to associate a description with the files. First of all it uses the file type and its access permission (this is how it recognizes the directories and other special files, see the Reference manual), and if neither of these two items gives it any information, it will place its confidence in the extensions of the file names.
You can edit your MIME types: open a KFM window, and then choose Edit/Mime Types from the menus, to see a list similar to figure 5.14.

For example, let's take the MIME type corresponding to the JPEG
images, that is image/jpeg; go to the image directory for
this, right-click on jpeg and you will get the screen
displayed figure 5.15.
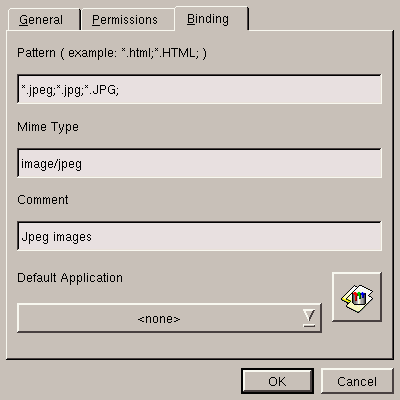
Select the Binding tab. This is where everything happens. The Pattern text field contains the file extensions to be associated with this type. The Mime Type field contains the name of the type and the summary of the type of file.
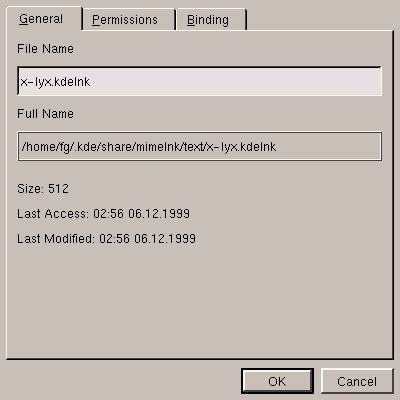
We are now going to create a MIME type for the LyX files:
KLyX is a word processing program supplied with
Linux-Mandrake, but it is not registered in the list of KDE
applications (we will do this afterwards), and initially we have to be
able to identify the files. These files have the extension
lyx. The type will be called text/x-lyx.
So you have to go into the text directory, and from there
right-click and select New/Mime Type.
After specifying a name in the New/Mime Type window that
will appear, you can then edit the MIME type as shown in
figure 5.16.
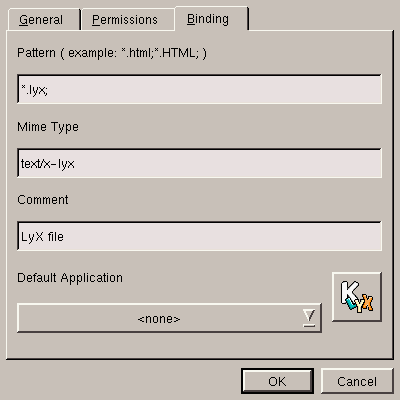
After naming it, you have to tell it which extension the file should normally have, which is done in the Binding tab, shown figure 5.17.
Now you have to declare the application.
To see the list of applications defined in KDE, you have to start from a KFM window and select Edit/Applications. You will then be taken to the list of applications already available in your personal directory, that will resemble figure 5.18.
To add KLyX to it, right-click on an unoccupied field in the KFM window and select New/Application, as in figure 5.19.
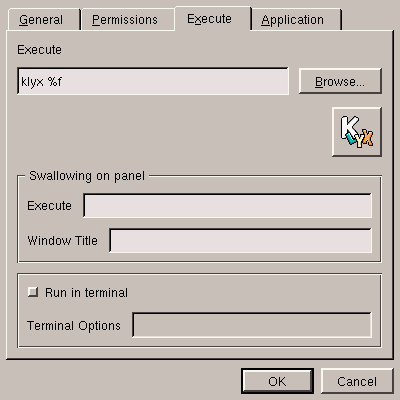
Now that we have created the application name, we have to go to the
Execute tab and fill in the required fields. Note the
%f in the Execute field: you need it to
designate the location of the file name(s) in the command line; this is
explained in figure 5.20.
Now you have got to the point of associating the application with the
MIME types associated with it. In this case there is only one, which
we have created above -- text/x-lyx, as
figure 5.21 recalls us.
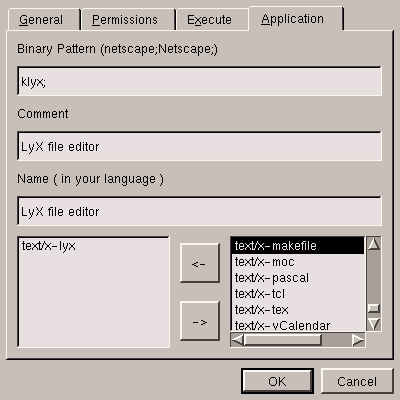
Note that the comment and application name are free.
To confirm creation, click OK. After creating the application, you can now reedit the corresponding MIME type and associate KLyX with it as the default application.
The KDE desktop behaves almost exactly the same way as Windows, although it has extra functionalities:
You also have contextual menus on your desktop. Right-click on an unoccupied desktop field, select Display properties.
As you can see, this screen (shown figure 5.22) configures the desktop background. And this is where the usefulness of virtual desktops begins to become apparent: if you wish, you can select a different background for each desktop (by deselecting the radio button Common background) by selecting each of the desktops in turn. The other options are very similar to those you may be already familiar with from Windows: possibility of selecting a plain background, a gradient one, various arrangements of the background image etc. If you want to have a bit of fun, select a wallpaper at random and make a list of your favorite background images!

The Screensaver tab configures the screensaver you want for your environment. The menu of figure 5.23 should also look familiar to most of you.

You can select a screensaver from the list on the left, configure it where possible and test it. You can also choose not to have a screensaver at all. Remember that, by default, you will be typing your password blind; if you want to display asterisks for each character you type, you will have to enable the Show passwords as stars option.
As an exercise, we are leaving you to find out what the
Colours and Fonts tabs are used for -- you
shouldn't find that too hard :)
However, the Style tab, shown figure 5.24, is a bit more complex.

Here is a description of the three radio buttons above:
Finally the bottom frame allows you to select the size of the icons appearing in the control panel (Panel on the desktop and in KFM, (File manager and desktop icons), and in the other (Other) contexts.
Icons are created in the same way as adding an application to KDE applications. To create an icon on the desktop, right-click on an unoccupied field within the desktop and select New/Application; you simply fill in the fields in exactly the same way.
You can also go to the KDE applications list, and drag and drop from the KFM window to the desktop: a menu will ask you if you want to move the file, copy or link it.
Icons themselves are Drag'n'Drop aware, and this is
particularly useful for applications. For example, if you look at the
properties of the printer icon in the Execute tab, you will
see the plain command lpr %f: this simply means that if you
drag an icon representing a file over to the printer icon, KDE
will execute the lpr command with the name of the file
concerned, (%f), which is exactly what we want (lpr
is the program used to print all types of files). You can thus change
the existing icons to provide them with this function. If you bring
over several icons, the names of all the files represented by these
icons will be passed as an argument.
The KDE control center (shown figure 5.25) brings together all the aspects of the KDE configuration. You can access it directly from the K menu.
Some of the settings have been mentioned in previous pages so we'll review some of the most interesting aspects.
As its name suggest, this tab allows you to choose a theme for KDE. A theme may contain its own icon design, window buttons, sounds, screen background images and other features. Take the time to try out the various themes available: there are a lot of them.
If you were wondering where the screen power-saving functions were, look no further: they are here. DPMS stands for Display Power Management System, and this is what is used to black out the screen after a certain period of inactivity. If you activate DPMS, do not forget to adjust the various parameters at your convenience.
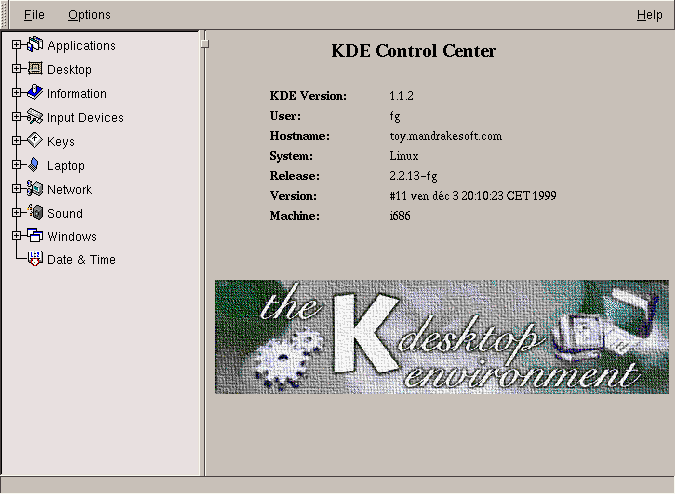
In this tab, you will find a whole range of information on the system. Note that everything you see here, and more, is available from a terminal.
In this tab, you can adjust the different window parameters at your convenience, from the title bar colors to the type of focus used, via the mouse movements in the windows, the title scroll configuration, the button positions and others. You have a great freedom of choice -- make the most of it!
We are going to configure and use an Internet connection using two tools: Kppp and LinuxConf.
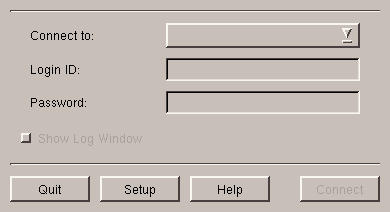
Kppp can be found in the KDE menu under the Internet submenu. The window for Kppp is shown in figure 6.1.
Select Setup, you will then display the screen shown figure 6.2.
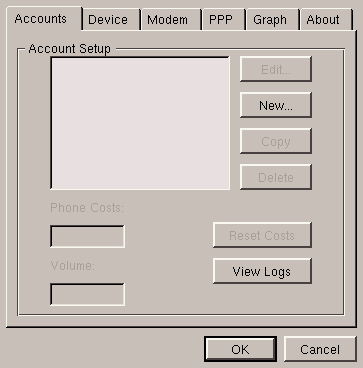
Few things to be done here. If you wish, you can change the speed of the serial port in the Device menu to 115200 and adjust the options in the PPP heading to your preferences. To create an account, choose New..., and you will see a window as in figure 6.3.

Section by section:
:)
And that's all! Then click on OK to validate, click on OK a second time in the configuration panel and you will return to the main screen.
From here, you will simply need to enter the user name and password for your ISP account (not those of your user account!), then click on Connect...

Configuring an Internet connection with LinuxConf is a
little more complicated than with Kppp, but LinuxConf
has a much wider range than Kppp: you can use it to configure
almost all aspects of your system, and the aspect that we are interested
in here is the network. Be careful, you have to start it as
root. Tip: you are not obliged to log in as root to be
root. On a normal user terminal, type su. You will
be asked for your root password.
LinuxConf also has the advantage of functioning in text mode,
but here we will use graphical mode. You can launch LinuxConf
directly from a terminal and select the Networking heading or
type netconf directly. In either case, the same screen will
appear, and it is shown in figure 6.4.
Here are the various sections you will have to edit, in the right order, and what you will have to do:
Section by section:

ATZ and
ATDT). However, in the Chat section, delete all and
simply enter TIMEOUT and 5 respectively in the first
two boxes;
And that's it! To control the interfaces configured by this means, you
will have to use the program called usernetctl but this too
can be accessed via the K menu named: Personal/Linux
Mandrake/Networking/Usernet. It is fairly user-friendly -- you
simply have to click on the interface name to connect and disconnect.

LinuxConf will be used here also. So start LinuxConf as
root from a terminal, then choose User accounts (or
start userconf directly) (figure 7.1).
If you click on the User accounts tab, you will bring up a list of existing users in the system; you then simply need to click on Add to add an account (figure 7.2).

You must at least complete the login name (therefore the name of the account used to login) and the full name (put what you want). You can even provide it with a user identification number. If you do not, a unique one will be allocated. Similarly, you can -- although you are not obliged to -- specify a group to which it will belong. LinuxConf will create a new default group for this user, with the user alone as member.
When you are satisfied with the information, click on Accept.
LinuxConf will then ask you for a password for the new user. As
always, be very careful when choosing your password! Linux-Mandrake
will warn you if your password is too weak from the security point of
view. For example, if you enter foo as the password,
LinuxConf will warn you as in figure 7.3.

In all cases, you will be asked to type it a second time for confirmation. Your new user has now been created.
To delete an account, you simply have to select the account in the list of accounts and click on Delete. LinuxConf will then ask you what to do with the user files.
The program which we will use is rpm (the
RedHat Package Manager), a text mode program.
Several graphical versions of rpm are available:
Kpackage (a KDE application), GnoRPM (an
application for GNOME) and the new Linux-Mandrake
application RPMDrake.
rpmThis is the simplest and most powerful way: the rpm command
not only allows you to install or uninstall packages, it also allows you
to see the package dependencies and what a package supplies the others
with, and to build packages. But we will restrict ourselves to the most
common tasks: installing, uninstalling and obtaining useful information.
Please note that you have to install packages as root. You
therefore have to connect as root, or you can also type the
command su as a user. The program will then ask you for the
root password. If you enter it correctly (always blind), you
will then be root:
fg!rtfm $ su
Password:
root!rtfm /home/fg #
(From here on, we will use the regular $ prompt character,
whether you need to be operating as root or not.)
Assuming that you have an RPM called foo-1.0-1.i386.rpm in the
directory, you can install it by entering the following command:
$ rpm -ivh foo-1.0-1.i386.rpm
If you want to upgrade a package (for example foo 1.1 has come
out), you will have to use -Uvh instead of -ivh.
However, you are not obliged to install it. you can simply test whether
the package will be installed: you will have to add the --test
option in the line above, which will give:
$ rpm -ivh --test foo-1.0-1.i386.rpm
If you want to uninstall foo, you will need to use the
-e option of the rpm program:
$ rpm -e foo
You do not need to specify the whole package name. Since the package has
been previously installed, it is in the RPM database and is
recognized here as foo. A reference to this package is
therefore enough.
The package query option is -q. You can ask RPM a
lot of things:
rpm -q
foo
),
rpm -ql foo),
rpm -qi
foo).You can even ask if a file in your system belongs to a package, and, if
yes, which one. For example, if you want to know which package contains
the file /etc/passwd, you simply have to type:
$ rpm -qf /etc/passwd
rpm will reply that this file belongs to the setup
package.
Finally, you can obtain information on the packages which have
not yet been installed: this is the -p <package_name> options.
For example, if you want to know which files the
foo-1.0-1.i386.rpm package will install, you will simply have to
type:
$ rpm -qlp foo-1.0-1.i386.rpm
Kpackage is the KDE package management program. This is the program with which KFM associates RPM packages: clicking on an RPM package in KFM will start Kpackage with this RPM, and here you will see the information on the package. Kpackage also supports Drag'n'Drop, and you can drag an RPM from KFM to an existing Kpackage window.
As we have already said, click on a package in KFM, drag an
RPM from KFM to an existing Kpackage window or invoke
kpackage <name_of_rpm>.i386.rpm from the command line.
You will then receive the information on the package
(figure 8.1).
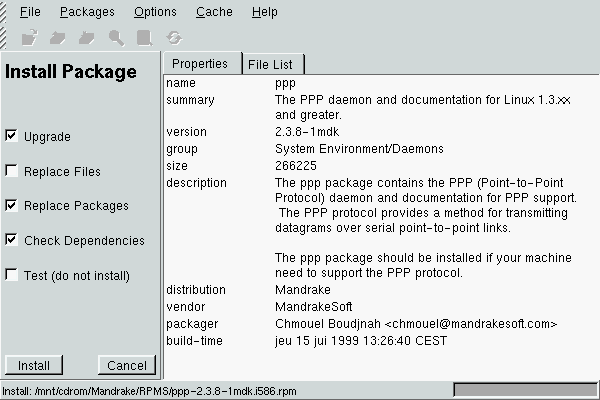
You can see the various options in the radio buttons on the left:
rpm the
-U option instead of -i;
rpm. If a dependency has not been supplied, the package will
refuse to install. You can force installation by disabling this option
(the equivalent of the --nodeps option of rpm), but
here too you have to know what you are doing. A package which has been
installed this way may not work!
--test of rpm.After this, click on Install if you want to install it, or on Cancel to cancel the operation.
Simply bringing up Kpackage will take you to the main window. Here you will see the list of all packages installed on the system in the form of a tree (figure 8.2).

You do not have to search for a package in the tree manually. In the File menu, you can carry out a package search by name (or by a substring). Kpackage will then develop the tree by itself and will highlight the selected package. When you have found the package you want, you will then have to click on Uninstall on the right side of the window.
You can even search by file. However, you will have to indicate the
complete path to the file. If, for example, you want to uninstall
xv, you can carry out a package search on the executable file
(/usr/X11R6/bin/xv); Kpackage will then tell you that the
corresponding package is xv. Then do a package search on
xv, and Kpackage will find it for you in the tree.
Kpackage provides this information automatically: when you click on an RPM in the tree, the information will appear on the right side of the window: general information in the Properties tab, and the list of files installed by this package in the File List tab. It will give you the same information on a package which you want to install.
When was the last time you had to install a new sound card on your Linux system and just couldn't quite get it to work? Sure you know which model it is and can even guess which driver supports it and may even have some idea as to the IRQ, DMA and I/O port it uses.
Here comes Lothar.
Lothar is a fully GUI based tool which ties together many of the tools already included in a Linux distribution to automate and simplify the process of installing new hardware. Some items will be detected, others can be selected from a drop down list. The various I/O, IRQ and such X86 annoyance settings can be adjusted from within this interface.
The window (figure 9.1) is separated in two parts, one with the list of devices detected, another with information about the device selected. All devices are sorted by categories.

You can select a category and show all hardware detected in it by using
+ or -. This action will expand tree with device detected on
this category. If you select a device, you'll see some useful
information about this device. And in some cases you'll see a
configuration button; that will allow you to configure the selected
device.
The configuration tools called from within Lothar through Run Configuration Tool are:
To exit Lothar, go to the File menu and select
Exit.
Lothar SoundConfig (figure 9.2) is used to configure the soundcard. In most cases your card will be detected. If not, try to select one in the list.

Some cards need some parameters as I/O, IRQ, DMA,
DMA 16/2, MPU401 I/O. You can easily select
them by clicking on the arrow of each combobox. These values can be
found in the manual of your soundcard. If the value is set up to
-1 you don't need to specify a value. After selecting a card
and its parameters (if needed), you can test it by pressing the
Test button. If your card is correctly configured, you'll
hear a sound sample. Test mode won't write any configuration files. If
the test is okay, you can save the configuration by pressing
Ok. A sample will be played to confirm. If you're not sure of
your settings, use Test button instead Ok, it's
safer.
Lothar EtherConfig (figure 9.3) has the same interface as SoundConfig but with less parameters and without a testing mode. In most cases your card will be detected. If not, try to select one from the list.

Some cards need some parameters as I/O, IRQ, DMA. You
can easily select them by clicking on the arrow of each combobox. These
values can be found in the manual of your Ethernet card. If the
value is set up to -1, you don't need to specify a value. You
can save configuration by pressing Ok.
In some cases, Lothar can freeze your system. So use it carefully. In other cases, hardware can be misconfigured or not be detected at all. For more information, news, links, etc, have a look at the Lothar home page:
http://www.linux-mandrake.com/lothar/index.html
In a previous section, we mentioned that it was possible to monitor processes; that is what we will cover next. To understand the operations we are going to perform here, it is helpful to know a bit more about them.
As with files, all processes that run on a Linux system are organized in the form of a tree, and each process has a number (its PID, Process ID), together with the number of its parent process (PPID, Parent Process ID).
This means that there is a process at the top of the tree structure, the
equivalent of the root for filesystems: init (see
Reference manual), which is always numbered 1. The next section
will explain two commands, ps and pstree, which
allow you to obtain information on a running process.
Every process in Unix can react to signals sent to it. There
exist 31 different signals. For each of these signals, the process can
reset the default behavior, except for two signals: signal number 9
(KILL), and signal number 19 (STOP).
Signal 9 kills a process irrevocably, without giving it the time to
terminate properly. This is the signal you send to a process which is
stuck or exhibits other problems. A full list of signals is available
using the command kill -l.
ps and pstreeThese two commands display a list of processes present on the system according to criteria set by you.
psSending this command without an argument will show only processes initiated by you and attached to the terminal you are using:
$ ps
  PID TTY          TIME CMD
 5162 ttya1    00:00:00 zsh
 7452 ttya1    00:00:00 ps
There are a large number of options, of which we will look at the most common:
a: also displays processes started by other users;
x: also displays processes with no control terminal (this
applies to almost all servers);
u: displays for each process the name of the user who
started it and the time it was started.There are many other options. Refer to the manual page for more
information (man ps).
The output of this command is divided into different fields: the one
that will interest you the most is the field PID, which contains
the process identifier. The field CMD contains the name of the
command executed.
A very common way of calling up ps is as follows:
$ ps ax | less
This gets you a list of all processes currently running, so that you can identify one or more processes which are causing problems and subsequently kill them.
pstreeThe command pstree displays the processes in the form of a
tree structure. One advantage is that you can immediately see what is
the parent process of what: when you want to kill a whole series of
processes and if they are all parents and children, you simply kill the
parent. You want to use the option -p, which displays the
PID of each process, and the option -u which displays the
name of the user who started off the process. As the tree structure is
generally long, you want to call up pstree in the following
way:
$ pstree -up | less
This gives you an overview of the whole process tree structure.
kill, killall and topxkillIf you are using KDE, there is a shortcut for killing a blocked X process. There is a very easily identifiable icon on the desktop, reproduced in figure 10.1.
xkill iconThis icon activates the command xkill which you can run from
a terminal. When you click on this icon (or start the program from your
terminal), the mouse cursor changes. You then left-click on the window
corresponding to the process you want to kill.
kill, killallThese two commands are used to send signals to processes. The command
kill requires a process number as an argument, while
killall requires a command name.
The two commands can optionally receive a signal number as an argument.
By default, they both send the signal 15 (TERM) to the relevant
process(es). For example, if you want to kill the process with
PID 785, you enter the command:
$ kill 785
If you want to send it signal 9, you enter:
$ kill -9 785
Suppose that you want to kill a process for which you know the command
name. Instead of finding the process number using ps, you can
kill the process directly:
$ killall -9 netscape
Whatever happens, you will only kill your own processes (unless you are
root), so don't worry about the "neighbor's" processes
with the same name, they will not be affected.
toptop is a program all in one: it simultaneously fulfils the
functions of ps and kill. It is a console mode
program, so you start it from a terminal, like it is shown in
figure 10.2.

topThe program is entirely keyboard controlled. You can access help by
pressing 'h'. Here are some of the commands you can use.
'k': this command is used to send a signal to a process.
top will then ask you for the process PID followed by
the number of the signal to be sent (15 by default);
'M': this command is used to sort processes by the amount of
memory they take up (field %MEM);
'P': this command is used to sort processes by the CPU time
they take up (field %CPU; this is the default sort
method);
'u': this command is used to display a given user's processes,
top will ask you which one. You need to enter the user's
name, not his UID. If you do not enter any name, all
processes will be displayed;
'i': this command acts as a toggle; by default, all processes,
even sleeping ones, are displayed; this command ensures that only
processes currently running are displayed (processes whose STAT
field states R, Running) and not the others. Using this
command again takes you back to the previous situation.In addition to the manuals included with Linux-Mandrake, many other sources of documentation are available. On the following pages we'll offer some suggestions which you may find useful.
This is a primary source of information on a day-to-day basis. Practically every command has its manual page, but there are also manual pages on the format of certain configuration files, on the library functions for programmers, and others.
The manual pages are arranged in different sections, and you will often
see in documents references to "open(2)",
"fstab(5)" or others, which means respectively
the manual page of open in section 2 and the manual page of
fstab in section 5.
The command for displaying a manual page is man, and its
syntax is as follows:
man [options] [section] <manual page>
There is even a manual page for man itself: man man.
Manual pages are formatted then displayed using the less
pager by default. So you already know how to browse through and
quit a manual page :)
At the top of each manual page you will see the name of the page and the
section of the manual which this page belongs to; at the bottom of the
manual page (in general in the SEE ALSO section)
you'll see references to other manual pages related to the one you are
looking at.
You can start by consulting the manual pages for the different commands
which have been covered in this manual: man ls,
man chmod, etc.
If you don't find the right manual page (for example, if you want to use
the function mknod in one of your programs but end up on the
manual page for the mknod command), you need to mention the
section explicitly: in this case it is man 2 mknod, or if you
can no longer remember the exact section, man -a mknod will
go through all the sections looking for manual pages named
mknod.
info pages are another source source of documentation which are
more complete than manual pages. The command for accessing info
pages is info.
The info pages are arranged in the form of a tree structure with
its top called dir. From the top, you can access all existing
info pages.
You can call up info in two ways: either with no argument, in which case you will find yourself at the top of the tree structure, or followed by a command or package name, in which case the corresponding page, if it exists, will be opened. For example:
$ info emacs
In the info pages, text like this:
* Buffers::
indicates a link. If you move the cursor to this link (using the arrow
keys) and press Enter, you will then be taken to the
corresponding info page.
The following keyboard shortcuts exist:
'u': for Up, goes to the level above;
'n': for Next, goes to the next info page
in this level of the tree structure;
'p': for Prev, goes to the previous info
page.There are a large number of commands, which you can list by typing
'?'.
HOWTOs are documents published by the LDP
(Linux Documentation Project), dedicated to the
configuration of many aspects of your system. HOWTOs exist in many
languages and you are likely to find a document that answers your
specific question or problem on your hard disk, as long as you have
installed the corresponding packages (this is the howto package
for the English edition). They are located in the directory
/usr/doc/HOWTO. Their primary form is text files, but they are
also available in HTML for reading with a web browser, and
PostScript for printing.
The list is very long: to get an idea, type the command:
ls /usr/doc/HOWTO/*-HOWTO | less. If you encounter a problem
which you are unable to resolve, finding and reading the corresponding
HOWTO if it exists is the best way to start, and it is very
likely not only that you will find your solution, but also that you will
learn a great deal at the same time. Amongst other things they cover
networking (NET-3-HOWTO), sound card configuration
(Sound-HOWTO), the writing of CD (CD-Writing-HOWTO), NIS
and NFS configuration and a whole raft of other things.
However, you need to check the modification dates of HOWTO documents. Some have not been updated recently and it is possible that their contents are no longer accurate... So check the publication date, which is always at the beginning of the document, and watch out especially for old HOWTO relating to hardware configuration: this is an area where Linux evolves very fast. Also remember that the term "old" in the world of free software is even more significant than in IT in general: free software is sometimes considered old when it's been around for fifteen days.
/usr/docSome packages also come with their own documentation, located in a
subdirectory of /usr/doc, which will have the same name as the
package.
Internet information sources are widespread, websites dedicated to Linux and its use or configuration are numerous. But websites are not all there is.
Of the multitude of existing websites, here are some of the most exhaustive:
http://www.linux.org/: one of the very first sites dedicated
to Linux, it contains a whole slew of links to other useful
sites;
http://freshmeat.net/: if you want the latest applications
in the Linux world, here is where you want to go;
http://www.linux-howto.com/: documentation, and
documentation again :)And of course don't forget your favorite search engine. It is often the most practical tool for finding the information you need. ... A few well chosen keywords in a search engine will often produce answers to your specific problem.
To get help on news, you can (should?) first look to see whether your
problem has already been covered (or solved) on Dejanews:
http://www.deja.com/home_ps.shtml. If you don't find anything,
there is a newsgroup entirely dedicated to Linux-Mandrake
(alt.os.linux.mandrake), and you also have access to many
groups in the comp.os.linux.* "hierarchy":
comp.os.linux.setup: questions on Linux
configuration (devices, configuration of applications) and resolution of
miscellaneous problems.
comp.os.linux.misc: all that will not fit in another
group.
Before posting to one of these groups, be certain that you have read the available documentation on your subject. New users who post to these groups without proper research are often made to regret it.
In Chapter 4.0 you were shown how to launch a shell. In this chapter we will show you how to put it to work.
The shell's main asset is the number of existing utilities: there are thousands of them, and each one is devoted to a particular task. We will only look at a small number of them here. One of Unix's greatest assets is the ability to combine these utilities, as we shall see later.
File handling here means copying, moving and deleting files. Later, we will look at ways of changing their attributes (owner, permissions).
mkdir, touch: creating empty directories and files (MaKe DIRectory)mkdir is used for creating directories. Its syntax is simple:
mkdir [options] <directory> [directory ...]
Only one option is worth noting: the option -p. If this option
is set, mkdir will create parent directories if these did not
exist before. If this option is not specified and the parent
directories do not exist, mkdir will display an error.
Examples:
mkdir foo: creates a directory foo in the
current directory;
mkdir -p images/misc docs: creates a directory
misc in directory images by first creating the latter if
it does not exist, together with a directory docs.Initially, the touch command is not intended for creating
files but for updating file access and modification times[3]. However, one of its
side-effects is to create the files mentioned if they did not exist
before. The syntax is:
touch [options] file [file...]
So running the command:
touch file1 images/file2
will create a file called file1 in the current directory and a
file file2 in directory images.
rm: deleting files or directories (ReMove)This command replaces the DOS commands del and
deltree, and more. Its syntax is as follows:
rm [options] <file|directory> [file|directory...]
Options include:
-r, or -R: Delete recursively. This option is
mandatory for deleting a directory, empty or not. However,
there is also the command rmdir for deleting empty
directories.
-i: Request confirmation before each deletion. It is
recommended to alias the bare rm word to rm
-i in your shell, and the same goes for cp and mv
commands.
-f: The opposite of -i, forces deletion of the
files or directories, even if the user has no write authorisation on the
files[4].Some examples:
rm -i images/*.jpg file1: Deletes all files which name
ends with .jpg in directory images and file
file1 in the current directory, requesting confirmation for each
file. Answer 'y' to confirm deletion, 'n' to cancel.
rm -Rf images/misc/ file*: Deletes without requesting
confirmation the whole directory misc/ in directory
images/ together with all files in the current directory which
name begins with file.Warning: a file deleted usingrmis deleted irrevocaby. There is no way of restoring the files! Don't hesitate to use the-ioption...
mv: moving or renaming files (MoVe)The syntax of the mv command is as follows:
mv [options] <file|directory> [file|directory ...] <destination>
Some options:
-f: Forces file moving -- no warning if an
existing file is overwritten by the operation.
-i: The opposite -- ask the user for
confirmation before overwriting an existing file.
-v: Verbose mode, report all changes.Some examples:
mv -i /tmp/pics/*.gif .: Move all files in directory
/tmp/pics/ which name ends with .gif to the current
directory (.), requesting confirmation before overwriting any
files.
mv foo bar: Rename file foo as bar.
mv -vf file* images/ trash/: Move, without requesting
confirmation, all files in the current directory which name begins with
file together with the entire directory images/ to
directory trash/, and show each operation carried out.cp: copying files and directories (CoPy)cp replaces the DOS commands copy,
xcopy and more. Its syntax is as follows:
cp [options] <file|directory> [file|directory ...] <destination>
It has a bunch of options. These are the most common:
-R: Recursive copy; mandatory for copying a
directory, even empty.
-i: Request confirmation before overwriting any files
which might be overwritten.
-f: The opposite of -i, replace any existing
files without requesting confirmation.
-v: Verbose mode, records all actions performed by
cp.Some examples:
cp -i /tmp/images/* images/: Copies all files from
directory /tmp/images to directory images/ of the current
directory, requesting confirmation if a file is going to be
overwritten.
cp -vR docs/ /shared/mp3s/* mystuff/: Copies the whole
directory docs to the current directory plus all files in
directory /shared/mp3s to directory mystuff located in the
current directory.
cp foo bar: Makes a copy of file foo under the
name bar in the current directory.The series of commands shown here is used to change the owner or owner group of a file or its permissions. We looked at the different permissions in chapter 4.0.
chown, chgrp: change the owner and group of one or more files (CHange OWNer, CHange GRouP)The syntax of the chown command is as follows:
chown [options] <user[.group]> <file|directory> [file|directory...]
The options include:
-R: Recursive; to change the owner of all files and
subdirectories in a given directory.
-v: Verbose mode; describes all actions performed by
chown; reports which files have changed owner as a result of
the command and which files have not been changed.
-c: Like -v, but only reports which files have
been changed.Some examples:
chown nobody /shared/book.tex: changes the owner of
file /shared/book.tex to nobody.
chown -Rc john.music *.mid concerts/: attributes all
files in the current directory ending with .mid and all files
and subdirectories in directory concerts/ to user john
and to group music, reporting only files affected by the
command.The chgrp command lets you change the group ownership of a
file (or files); its syntax is very similar to that of chown:
chgrp [options] <group> <file|directory> [file|directory...]
The options for this command are the same as for chown, and it
is used in a very similar way. Thus, the command:
chgrp disk /dev/hd*
attributes to the group disk all files in directory /dev/
which name begins with hd.
chmod: changing permissions on files and directories (CHange MODe)The chmod command has a very distinct syntax. The general
syntax is:
chmod [options] <change mode> <file|directory> [file|directory...]
but what distinguishes it is the different forms that the mode change can take. It can be specified in two ways:
<x>00, where <x> corresponds to the
permission assigned: 4 for read permission, 2 for write permission and 1
for execution permission; similarly, the owner group permissions take
the form <x>0 and permissions for "others" the form
<x>. Then all you need to do is add together the assigned
permissions to get the right figure. Thus, the permissions
rwxr-xr-- correspond to 400+200+100 (owner permissions,
rwx) +40+10 (group permissions, r-x) +4 (others'
permissions, r--) = 754; in this way, the permissions are
expressed in absolute terms: previous permissions are unconditionally
replaced;
[category]<+|-><permissions>. The category may be one or more
u (User, permissions for owner),
g (Group, permissions for owner group) or
o (Others, permissions for
"others"). If no category is specified the changes apply to all
categories. A + sets a permission, a - removes the
permission. Finally, the permission is one or more of r
(Read), w (Write) or
x (eXecute).The main options are quite similar to those of chown or
chgrp:
-R: Change permissions recursively.
-v: Verbose mode, describes actions carried out for each
file.
-c: Like -v but only shows files for which
there has been a change of permissions.Examples:
chmod -R o-w /shared/docs: Recursively removes write
permission for "others" on all files and subdirectories of
/shared/docs/.
chmod -R og-w,o-x private/: Recursively removes write
permission for the group and others for the whole directory
private/, and removes the execution permission for others.
chmod -c 644 miscellaneous/file*: changes permissions
of all files in directory miscellaneous/ with names beginning
with file to rw-r--r-- (i.e. read permission for
everyone and write permission only for the owner), and reports only
files where a change has been made.You probably already use globbing characters without knowing it.
When you write a file in a Windows or when you look for a file,
you use * to match a random string. For example,
*.txt matches all files which name end with .txt. We
also used it heavily in the last section. But there is more to globbing
than *.
When you type a command like ls *.txt and press Return,
the task of finding which files match the pattern *.txt is not
done by the ls command, but by the shell itself. This requires
a little explanation about how a command line is interpreted by the
shell. When you type:
$ ls *.txt
readme.txt  recipes.txt
the command line is first split into words (ls and
*.txt in this example) . When it sees a * in a word,
it will interpret the whole word as a globbing pattern and will replace
it with the names of all matching files. Therefore, the line just before
the shell executes it has become ls readme.txt recipe.txt,
which gives the expected result. Other characters make the shell react
this way:
?: matches one and only one character, whatever that
character;
[...]: matches any character found into the brackets;
characters can be referred to either as a range of characters (e.g,
1-9) or discrete values, or even both. Example:
[a-zBE5-7] will match all characters a to
z, a B, a E, a 5, a 6
or a 7;
[!...]: matches any character not found in the
brackets. [!a-z], for example, will match any character which
is not a lowercase letter;
{c1,c2}: matches c1 or
c2, where c1 and c2 are also globbing
patterns.Here are some patterns and their meaning:
/etc/*conf: All files in /etc which name end
with conf. It can match /etc/inetd.conf, but it can also
match /etc/conf.linuxconf, and also /etc/conf if such a
file exists. Remember that * can match an empty string.
image/cars,space[0-9]/*.jpg: All filenames ending
with .jpg in directory image/cars, image/space0,
... , image/space9, if such directories exist.
/usr/doc/*/README: All files named README in all
immediate subdirectories of /usr/doc. This will make
/usr/doc/mandrake/README match for example, but not
/usr/doc/myprog/doc/README.
*[!a-z]: All files which names do not end with a
lowercase letter in the current directory.To understand the principle of redirections and pipes, we need to explain a notion about processes which has not yet been introduced. Each Unix process (this also includes graphical applications) opens a minimum of three file descriptors: standard input, standard output and standard error. Their respective numbers are 0, 1 and 2. In general, these three descriptors are associated with the terminal from which the process was started, the input being the keyboard. The aim of redirections and pipes is to redirect these descriptors. The examples in this section will help you understand better.
Imagine, for example, that you wanted a list of files ending with
.gif[5] in directory images. This
list is very long, so you want to store it in a file to look at it at
leisure subsequently. You can enter the following command:
$ ls images/*.gif 1>file_list
This means that the standard output of this command (1) is
redirected (>) to the file named file_list. The
operator > is the output redirection operator. If the
redirection file does not exist, it is created, but if it exists its
previous contents are overwritten. However, the default descriptor
redirected by this operator is the standard output and does not need to
be specified on the command line. So you can write more simply:
$ ls images/*.gif >file_list
and the result will be exactly the same. Next, you can look at the file
using a text file viewer such as less.
Now imagine that you want to know how many of these files there are.
Instead of counting them by hand, you can use the utility called
wc (Word Count) with the option
-l, which writes on the standard output the number of lines in
the file. One solution is as follows:
wc -l 0<file_list
and this gives the desired result. The operator < is the input
redirection operator, and similarly the default redirected descriptor is
the standard input one, i.e. 0, and you simply need to write
the line:
wc -l <file_list
Now suppose that you want to look at this, remove all the file
"extensions" and put the result in another file. One tool for
doing this is sed, i.e. Stream EDitor.
You simply redirect the standard input of sed to the file
file_list and redirect its output to the result file, e.g.
the_list:
sed -e 's/.gif$//g' <file_list >the_list
and there is your list created, ready for consultation at leisure with a viewer.
It can also be useful to redirect standard errors. For example, you want
to know which directories in /shared you cannot access: one
solution is to list this directory recursively and to redirect the
errors to a file, while not displaying the standard output:
ls -R /shared >/dev/null 2>errors
which means that the standard output will be redirected (>) to
/dev/null, a special file in which everything you write is lost
(i.e. as a side effect the standard output is not displayed) and the
standard error channel (2) is redirected (>) to the
file errors.
Pipes are in some way a combination of input and output redirections.
The principle is that of a pipe, hence the name: one process sends data
into one end of the pipe and another process reads the data at the other
end. The pipe operator is |. Let us go back to the example of
the file list above. Suppose you want to find out directly how many
corresponding files there are without having to store the list in a
temporary file, you then use the following command:
ls images/*.gif | wc -l
which means that the standard output of the ls command (i.e.
the list of files) is redirected to the standard input of the
wc command. This then gives you the desired result.
You can also directly put together a list of files "without extensions" using the following command:
ls images/*.gif | sed -e 's/.gif$//g' >the_list
or, if you want to consult the list directly without storing it in a file:
ls images/*.gif | sed -e 's/.gif$//g' | less
Pipes and redirections are not restricted solely to text that can be read by human beings. For example, the following command sent from a xterm:
xwd -root | convert - /my_desktop.gif
will send a screenshot of your desktop to the
my_desktop.gif[6] file in your personal directory.
Completion is a very handy functionality, and all modern shells (including Bash) have it. Its role is to give the user as little work to do as possible. The best way to illustrate completion is to give an example.
Suppose your personal directory contains a file which name is
file_with_very_long_name_impossible_to_type, and you want to look
at it. Suppose you also have in the same directory another file called
file_text. You are in your personal directory. So you type the
following sequence:
$ less fi<TAB>
(i.e., type less fi and then press the TAB key). The
shell will then extend the command line for you:)
$ less file_
and also give the list of possible choices (in its default configuration, which can be customised). Then type the following sequence of keys:
less file_w<TAB>
and the shell will extend the command line to give you the result you want:
less file_with_very_long_name_impossible_to_type
All you need to do then is press the Enter key to confirm and read the
file.
The TAB key is not the only way to activate completion, although
it is the most common. As a general rule, the word to be completed will
be a command name for the first word of the command line
(nsl<TAB> will give nslookup), and a file name for
all the others, unless the word is preceded by a "magic"
character from , @ or $, in which case
the shell will respectively try to complete a user name, a machine name
or an environment variable name[7].
There is also a magic character for completing a command name
(!) or a file name (/).
The other two ways to activate completion are the sequences
Esc-<x> and C-x <x> (Esc being the Escape key,
and C-x meaning Control+<x>), where <x> is one
of the magic characters already mentioned. Esc-<x> will attempt to
come up with a unique completion, and if it fails will complete the word
with the largest possible substring in the list of choices. A
beep means either that the choice is not unique, or quite simply
that there is no corresponding choice. The sequence C-x <x>
displays the list of possible choices without attempting any completion.
Pressing the TAB key is the same as successively pressing
Esc-<x> and C-x <x>, where the magic character depends on
the context.
Thus, one way to see all the environment variables defined is to type
the sequence C-x $ in a blank line. Another example: if you want
to see the page of the manual for the command nslookup, you
simply type man nsl then Esc-!, and the shell will
automatically complete to man nslookup.
You will have noticed that when you send an order from a terminal, you normally have to wait for the command to finish before the shell returns control to you: you sent the command in the foreground. However, there are occasions when this is not desirable.
Suppose, for example, that you have decided to copy a large directory
recursively to another. You also decided to ignore errors, so you
redirect the error channel to /dev/null:
cp -R images/ /shared/ 2>/dev/null
A command like this can take several minutes to finish. You then have
two solutions: the first is violent, and means stopping (killing) the
command and then doing it again when you have the time. To do this, type
C-c (Control+'c'): this will take you back to the
prompt.
But suppose you want the command to run while doing something else. The
solution is then to shift the process to the background. To do
this, type C-z to suspend the process:
$ cp -R images/ /shared/ 2>/dev/null
  # Type C-z here
[1]+  Stopped                 cp -R images/ /shared/ 2>/dev/null
$
and there you are again with the prompt. The process is then on standby,
waiting for you to restart it (as shown by the keyword
Stopped). That, of course, is what you want to do, but in the
background. Type bg (for BackGround) to
get the desired result:
$ bg
[1]+ cp -R images/ /shared/ 2>/dev/null &
$
The process will then start running again as a background task, as
indicated by the & (ampersand) sign at the end of the line.
You will then be back at the prompt and able to continue working. A
process which runs as a background task, or in the background, is called
a job.
Of course, you can start processes directly as background tasks,
precisely by adding an '&' at the end of the command. So, for
example, you can start copying the directory in the background by
writing:
cp -R images/ /shared/ 2>/dev/null &
If you want, you can also restore this process to the foreground and
wait for it to finish by typing fg
(ForeGround). To put it into the background again,
type the sequence C-z, bg.
You can start several jobs in this way: each command will then be given
a job number. The shell command jobs lists all the jobs
associated with the current shell. The job preceded by a +
sign indicates the last process begun as a background task. To restore a
particular job to the foreground, you can then type fg <n>
where <n> is the job number, e.g. fg 5.
Note that you can also suspend or start full-screen applications
(if they are properly programmed) in this way, such as less or
a text editor like VI, and restore them to the foreground when
you want.
As you can see, the shell is very complete and using it effectively is a matter of practice. In this relatively long chapter, we have only mentioned a few of the available commands: Linux-Mandrake has thousands of utilities, and even the most experienced users employ a hundred at most.
There are utilities for all tastes and purposes: you have utilities for
handling images (like convert mentioned above, but also
GIMP batch mode and all pixmap handling utilities),
sounds (MP3 encoders, audio CD players), for CD writing,
e-mail programs, FTP clients and even web browsers
(lynx or w3m), not to mention all the administration
tools.
Even if graphical applications with equivalent functions do exist, they
are usually graphical interfaces built around these very same utilities;
in addition, command line utilities have the advantage of being able to
operate in non-interactive mode: you can start writing a CD and then
log off the system in the confidence that the writing will take place
(see the nohup(1) manual page).
As stated in the introduction, text editing[8] is a fundamental feature in the use of a Unix system. The two editors we are going to take a quick look at the use of, are slightly difficult initially, but once you have got the basics, both prove to be powerful tools.
Emacs is probably the most powerful text editor in existence. It can do absolutely everything and is infinitely extendable thanks to its built-in Lisp-based programming language. With Emacs, you can move around the web, read your mail, take part in discussion forums, make coffee, etc. But what you will be able to do at the end of this section will be limited to: open Emacs, edit one or more files, save them and quit Emacs. Which is not bad to start with.
Calling up Emacs is relatively simple:
emacs [file] [file...]
Emacs will open every file entered as an argument in a buffer up
to a maximum of two buffers visible at the same time, and will present
you the buffer *scratch* if you do not specify a file. If you are
in X, you also have menus available, but here we will look at
working on the keyboard. C-x represents the sequence
Control+x, M-s represents the sequence Alt+s.
It is time to go hands-on. By way of example, let us open two files,
file1 and file2. If these two files do not exist, they
will be created (if you write something in them).
$ emacs file1 file2
to get the window shown in figure 60.1.

As you can see, two buffers have been created: one per file. A third is
also present at the bottom of the screen (where you see (New
file)): that is the mini-buffer. You cannot yourself go into this
buffer, but must be invited by Emacs during interactive entries.
To change buffers, type C-x o. You can type text as in a
"normal" editor, deleted with the DEL or Backspace
key.
To move around, you can use the arrow keys, but also other key
combinations: C-a to go to the beginning of the line, C-e to
go to the end of the line, M-< to go to the beginning of the
buffer and M-> to go to the end of the buffer. There are many
other combinations, even for each of the arrow
keys[9].
As soon as you want to save changes made in a file, type C-x C-s,
or if you want to save the contents of the buffer to another file, type
C-x C-w and Emacs will ask you for the name of the file to
which the buffer contents are to be written. You can use
completion to do this.
If you want, you can show only one buffer on the screen. There are two ways of doing this:
C-x 0;
C-x 1.There are then two ways to restore the buffer which you want on the screen:
C-x b and enter the name of the buffer you want,
C-x C-b, a new buffer will then be opened, called
*Buffer List*; you can move around this buffer using the
sequence C-x o, then select the buffer you want and press the
Enter key, or else type the name in the mini-buffer. The buffer
*Buffer List* returns to the background once you have made
your choice.If you have finished with a file and want to get rid of the associated
buffer, type C-x k. Emacs will then ask you which buffer
it should close. By default, it is the name of the buffer in which you
are; if you want to get rid of a buffer other than the one proposed,
enter its name directly or all press TAB: Emacs will
then open (yet) another buffer called *Completions* giving the
list of possible choices. Confirm the choice with the Enter key.
You can also restore two visible buffers to the screen at any time; to
do this type C-x 2. By default, the new buffer created will be a
copy of the current buffer (which enables you, for example, to edit a
large file in several places "at the same time"), and you
simply proceed as described previously to move to another buffer.
You can open other files at any time, using C-x C-f. Emacs
will then ask you for the filename and here again completion is
available.
Suppose we are in the situation of figure 13.2.
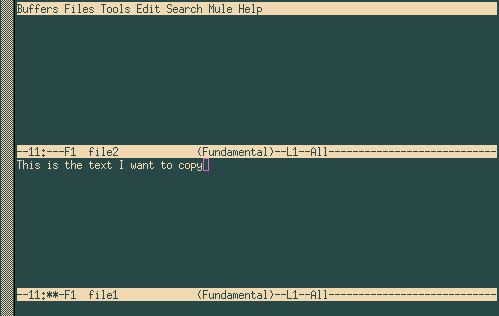
First, you need to select the text that you want to copy. In X,
you can do it using the mouse, and the area selected will even be
highlighted. But here we are in text mode :) In this case, we
want to copy the whole sentence. First, you need to place a mark to
mark the beginning of the area. Assuming the cursor is in the position
where it is in the figure above, first type C-SPACE (Control
+ space bar): Emacs will then display the message Mark
set in the mini-buffer. Then move to the beginning of the line with
C-a: the area selected for copying or cutting is the whole area
located between the mark and the cursor's current position, hence in the
present case the whole line. Next type M-w (to copy) or C-w
(to cut). If you copy, Emacs will return briefly to the mark
position, so that you can view the selected area.
Then go to the buffer to which you want to copy the text, and type
C-y, to obtain what is displayed in figure 13.3.
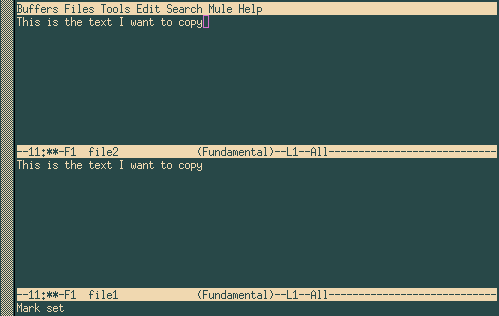
In fact, what you have just done is copy text to the
"kill ring" of Emacs: this kill ring contains
all the areas copied or cut since Emacs was started.
Any area just copied or cut is placed at the top of the kill
ring. The sequence C-y only "pastes" the area at the top:
if you want to have access to the other areas, press C-y then
M-y until you get to the desired text.
To search for text, go into the desired buffer and type C-s:
Emacs then asks you what string to search for. To start a new
search with the same string, still in the current buffer, type C-s
again. When Emacs reaches the end of the buffer and finds no
more occurrences, you can type C-s again to restart the search
from the beginning of the buffer. Pressing the Enter key ends the
search.
To search and replace, type M-%. Emacs asks you what
string to search for, what to replace it with, and asks for confirmation
for each occurrence it finds.
A final very useful thing: C-x u undoes the
previous operation. You can undo as many operations as you want .
The shortcut for this is C-x C-c. Emacs then asks you
whether you want to save the changes made to the buffers if you have not
saved them .
VI was the first full-screen editor in existence. That is one of the main objections of Unix detractors, but also one of the main arguments of its defenders: while it is complicated to learn, it is also an extremely powerful tool once one gets into the habit of using it. With a few keystrokes, a VI user can move mountains, and apart from Emacs, few text editors can say the same.
The version supplied with Linux-Mandrake is in fact VIm, for VI iMproved, but we will call it VI throughout this chapter.
First, calling up: exactly like Emacs. So let us go back to our two files and type:
$ vi file1 file2
At this point, you find yourself in front of a window resembling figure 13.4.

You are now in command mode in front of the first open file.
And here, the difficulties begin :) In command mode, you cannot
insert text into a file... To do this, you have to go into insert
mode, and therefore enter one of the commands which allows you to do
so:
'a' and 'i': to insert text respectively after and before
the cursor ('A' and 'I' insert text at the end and at the
beginning of the current line);
'o' and 'O': to insert text respectively below and above
the current line.In insert mode, you will see the string --INSERT-- appear
at the bottom of the screen (so you know what mode you are in). It is in
this and only this mode that you can enter text. To return to command
mode, press the Esc key.
In insert mode, you can use the Backspace and DEL keys to
delete text as you go along. To move around the text, both in command
mode and in insert mode, you use the arrow keys. In command mode, there
are also other key combinations which we will look at later.
ex mode is accessed by pressing the ':' key in command mode:
the same ':' will appear at the bottom of the screen, and the cursor
will be positioned on it. Everything you type subsequently, followed by
pressing Enter, will be considered by VI to be an
ex command. If you delete the command up to "delete"
the ':', you will return to command mode and the cursor will go back
to its original position.
To save changes to a file you type :w in command mode. If you want
to save the contents of the buffer to another file, type :w
<file_name>.
As with Emacs, you can have several buffers displayed on the
screen. To do this, use the :split command .
To move from one file to another, in a buffer, you type :next to
move to the next file and :prev to move to the previous file. You
can also use :e <file_name>, which allows you either to change to
the desired file if this is already open, or to open another file. Here
again completion is available.
To change buffers, type C-w j to go to the buffer below or
C-w k to go to the buffer above. You can also use the up and down
arrow keys instead of 'j' or 'k'. The :close command hides
a buffer, the :q command closes it.
Watch out, VI is finicky: if you try to hide or close a buffer without saving the changes, the command will not be carried out and you will get this message:
No write since last change (use! to override)
In this case, do as you are told :) type :q! or
:close!.
Apart from the Backspace and DEL keys in edit mode,
VI has many commands for deleting, copying, pasting, and
replacing text -- in command mode. Here, we will look at a few.
All the commands shown here are in fact separated into two parts: the
action to be performed and its effect. The action may be:
'c': to replace (Change); the editor deletes the
text requested and goes back into insert mode after this command;
'd': to delete (Delete);
'y': to copy (Yank), we will look at this in the
next section.
'.': repeats last action.The effect defines which group of characters the command acts upon. These same effect commands entered as they are in command mode correspond to movements:
'h', 'j', 'k', 'l': one character left, down, up,
right[10];
'e', 'b', 'w': to the end (resp. to the beginning) of
current word; to the beginning of the next word;
'^ ', '0', '$': to the first non blank character of
current line, to beginning of current line, to the end of current line;
f<x>: to next occurrence of character <x>; for
example, fe moves the cursor to the next occurrence of the
character 'e';
/<string>, ?<string>: to the next occurrence of string
or regexp <string>, and the same thing going backwards in the
file; for exemple, /foobar moves the cursor until the next
occurrence of the word foobar;
'{', '}': to the beginning, to the
end of current paragraph;
'G', 'H': to end of file, to beginning of screen.Each of these effect characters or move commands can be preceded by a
repetition number. For 'G', this references the line number in the
file. On this basis, you can make all sorts of combinations. Some
examples:
6b: moves 6 words backward;
c8fk: delete all text until the eighth occurrence of the
character 'k' then goes into insert mode;
91G: goes to line 91 of the file;
d3$: deletes up to the end of the current line plus the next
two lines.It is true that these commands are not very intuitive, but as always the
best method is practice. But you can see that the expression
"move mountains with a few keys" is not such an exaggeration
:)
VI has a command that we have already seen for copying text:
the 'y' command. To cut text, simply use the 'd' command. You
have 27 memories for storing text: an anonymous memory and 26 memories
named after the 26 lowercase letters of the alphabet.
To use the anonymous memory you enter the command as it is. So the
command y12w copies to the anonymous memory the 12 words after the
cursor[11]. Use d12w if you want to cut this area.
To use one of the 26 named memories, enter the sequence
"<x> before the command, where <x> gives the name
of the memory. Thus, to copy the same 12 words into the memory 'k',
you would write "ky12w, and "kd12w to cut them.
To paste the contents of the anonymous memory, you use the commands
'p' or 'P' (for Paste), to insert text respectively
after or before the cursor. To paste the contents of a named memory, use
"<x>p or "<x>P in the same way (for example "dp will
paste the contents of memory d after the cursor).
Let us look at the example of figure 13.5.

To carry out this action, we will:
'r' (for
example): "ry6w[12];
file2, which is located below:
C-w j;
'r' before the cursor:
"rp.We get the expected result, as shown in figure 13.6.

Searching for text is very simple: in command mode, you simply type
'/' followed by the string to search for, and then press the
Enter key. For example, /party will search for the string
party from the current cursor position. Pressing 'n' takes
you to the next occurrence, and if you reach the end of the file, the
search will start again from the beginning. To search backwards, use
'?' instead of '/'.
To quit, the command is :q (in fact, this command closes the
active buffer, as we have already seen, but if it is the only buffer
present, you quit VI). There is a shortcut: most of the time you
edit only one file. So to quit, you will use:
:wq to save changes and quit (a quicker solution is
ZZ), or
:q! to quit without saving.By extension, you will have guessed that if you have several buffers,
:wq will write the active buffer then close it.
Of course, we have said much more here than was necessary (after all, the first aim was to edit a text file), but it is also to show you some of the possibilities of each of these editors. There is a great deal more to be said on them, as witnessed by the number of books dedicated to one or the other.
Take the time to absorb all this information, opt for one of them, or
learn only what you think necessary. But at least you know that when you
want to go further, you can :)
These days, a Unix system is big, very big, and that is particularly true with Linux: the profusion of software available would make it an unmanageable system if there were not guidelines for the location of files in the tree structure.
The acknowledged standard in this respect is FHS
(Filesystem Hierarchy Standard), which is on
version 2.0 at the time of writing of this manual. The document which
describes the standard is available on the Internet in different
formats at URL http://www.pathname.com/fhs/. This chapter gives
only a brief summary, but it should be enough to teach you in what
directory to look for (or place) a given file.
Data on a Unix system can be classified according to these two criteria. You will have guessed what they both mean: shareable data is data that can be common to several machines in a network, while unshareable data cannot be. Static data must not been modified in normal use, while variable data can be. As we explore the tree structure, we will classify the different directories into each of these categories.
Note that these classifications are only recommended. You are not
obliged to follow them, but adopting these guidelines will greatly help
you manage your system. Note, too, that the static/variable
distinction only applies to the use of the system and not its
configuration. If you install a program, you will obviously have to
modify "normally" static directories, e.g. /usr.
/The root directory contains the whole system hierarchy. It cannot be classified since its subdirectories may or may not be static or shareable. Here is a list of the main directories and subdirectories:
/bin: essential binary files. This directory contains the
basic commands which will be used by all users and are necessary to the
operation of the system: ls, cp, login, etc.
Static, unshareable.
/boot: contains the files required by the Linux
boot manager (LILO for Intel platforms). This may or
may not contain the kernel: if it is not here, it must be located in the
root directory. Static, unshareable.
/dev: system device files (dev for
DEVices). Static, unshareable.
/etc: this directory contains all the configuration files
specific to the machine.
/home: contains all the personal directories of users of
the system. This directory may or may not be shareable (some large
networks make it shareable by NFS), and it is obviously variable.
/lib: this directory contains the libraries essential to
the system and the kernel modules, in /lib/modules. All the
libraries required by the binaries in directories /bin and
/sbin must be located here, together with the linker
ld.so. Static, unshareable.
/mnt: directory containing the mounting points for the
temporary file systems. Variable, unshareable.
/opt: this directory contains packages not required for
system operation. It is recommended to place static files (binaries,
libraries, manual pages, etc.) for such packets in
/opt/package_name and their specific configuration files for the
machine in /etc/opt.
/root: personal directory of the Almighty. Variable,
unshareable.
/usr: see next section. Static, shareable.
/sbin: contains the system binaries essential to system
startup, operable by root only. A normal user can also run them
but will not get very far. Static, unshareable.
/tmp: directory intended to contain temporary files which
certain programs may create. Variable, unshareable .
/var: location for data which may be modified in real time
by programs (e.g. the e-mail server, audit programs, the print server,
etc.). All of /var is variable, but its different subdirectories
may be shareable or unshareable./usr: the big oneThe /usr directory is the main application storage directory.
All the binary files in this directory must not be required for the
system startup or maintenance, since the /usr hierarchy is very
often a separate filesystem. Given its often large size, /usr has
its own hierarchy of subdirectories. We will mention just a few:
/usr/X11R6: the whole X Window System hierarchy. All the
binaries required for the operation of X (obviously including
the X servers) and all the necessary libraries must be located
in it. The /usr/X11R6/lib/X11 directory contains all aspects of
the configuration of X which do not vary from one machine to
another. Specific configuration for each machine is in /etc/X11.
/usr/bin: this directory contains the large majority of the
system's binary programs. Any binary program which is not
necessary to the maintenance of the system and is not a system
administration program must be located in this directory, apart from
programs you install yourselves, which must be in /usr/local.
/usr/lib: this directory contains all the libraries
necessary to run programs located in /usr/bin and
/usr/sbin. There is also a symbolic link /usr/lib/X11
pointing to the directory which contains the X Window System libraries,
/usr/X11R6/lib (if X Window System is installed, of course).
/usr/local: this is the directory where you should install
your personal applications. The installation program will have created
the necessary hierarchy: lib/, man/, etc.
/usr/share: this directory contains all the data required
by the applications in /usr/, and all the independent
architecture data. Among other things, you will find in it zone and
location information (zoneinfo and locale).There are also /usr/doc and /usr/man directories, which
respectively contain application documentation and the system manual
pages, but the standard recommends they be eventually moved to
/usr/share.
/var: data modifiable during useThe /var directory contains all the operating data for programs
running on the system. Unlike the working data in /tmp, these
data must be kept intact on the event of a reboot. There are many
subdirectories, and some are very useful:
/var/log: contains the system log files;
/var/spool: contains the system daemon working files. For
example, /var/spool/lpd contains the print server working files
and /var/spool/mail e-mail server working files (i.e. all mail
arriving on and leaving your system).
/var/run: this directory is used to keep track of all
processes being used by the system, so that you can act on these
processes in the event of a change of system runlevel (see a previous
chapter)./etc: configuration filesThe /etc directory is one of the essential directories in any
Unix system. It contains all the basic system configuration
files. Please do not delete it to save space! Likewise, if you want to
extend your tree structure over several partitions, remember that
/etc must not be put on a separate partition: it is needed for
system initialization.
Some important files are:
passwd and shadow: these two files are text files
which contains all the system users and their passwords (encrypted
:)). shadow is only there are if you use shadow passwords,
but it is the default installation option;
inittab: is the configuration file for the program
init, which plays a fundamental role when starting up the
system, as we will see later on;
services: this file contains a list of existing network
services;
profile: this is the shell configuration file,
although certain shells use others. For example, Bash uses
bashrc;
crontab: configuration file of cron, the program
responsible for periodic execution of commands.There are also certain subdirectories for programs which require large
numbers of files for configuration. This applies to X Window System, for
example, which has the whole /etc/X11 directory.
The User Guide will have introduced the concepts of file ownership and access permissions, but really understanding the Linux filesystem requires that we redefine the concept of a file itself. One reason is that:
Here, "everything" really means everything. A hard disk, a partition on a hard disk, a parallel port, a connection to a web site, an Ethernet card, all these are files. Even directories are files. Linux recognizes many types of files in addition to the standard files and directories. Note that by file type here, we don't mean the type of the contents of a file: for Linux and any Unix system, a file, whether it be a GIF image, a binary file or whatever, is just a stream of bytes. Differentiating files according to their contents is left to applications.
If you remember well, when you do a ls -l, the character
before the access rights identifies the type of a file. We have already
seen two types of files: regular files (-) and directories
(d). You can also stumble upon these if you wander through the
file tree and list contents of directories:
/dev/null, which we have already seen), or
peripherals (serial or parallel ports), which share the particularity
that their contents (if they have any) are not buffered (which
means that they are not kept into memory). Such files are identified by
the letter 'c'.
/dev/hda, /dev/sda5 are example of block mode files. On a
ls -l output, these are identified by the letter
'b'.
'l'.
'p'.
's'.Here is a sample of each file:
$ ls -l /dev/null /dev/sda  /etc/rc.d/rc3.d/S20random /proc/554/maps \
  /tmp/ssh-fg/ssh-510-agent
crw-rw-rw-    1 root     root       1,   3 May  5  1998 /dev/null
brw-rw----    1 root     disk       8,   0 May  5  1998 /dev/sda
lrwxrwxrwx    1 root     root           16 Dec  9 19:12 /etc/rc.d/rc3.d/S20random ->
../init.d/random*
pr--r--r--    1 fg       fg              0 Dec 10 20:23 /proc/554/maps|
srwx------    1 fg       fg              0 Dec 10 20:08 /tmp/ssh-fg/ssh-510-agent=
$
We should add that ext2fs, like all other Unix filesystems, stores files, whichever their type, in an inode table. One particularity is that a file is not identified by its name, but by an inode number. In fact, not every file has a name. Names are just a consequence of a wider notion:
The best way to understand what's behind this notion of link is to take an example. Let's create a (regular) file:
$ pwd
/home/fg/example
$ ls
$ touch a
$ ls -il a
  32555 -rw-rw-r--    1 fg       fg              0 Dec 10 08:12 a
The -i option of the ls command prints the inode
number, which is the first field on the output. As you can see, before
we created file a, there were no files in the directory. The
other field of interest is the third one, which is the link counter of
the file.
In fact, the command touch a can be separated into two
distinct actions:
a, in the current
directory, /home/fg/example. Therefore, the file
/home/fg/example/a is a link to the inode numbered 32555, and it
is currently the only one: the link counter shows one.But now, if we type:
$ ln a b
$ ls -il a b
  32555 -rw-rw-r--    2 fg       fg              0 Dec 10 08:12 a
  32555 -rw-rw-r--    2 fg       fg              0 Dec 10 08:12 b
$
we have created another link to the same inode. As you can see, we have
not created any file named b, but instead we have just added
another link to the inode numbered 32555 in the same directory named
b. You can see on the ls -l output that the link
counter for the inode is now 2, and no more 1.
Now, if we do:
$ rm a
$ ls -il b
  32555 -rw-rw-r--    1 fg       fg              0 Dec 10 08:12 b
$
we see that even though we have deleted the "original file",
the inode still exists. But now the only link to it is the file named
/home/fg/example/b.
Therefore, an inode is linked if and only if it is referenced by
a name at least once in any directory[13]. Directories themselves are also
stored into inodes, but their link count, unlike all other file types,
is the number of subdirectories within them. There are at least two
links per directory: the directory itself (.) and its parent
directory (..).
Typical examples of files which are not linked (ie, have no name) are
network connections: you will never see the file corresponding to your
connection to www.linux-mandrake.com in your file tree, whichever
directory you try. Similarly, when you use a pipe in the
shell, the file corresponding to the pipe does exist, but it is
not linked.
Let's get back to the example of pipes, as it's quite interesting and is also a good illustration of the notion of links. When you use a pipe in a command line, the shell creates the pipe for you and operates so that the command before the pipe writes to it, whereas the command after the pipe reads from it. All pipes, whether they be anonymous (like the ones used by the shells) or named (see below), act like FIFOs (First In, First Out). We have already seen examples of how to use pipes in the shell, but let's take one for the sake of our demonstration:
$ ls -d /proc/[0-9] | head -6
/proc/1/
/proc/2/
/proc/3/
/proc/4/
/proc/5/
One thing that you won't notice in this example (because it happens too
fast for one to see) is that writes on pipes are blocking. It means that
when the ls command writes to the pipe, it is blocked until a
process at the other end reads from the pipe. In order to visualize the
effect, you can create named pipes, which, as opposite to the pipes used
by shells, have names (ie, they are linked, whereas
shell pipes are not). The command to create such pipes is
mkfifo:
$ mkfifo a_pipe
$ ls -il
total 0
    169 prw-rw-r--    1 fg       fg              0 Dec 10 14:12 a_pipe|
  #
  # You can see that the link counter is 1, and that the output shows
  # that the file is a pipe ('p').
  #
  # You can also use ln here:
  #
$ ln a_pipe the_same_pipe
$ ls -il
total 0
    169 prw-rw-r--    2 fg       fg              0 Dec 10 15:37 a_pipe|
    169 prw-rw-r--    2 fg       fg              0 Dec 10 15:37 the_same_pipe|
$ ls -d /proc/[0-9] >a_pipe
  #
  # The process is blocked, as there is no reader at the other end.
  # Type C-z to suspend the process...
  #
zsh: 3452 suspended  ls -d /proc/[0-9] > a_pipe
  #
  # ...Then put in into the background:
  #
$ bg
[1]  + continued  ls -d /proc/[0-9] > a_pipe
  #
  # now read from the pipe...
  #
$ head -6 <the_same_pipe
  #
  # ...the writing process terminates
  #
[1]  + 3452 done       ls -d /proc/[0-9] > a_pipe
/proc/1/
/proc/2/
/proc/3/
/proc/4/
/proc/5/
#
Similarly, reads are also blocking. If we execute the above commands in
the reverse order, we observe that head blocks, waiting for
some process to give it something to read:
$ head -6 <a_pipe
  #
  # Program blocks, suspend it: C-z
  #
zsh: 741 suspended  head -6 < a_pipe
  #
  # Put it into the background...
  #
$ bg
[1]  + continued  head -6 < a_pipe
  #
  # ...And give it some food :)
  #
$ ls -d /proc/[0-9] >the_same_pipe
$ /proc/1/
/proc/2/
/proc/3/
/proc/4/
/proc/5/
[1]  + 741 done       head -6 < a_pipe
$
You can also see an undesired effect in the previous example: the
ls command has terminated before the head command
took over. The consequence is that you got back at the prompt
immediately, but head executed only after. Therefore it made
its output only after you got back to the prompt :)
As already stated, such files are either files created by the system or peripherals on your machine. We have also mentioned that the contents of block mode character files were buffered whereas character mode files were not. In order to illustrate this, insert a floppy into the drive and type the following command twice:
$ dd if=/dev/fd0 of=/dev/null
You can observe the following: while, the first time the command was launched, the whole contents of the floppy were read, the second time there was no access to the floppy drive at all. This is simply because the contents of the floppy were buffered when you first launched the command -- and you didn't change the floppy meanwhile.
But now, if you want to print a big file this way (yes it will work):
$ cat /a/big/printable/file/somewhere >/dev/lp0
the command will take as much time whether you launch it once, twice or
fifty times. This is because /dev/lp0 is a character mode file,
and its contents are not buffered.
The fact that block mode files are buffered have a nice side effect: not only are reads buffered, but writes are buffered too. This allows for writes on disks to be asynchronous: when you write a file on disk, the write operation itself is not immediate. It will only occur when Linux decides for it.
Finally, each special file has a major and minor number.
On a ls -l output, they appear in place of the size, as the
size for such files is irrelevant:
$ ls -l /dev/hda /dev/lp0
brw-rw----    1 root     disk       3,   0 May  5  1998 /dev/hda
crw-rw----    1 root     daemon     6,   0 May  5  1998 /dev/lp0
Here, the major and minor of /dev/hda are respectively 3 and 0,
whereas for /dev/lp0 they are respectively 6 and 0. Note that
these numbers are unique per file category, which means that there can
be a character mode file with major 3 and minor 0 (this file actually
exists: /dev/ttyp0), and similarly there can only be a block mode
file with major 6 and minor 0. These numbers exist for a simple reason:
it allows Linux to associate the good operations to these files
(that is, to the peripherals these files refer to). You don't handle a
floppy drive the same way than, say, a SCSI hard drive.
Here we have to face a very common misconception, even among Unix users, which is mainly due to the fact that links as we have seen them so far (wrongly called "hard" links) are only associated to regular files (and we have seen that it's not the case -- all the more that even symbolic links are "linked") But this requires that we first explain what symbolic links ("soft" links, or even more often "symlinks") are.
Symbolic links are files of a particular type which sole contents is an arbitrary string, which may or may not point to an actual filename. When you mention a symbolic link on the command line or in a program, in fact you access the file it points to, if it exists. For example:
$ echo Hello >myfile
$ ln -s myfile mylink
$ ls -il
total 4
    169 -rw-rw-r--    1 fg       fg              6 Dec 10 21:30 myfile
    416 lrwxrwxrwx    1 fg       fg              6 Dec 10 21:30 mylink -> myfile
$ cat myfile
Hello
$ cat mylink
Hello
You can see that the file type for mylink is 'l', for
symbolic Link. The access rights for a symolic link
are not significant: they will always be rwxrwxrwx. You can
also see that it is a different file from myfile, as its
inode number is different. But it refers to it symbolically, therefore
when you type cat mylink, you will in fact print the contents
of the file myfile. To demonstrate that a symbolic link contains
an arbitrary string, we can do the following:
$ ln -s "I'm no existing file" anotherlink
$ ls -il anotherlink
    418 lrwxrwxrwx    1 fg       fg             20 Dec 10 21:43 anotherlink ->
I'm no existing file
$ cat anotherlink
cat: anotherlink: No such file or directory
$
But symbolic links exist because they overcome several limitations encountered by normal ("hard") links:
Symbolic links are therefore very useful in several circumstances, and
very often, people tend to use them to link files together even when a
normal link could be used instead. One advantage of normal linking,
though, is that you don't lose the file if you delete "the
original one" :)
Lastly, if you have observed carefully, you know what the size of a symbolic link is: it is simply the size of the string.
The same way that FAT has file attributes (archive, system file, invisible), ext2fs has its own, but they are different. We speak of them here for the sake of completeness, but they are very seldom used. However, if you really want a secure system, read on.
There are two commands for manipulating file attributes:
lsattr(1) and chattr(1). You'll probably
have guessed it, lsattr LiSts attributes,
whereas chattr CHanges them. These
attributes can only be set on directories and regular files. These are
the following:
A (no Access time): If a
file or directory has this attribute set, whenever it is accessed,
either for reading of for writing, its last access time will not be
updated. This can be useful, for example, on files or directories which
are very often accessed for reading, especially since this parameter is
the only one which changes on an inode when it's open readonly.
a (append only): If a
file has this attribute set and is open for writing, the only operation
possible will be to append data to its previous contents. For a
directory, this means that you can only add files to it, but not rename
or delete any existing file. Only root can set or clear this
attribute.
d (no dump):
dump(8) is the standard Unix utility for backups.
It dumps any filesystem for which the dump counter is 1 in
/etc/fstab (see chapter 37.0). But if a
file or directory has this attribute set, unlike others, it will not be
taken into account when a dump is in progress. Note that for
directories, this also includes all subdirectories and files under it.
i (immutable): A file or
directory with this attribute set simply cannot be modified at all: it
cannot be renamed, no further link can be created to it[14] and it cannot be removed. Only root can
set or clear this attribute. Note that this also prevents changes to
access time, therefore you don't need to set the A attribute
when this one is set.
s (secure deletion):
When such a file or directory with this attribute set is deleted, the
blocks it was occupying on disk are written back with zeros.
S (Synchronous mode):
When a file or directory has this attribute set, all modifications on
it are synchronous and written back to disk immediately.You may want, for example, to set the 'i' attribute on
essential system files in order to avoid bad surprises. Also consider
the 'A' attribute on man pages for example: this prevents a
lot of disk operations and, in particular, it saves some battery life on
laptops.
/proc filesystemThe /proc filesystem is a specificity of Linux. It is a
virtual filesystem, and as such it takes no room on your disk. It is a
very convenient way to obtain information on the system, all the more
that most files into this directory are human readable (well, with a
little habit). Many programs actually gather information from files in
/proc, format it in their own way and then display it. This is
the case for all programs which display information about processes, and
we have already seen a few of them (top, ps and
friends). /proc is also a good source of information about your
hardware, and similarly, quite a few programs are just interfaces to
information contained in /proc.
There is also a special subdirectory, /proc/sys. It allows for
changing some kernel parameters in real time or displaying them.
If you list the contents of the /proc directory, you will see
many directories the name of which is a number. These are the
directories holding information on all processes currently running on
the system:
$ ls -d /proc/[0-9]*
/proc/1/    /proc/302/  /proc/451/  /proc/496/  /proc/556/  /proc/633/
/proc/127/  /proc/317/  /proc/452/  /proc/497/  /proc/557/  /proc/718/
/proc/2/    /proc/339/  /proc/453/  /proc/5/    /proc/558/  /proc/755/
/proc/250/  /proc/385/  /proc/454/  /proc/501/  /proc/559/  /proc/760/
/proc/260/  /proc/4/    /proc/455/  /proc/504/  /proc/565/  /proc/761/
/proc/275/  /proc/402/  /proc/463/  /proc/505/  /proc/569/  /proc/769/
/proc/290/  /proc/433/  /proc/487/  /proc/509/  /proc/594/  /proc/774/
/proc/3/    /proc/450/  /proc/491/  /proc/554/  /proc/595/
Note that as a user, you can (logically) only display information
related to your own processes, but not the ones of other users. So,
let's be root and see what information is available from
process 127:
$ su
Password:
$ cd /proc/127
$ ls -l
total 0
-r--r--r--    1 root     root            0 d    c 14 19:53 cmdline
lrwx------    1 root     root            0 d    c 14 19:53 cwd -> //
-r--------    1 root     root            0 d    c 14 19:53 environ
lrwx------    1 root     root            0 d    c 14 19:53 exe -> /usr/sbin/apmd*
dr-x------    2 root     root            0 d    c 14 19:53 fd/
pr--r--r--    1 root     root            0 d    c 14 19:53 maps|
-rw-------    1 root     root            0 d    c 14 19:53 mem
lrwx------    1 root     root            0 d    c 14 19:53 root -> //
-r--r--r--    1 root     root            0 d    c 14 19:53 stat
-r--r--r--    1 root     root            0 d    c 14 19:53 statm
-r--r--r--    1 root     root            0 d    c 14 19:53 status
$
Each directory contains the same entries. Here is a brief description of some of the entries:
cmdline: This (pseudo-)file contains the whole command line
used to invoke the process. It is not formatted: there is no space
between the program and its arguments, and there is no newline at the
end of the line either.
cwd: This symbolic link points to the current working
directory (hence the name) of the process.
environ: This file contains all the environment variables
defined for this process, in the form VARIABLE=value. Similarly
to cmdline, the output is not formatted at all: no newlines to
separate between different variables, and no newline at the end either.
exe: This is a symlink pointing to the executable file
corresponding to the process being run.
fd: This subdirectory contains the list of file
descriptors currently opened by the process. See below.
maps: When you print the contents of this named pipe (with
cat for example), you can see the parts of the process'
address space which are currently mapped to a file. The fields, from
left to right, are: the address space associated to this mapping, the
permissions associated to this mapping, the offset from the beginning of
the file where the mapping starts, the device on which the mapped file
is located, the inode number of the file, and finally the name of the
file itsef. See mmap(2).
root: This is a symbolic link which points to the root
directory used by the process. Usually, it will be /, but see
chroot(2).
status: This file contains various information about the
process: the name of the executable, its current state, its PID and
PPID, its real and effective UID and GID, its memory usage, and
other information.If we list the contents of the directory fd, we obtain this:
$ ls -l fd
total 0
lrwx------    1 root     root           64 Dec 16 22:04 0 -> /dev/console
l-wx------    1 root     root           64 Dec 16 22:04 1 -> pipe:[128]
l-wx------    1 root     root           64 Dec 16 22:04 2 -> pipe:[129]
l-wx------    1 root     root           64 Dec 16 22:04 21 -> pipe:[130]
lrwx------    1 root     root           64 Dec 16 22:04 3 -> /dev/apm_bios
lr-x------    1 root     root           64 Dec 16 22:04 7 -> pipe:[130]
lrwx------    1 root     root           64 Dec 16 22:04 9 ->
/dev/console
$
In fact, this is the list of file descriptors opened by the process. Each opened descriptor is materialized by a symbolic link the name of which is the descriptor number, and which points to the file opened by this descriptor[15]. You can also notice the permissions on the symlinks: this is the only place where they make sense, as they represent the permissions with which the file corresponding to the descriptor has been opened.
Apart from the directories asociated to the different processes,
/proc also contains a myriad of information on the hardware
present in your machine. A list of files from the /proc
directory gives the following:
$ ls -d [a-z]*
apm      dma          interrupts  loadavg  mounts      rtc       swaps
bus/     fb           ioports     locks    mtrr        scsi/     sys/
cmdline  filesystems  kcore       meminfo  net/        self/     tty/
cpuinfo  fs/          kmsg        misc     partitions  slabinfo  uptime
devices  ide/         ksyms       modules  pci         stat      version
$
For example, if we look at the contents of /proc/interrupts,
we can see that it contains the list of interruptions currently used by
the system, along with the peripheral which holds them. Similarly,
ioports contains the list of input/output address ranges
currently busy, and lastly dma does the same for DMA channels.
Therefore, in order to chase down a conflict, look at the contents of
these three files:
$ cat interrupts
           CPU0
  0:     127648          XT-PIC  timer
  1:       5191          XT-PIC  keyboard
  2:          0          XT-PIC  cascade
  5:       1402          XT-PIC  xirc2ps_cs
  8:          1          XT-PIC  rtc
 10:          0          XT-PIC  ESS Solo1
 12:       2631          XT-PIC  PS/2 Mouse
 13:          1          XT-PIC  fpu
 14:      73434          XT-PIC  ide0
 15:      80234          XT-PIC  ide1
NMI:          0
$ cat ioports
0000-001f : dma1
0020-003f : pic1
0040-005f : timer
0060-006f : keyboard
0070-007f : rtc
0080-008f : dma page reg
00a0-00bf : pic2
00c0-00df : dma2
00f0-00ff : fpu
0170-0177 : ide1
01f0-01f7 : ide0
0300-030f : xirc2ps_cs
0376-0376 : ide1
03c0-03df : vga+
03f6-03f6 : ide0
03f8-03ff : serial(auto)
1050-1057 : ide0
1058-105f : ide1
1080-108f : ESS Solo1
10c0-10cf : ESS Solo1
10d4-10df : ESS Solo1
10ec-10ef : ESS Solo1
$ cat dma
 4: cascade
$
Or, more simply, use the lsdev command, which gathers
information from these three files and sorts them by peripheral, which
is undoubtedly more convenient[16]:
$ lsdev
Device            DMA   IRQ  I/O Ports
------------------------------------------------
cascade             4     2
dma                          0080-008f
dma1                         0000-001f
dma2                         00c0-00df
ESS                          1080-108f 10c0-10cf 10d4-10df 10ec-10ef
fpu                      13  00f0-00ff
ide0                     14  01f0-01f7 03f6-03f6 1050-1057
ide1                     15  0170-0177 0376-0376 1058-105f
keyboard                  1  0060-006f
Mouse                    12
pic1                         0020-003f
pic2                         00a0-00bf
rtc                       8  0070-007f
serial                       03f8-03ff
Solo1                    10
timer                     0  0040-005f
vga+                         03c0-03df
xirc2ps_cs                5  0300-030f
$
An exhaustive listing of files would be too long, but here's the description of some of them:
cpuinfo: This file contains, as its name says, information
on the processor(s) present on your machine.
modules: This file contains the list of modules currently
used by the kernel, along with the usage count for each one. In fact,
this is the same information than what is reported by the
lsmod command.
meminfo: This file contains information on memory usage at
the time you print its contents. A more clearly formatted output of the
same information is available with the free command.
apm: If you have a laptop, displaying the contents of this
file allows you to see the state of your battery. You can see whether
the AC is plugged in, the current load of your battery, and if the
APM BIOS of your laptop supports it (unfortunately this is
not the case for all), the remaining battery life in minutes. The file
isn't very readable by itself, therefore you want to use the
apm command instead, which gives the same information in a
human readable format.
bus: This subdirectory contains information on all
peripherals found on different buses in your machine. Information inside
it are generally seldom readable, and for the most part they are dealed
with and reformatted with external utilities: lspcidrake,
lspnp, etc./proc/sys subdirectoryThe role of this subdirectory is to report different kernel parameters,
and to allow for changing in real time some of these parameters. As
opposite to all other files in /proc, some files in this
directory are writable, but for root only.
A list of directories and files would be too long, all the more that they will depend in a large part on your system, and that most files will only be useful for very specialized applications. However, here are three common uses of this subdirectory:
root:
$ echo 1 >/proc/sys/net/ipv4/ip_forward
Replace the 1 by a 0 if you want to forbid routing.
$ echo 1 >/proc/sys/net/ipv4/conf/all/rp_filter
and this kind of attack becomes impossible.
$ echo 8192 >/proc/sys/fs/file-max
$ echo 16384 >/proc/sys/fs/inode-max
In order for these to be executed each time you boot the system, you
might want to add these two lines to the file /etc/rc.d/rc.local
so that you avoid typing them each time.
Well, you must tell, an implementation of an exotic dance for Linux. What does this mean, indeed? No, it has nothing to see with the Brasilian dance, It is a server for SMB clients (the Server Message Block) or its successor CIFS (Common Internet File System).
tar extension for the clients, in order to create remote
backups.
For more information about all that, please consult the website
http://samba.org/samba/.
Such as Linux, this software is an Open Source project in the scope of the GPL and the GNU project, entirely written in C, with freedom and gratis. It is freely distributable, you are even encouraged to do so.
This document will help you installing a SMB server.
If you already use Samba, run /etc/rc.d/init.d/smb
stop. On the installation CDROM you will find the package named
samba-2.0.6-1mdk.i586.rpm which you can install, as
root, with command rpm -Uv h samba-*mdk.i586.rpm.
The command rpm -ql samba|less allows you then to view the
list of all files provided with the package, and their location. This
allows you to find files of the doc section, etc.
/etc/smb.confThis is the text file allowing you to configure the Samba server.
It is made of different sections which titles are placed into brackets
[ ]. Every line beginning with a ';' or a '#' is
ignored at Samba startup. This is often used to add explanation
comments on the different sections. Thanks to that, it will be easier
later when reading again the file.
During the package install, a /etc/smb.conf file has been copied to
your computer. We will use this file as a template.
There are three special sections: [global],
[printers], and [homes].
[global] sectionHere are introduced the parameters applied to the server itself, in its whole, or that will be used as default parameters for some sections.
[global]
netbios name =          Zeus
netbios aliases =       creation
# without these two entries, the first part of the
# DNS name will be used instead.
workgroup =             DESIGN
# Samba can only belong to one work group ar a
# time
server string =         File server [%v]
# this indicates the name and the version number to
# print
deadtime =              15
# maximal inactivity time
auto services =         john
# this service, although present in the exploration
# list, is not available until john connects to the
# server
security = user
This latter parameter may take one of four values: share,
user, server or domain.
share mode: In this mode, the client sends a password
while asking for a connection, but no username is required. This mode
is the default security mode for files or printers under
Windows 95. It may be changed, under Windows 95 in the
Network section of the Configuration Panel,
under Access Control.
user mode: This security mode is recommended. You are
here asked for a valid username and its associated password.
server mode: This mode is derived from user
mode. The Samba server sends a session opening request to the
passwords server.
password server = NT_passerv
# where NT_passerv is the name of the NT passwords
# server. Various servers may be listed.
domain mode: This mode is hardly the same as the
previous one.For these last three modes, the user has to be "created" on the Samba server.
hosts allow = john.design.org 192.168.1.45 EXCEPT 192.168.2.
With this line, all users from 192.168.2. network will be rejected.
hosts deny = 192.168.2
This line has the same effect as the previous EXCEPT
statement.
guest account = pcguest
# If you wish to add a guest user; to be
# added in /etc/passwd
First of all, create the shared directory with the command
mkdir /home/shared and set owners and permissions with
chmod and chown. For example, chmod
0777 gives all rights towards this folder on the Unix side.
However, Samba has to allow this too.
[share]
  comment = share access granted to everyone
  path = /home/shared
  browsable = yes
  writable = yes
  create mask = 0750
# means that the creator of the file has rwx
# rights on it, the group r-x and others r--
  directory mask = 0750
# same meaning but for directories
  mangled names = yes
# converts names in a DOS/Windows manner, with
# eight characters for the name and three for the
# extension.
  preserve case = no
# do not take case into account.
Another example of sharing
First of all, be sure to load the ppa module with command
modprobe ppa.o.
[zip]
comment = automatically mount/unmount the zip drive
  browseable = yes
  path = /mnt/zip
  root preexec = /bin/mount /dev/sda4 /mnt/zip
  root postexec = /bin/unmount /mnt/zip
[homes] sectionIt makes the home directory of each user available from a Windows box with their username and password.
This is a special sharing type.
[homes]
  comment = Home directories
  browseable = no
  writable = yes
  path = /export/homes/%U
  valid users = %S
[printers] sectionThis is another special sharing type.
[printers]
   comment = shared printers
   path = /var/spool/samba
   load printers = yes # load all available printers
   browseable = no
   printable = yes
   public = no
   writable = no
   create mode = 0700
You may also print from Linux on a printer connected to a PC
running Windows. To do so, use printtool and setup the
printer. This will create an entry into /etc/printcap. Be sure
that the printer is set shareable under Windows.
There are a lot of other parameters, for more information, run
man smb.conf.
Before launching smb and nmb daemons, launch
testparm. This command will read /etc/smb.conf and
print which entries will be taken into account.
Just type /etc/rc.d/init.d/smb start. The following messages
should be printed:
Starting SMB services:                                   [OK]
Starting NMB services:                                   [OK]
To check that the daemon is running, run ps aux | grep smbd or
/etc/rc.d/init.d/smb status
This is a utility close to ftp that enables you to connect to a
PC running Windows. To know the list of shares accessible on
PC win through SMB, launch smbclient -L
win -N. Launch smbclient
//win/work to connect to the share work on the PC called
win. You may also use smbclient winwork.
To create a tar archive of the work share, launch
smbclient //win/work -Tc work.tar. To print a file
letter.txt to the printer my_printer connected to the
PC win, type
cat letter.txt | smbclient //win/printer_name my_password \
  -N -c "put - john"
For more information, run man smbclient.
For you being able to mount/unmount some directories from
Windows on your Linux box, your kernel needs to support
the smbfs filesystem (which is the case for the
Linux-Mandrake distribution). Then you can use the programs
smbmount and/or smbumount. For example:
smbmount "winwork" -c 'mount /mnt -u 123 -g 456'. Which
will locally mount the share work with a local UID of 123
and a local GID of 456.
Allows to create tar archives remotely. Read the manual page for
more information on its numerous options.
SWAT is a configuration utility included with the Samba
package. To make it
available you must first comment out (delete the # at the
beginning of the line) the line:
swat stream tcp nowait.400 root /usr/sbin/swat swat
in /etc/inet.conf file and then
restart inet services through /etc/rc.d/init.d/inet
restart.
From your favorite web browser (preferably a graphical one), type in the
following URL: http://127.0.0.1:901. An authentication window
should appear (figure 46.1) where you will be asked
for a login name and password. The root login should be secure
enough.
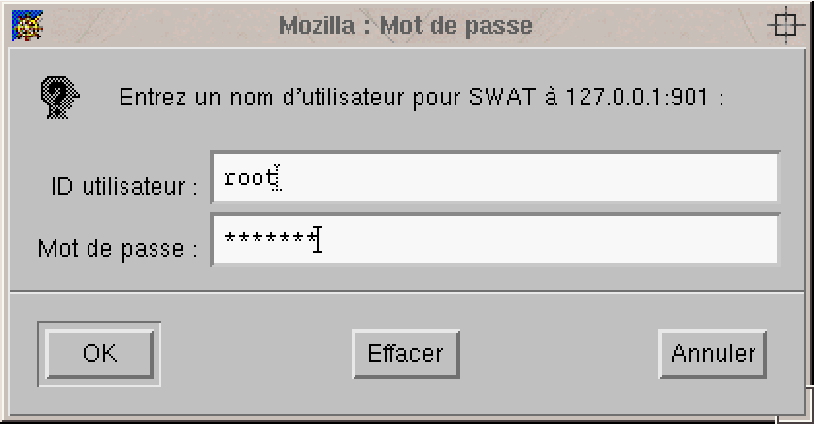
Here you are, in a graphical interface to edit the parameters of
smb.conf. You should be able to use this interface
without trouble following the explanations given here and consulting
the manual pages for more specific configurations.
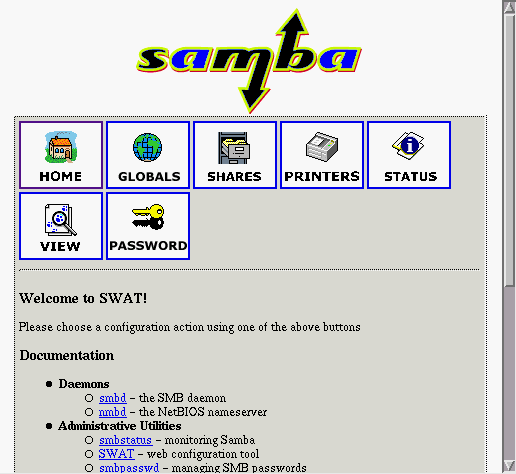
smb.conf sample file:
[global]
  workgroup = MyWorkGroup
  server string = (Samba %v)
  #server string = Samba Server
  browseable = yes
  printing = bsd
  printcap name = /etc/printcap
  load printers = yes
  log file = /var/log/samba/log.%m
  max log size = 100
  lock directory = /var/lock/samba
  locking = no
  strict locking = no
  share modes = yes
  security = user
  null passwords = yes
  socket options = TCP_NODELAY
  # Allows the Samba server to become a domain controller
  #os level = 33
  #domain master = yes
  # Facilitates the long names recognition
  preserve case = no
  short preserve case = no
  character set = iso8859-1
[homes]
  comment = Home Directories
  preexec = /bin/sh -c 'echo /usr/bin/smbclient -M %m -I %I'&
  browseable = yes
  readonfiltered= no
  writable = yes
  create mode = 0750
  public = yes
["public"]
  comment = "Public"
  path = /public/
  browseable = yes
  hide dot files = yes
  readonfiltered= no
  public = yes
  pritable = yes
  #create mode = 0775
  printable = no
["printers"]
  comment = All Printers
  #path = /var/spool/samba
  path = /var/spool/lpd/lp
  browseable = yes
  # Set public = yes to allow user 'guest account' to print
  guest ok = yes
  writable = yes
  printable = yes
If you need more information, you are invited to consult the Samba documentation.
While Linux is being used for a very wide range of applications, from basic office work to high availability servers, came the need for different security levels. It is obvious that constraints inherent to highly secured servers do not match the needs of a secretary. On the other hand, a big public server is more sensitive to malicious people than my isolated Linux box.
It is with that aim that the MSEC package was designed. It is made of two parts:
Note that the user may also define his own security level, adjusting parameters to his own needs.
MSEC is a base RPM. That means that if you previously installed Linux-Mandrake, MSEC is already installed on your system.
Installing the RPM will create a msec directory into the
directory /etc/security, containing all that is needed to secure
your system.
Then just login as root and type
/etc/security/msec/init.sh x, x being the security
level you want or custom to create your own security level.
The script will begin to remove all modifications made by a previous
security level change, and apply the features of the chosen security
level to your system. If you choose custom, then you will be
asked a series of questions for each security feature MSEC
proposes. In the end, these features will be applied to your system.
Note that whatever the level you choose, your configuration will be
stored into /etc/security/msec/security.conf.
This level is to be used with care. It makes your system easier to use, but extremely insecure. In particular, you shouldn't use this without security level if you answer "yes" to any of the following questions:
As you can see, this security level shouldn't be set by default because it may result in big problems for your data.
The main security improvement compared with level 0 is that now, the access to the data of any user is granted via username and password. Therefore, it may be used by various people, and it is less sensitive to mistakes. However, it shouldn't be used on a computer that is connected to a modem or LAN (Local Area Network).
Few major improvements for this security level; it mainly provides additional security warnings and checks. It is more secure for multi-users use.
This is the standard security level, recommended for a computer that will be used to connect to the Internet as a client. Most of the security checks are periodically run, specifically one that checks for open ports on the system. However, these open ports are kept opened and access to them is granted to everyone.
From the user's point of view, the system is now a little bit more closed, so he'll need basic knowledge of the Linux system to achieve some special operations. The security here offered is comparable with the one of a standard Red Hat or any previous Linux-Mandrake distribution.
With this security level, the use of this system as a server becomes possible. The security is now high enough to use the system as a server which will accept connections from many clients. By default, only connections from the computer itself will be granted. However, advanced services have been disabled, and the system administrator will have to activate the desired ones by hand in configuration files. He also will have to define for whom the access will be granted.
Security checks will warn system administrator of possible security holes or intrusions on the system.
We build on Level 4 features and now the system is entirely closed. Security features are at their maximum. The system administrator has to activate ports, and grant connections to give other computers access to services offered by this machine.
What follows is the description of the different security features each level brings to the system. These features are of various types:
root, writeable, unowned,
| Security | 0 | 1 | 2 | 3 | 4 | 5 |
| Featurelevel | ||||||
global security umask for users umask for shell without authorized to user in warnings in file warnings directly warnings in warnings sent by suid suid writeable files check permissions check suid group files check unowned files check promiscuous check listening port check system security check all system events unknown services boot password (LILO) grants connection toyes yes yes yes yes check 002 002 022 022 077 077 root002 002 022 022 022 077 yes password connect to all local local none none none X display audioyes yes yes group . in '$PATH'yes yes yes yes yes yes yes /var/log/security.log yes yes on tty syslog yes yes yes yes yes yes yes e-mail to rootroot files check yes yes yes yes root filesyes yes yes yes MD5 check yes yes yes yes yes yes yes yes yes yes yes yes yes yes yes yes yes passwd fileyes yes yes integrity check shadow fileyes yes yes integrity check yes yes yes every day at midnight yes yes additionally logged to /dev/tty12yes yes are disabled yes yes all all all all local none
Note that six out of the ten periodical checks can detect changes on the
system. They store into files located in the /var/log/security/
directory the configuration of the system during the last check (one day
ago), and warn you of any changes occurred in the meantime. These checks
are:
root file check
root file MD5 check
nosuid": these
filesystems are exported without the nosuid option, which
forbids suid programs to work on the machine.
+ sign": that
means that one of the following files: /etc/hosts.equiv,
/etc/shosts.equiv, /etc/hosts.lpd contains
hosts allowed to connect without proper authentication.
/etc/aliases and /etc/postfix/aliases.Simply sets the umask for normal users to the value corresponding to the security level.
root"The same, but for root.
Access to the consoles are granted without asking for a password.
all: everybody from everywhere can open an X
window on your screen.
local: only people connected at localhost may
open an X window on your screen.
none: nobody can do that.audio group"Each user is a member of the audio, urpmi and
cdrom groups. That means that all users are granted some
special privileges regarding sound card, packages, etc.
. in '$PATH'"the . entry is added to the '$PATH' environment
variable, allowing easy execution of programs within the current working
directory (it is also, to some extent, a security hole).
/var/log/security.log"Each warning issued by MSEC is logged into the file bearing the
name /var/log/security.log.
Each warning issued by MSEC is directly printed on the current console.
Warnings of MSEC are directed to the syslog service.
root"Warnings issued by MSEC are also sent by e-mail to root.
root files check"Checks for new or removed suid root files on the
system. If such files are found, a list of these files are issued
as a warning.
root file MD5 check"Checks the MD5 signature of each suid root
file that is on the system. If the signature has changed, it means
that a modification has been made to this program, possibly a
backdoor. A warning is then issued.
Check whether files are world writeable on the system. If so, issues a warning containing the list of these naughty files.
This one checks permissions for some special files such as .netrc
or users' configuration files. It also checks permissions of users' home
directories. If their permissions are too loose or the owners unusual,
it issues a warning.
Check for new or removed suid group files on the system. If such files are found, a list of these files are issued as a warning.
This check searches for files owned by users or groups not known by the
system. If such files are found, the owner is automatically changed to
user/group nobody.
This test checks every Ethernet card to determine whether they are in "promiscuous" mode. This mode allows the card to intercept every packet received by the card, even those that are not directed to it. It may mean that a sniffer is running on your machine. Note that this check is set up to be run every minute.
Issues a warning with all listening ports.
passwd file integrity check"Verifies that each user has a password (not a blank or an easy to guess one) an checks that it is shadowed.
shadow file integrity check"Verifies that each user into the shadow file has a password (not
a blank or an easy to guess one).
All previous checks will be performed everyday at midnight. This
relies on the addition of a cron script in the crontab
file.
All services not into /etc/security/msec/init-sh/server.4 for
level 4 or server.5 for level 5 will be disabled. They are not
removed, but simply not started when loading a runlevel. If you
need some of them, just add them again with the chkconfig
utility (you might also need to restart them with init scripts
in /etc/rc.d/init.d).
Allows you to setup a password for LILO. Prevents (unexperienced) people from rebooting the machine, but in the other hand, the machine won't be able to reboot by itself.
all: all computers are allowed to connect to open
ports.
local: only the localhost is allowed to connect
to open ports.
none: no computers are allowed to connect to open
ports.This chapter is intended to Linux-Mandrake users that wish to automate the complete install procedure on a machine. Just insert the boot disk into the machine, and the CD if needed, ½ et voilα ╗!
This feature may be particularly useful to system administrators, reducing considerably the time spent in front of a machine for a new install or even an update... The different install modes currently available are from:
You'll notice while reading this document that the process of creating an auto-install boot disk is not designed for beginners. Here are described all the steps to do so for a Linux system administrator (whom this feature is intented to). However, following carefully all the steps, a Linux user knowing basic commands should achieve the challenge, moreover if he needn't to edit by hand the configuration file.
The process of setting up an automated install and using it consists of 4 single steps:
auto_inst.cfg.pl fileThis file contains all of the information needed by the install script to actually perform the install automatically. It contains all the info the users would have entered if in manual mode. There are basically three ways to generate this file:
This install machine should be similar to the ones the automatic install will be applied to. However, this is not a requirement, as we'll see later.
Each install generates a file /tmp/auto_inst.cfg.pl containing
all of your choices and all automatically chosen parameters (for
example partitioning, NIC card, etc.). This is the file
that will be used for automatic install.
Just launch
Mandrake/mdkinst/usr/bin/perl-install/g_auto_install
on your install CD. It'll open 4 windows corresponding to the four
zones displayed during "real" install. Then just follow the
steps as if you were installing Linux-Mandrake onto the machines the
auto-install is intended to. Of course, this install won't
partition nor format your disks, The only modification this
install will perform on your system (remember this is a simulated
install) is creating some few files into /tmp. Among them, of
course, is the /tmp/auto_inst.cfg.pl file we just talked about.
Well, indeed, not really from scratch. You are encouraged to start from
an existing /tmp/auto_inst.cfg.pl file you previously generated
with a normal or simulated install.
In fact, it is recommended whatever the method you used to generate the
auto_inst.cfg.pl file, to edit it by hand, following the details
given in the last section of this chapter "Inside the
auto_inst file".
Just follow the instructions given in the "install" section of the userguide, just as if you were beginning a normal install. Use:
hd.img for an install from the local hard drive,
cdrom.img for an install from the local CDROM drive,
network.img for an install through NFS or FTP
using an ISAPCI NIC,
pcmcia.img for an install through NFS or FTP (and
possibly CDROM) using a PCMCIA card.There are a few modifications to make to the boot disk in order to get it self-sufficient for the auto-install we try to setup.
It consists of modifying an existing file to tell the install disk this is an auto-install, and adding files to automate the process:
syslinux.conf fileYour original file looks like that:
default linux
prompt 1
timeout 72
display boot.msg
F1 boot.msg
F2 general.msg
F3 expert.msg
F4 rescue.msg
F5 kickit.msg
F6 param.msg
label linux
kernel vmlinuz
append ramdisk=32000 initrd=network.rdz mdkinst network
label expert
kernel vmlinuz
append expert ramdisk=32000 initrd=network.rdz mdkinst network
label ks
kernel vmlinuz
append ks ramdisk=32000 initrd=network.rdz mdkinst network
label rescue
kernel vmlinuz
append rescue root=/dev/fd0 load_ramdisk=1 prompt_ramdisk=1
You can then suppress three of the four boot modes (keep
ks) and change default to ks. The
timeout line is then useless. You will also need to add a
parameter to the append line: kickstart=floppy.
Your file will then look like:
default ks
prompt 1
display boot.msg
F1 boot.msg
F2 general.msg
F3 expert.msg
F4 rescue.msg
F5 kickit.msg
F6 param.msg
label ks
kernel vmlinuz
append ks kickstart=floppy ramdisk=32000 initrd=network.rdz mdkinst
network
auto_inst.cfg.pl fileHere comes the file we finely tuned to achieve the whole automated install process. You just need to copy it to your boot disk.
ks.cfg file for network installIn case you wish your install to be performed via NFS or FTP,
you'll need an additional ks.cfg file to tell the install where
to find the install source tree. It consists of two lines, one for
network configuration, one for the location, on the network, of the
install source tree.
network --ip 192.168.1.25   \
  --netmask 255.255.255.0   \
  --gateway 192.168.1.1     \
  --nameserver 192.168.1.12 \
(of course, adapt IP addresses to your local context)
network --bootproto dhcp
network --bootproto bootpnfs --server 192.168.1.9 --dir /export
url --url ftp://user:password@192.168.1.9//export
Where 192.168.1.9 refers to the IP address of your
NFS or FTP server, and /export to the directory on that
server containing the install source tree. For FTP access, supply your
username and password on that server.
auto_inf fileThis file (formatted in Perl) contains, as we previously saw,
all the information the install process needs to install
Linux-Mandrake on a particular machine. It is, roughly speaking, made
of a hash tree, containing keys and their corresponding values, each one
on one side of the => sign. Note that a value may be itself a
hash, or a list of values.
Let's analyse each section of the file, corresponding to the first level of the tree.
langThe code used (en, fr_FR, ...) corresponds to the codes
used for locales.
autoSCSITo automatically probe SCSI devices. Disable for some special machines.
authentication$shadow : set at 1 to use shadow
passwords, 0 elsewhere,
$md5 : idem
$nis : set at 1 if you wish to use a NIS
server, you will then need to setup:
$nis_server : the IP address of the NIS server the
machine will use.printerVarious parameters for configuring your printer, being local, remote, remote SMB, remote NCP,...
mouseYou should just suppress this section as it is highly probable that the install process will recognize the mouse on the target machine.
netcVarious parameters to configure the network on the target machine,
NETWORKING (to true or false)
DOMAINNAME
dnsServer
FORWARD_IPV4 (to true or false)
HOSTNAMEtimezoneGMT => (to true or false)
timezone => Europe/Paris (for
example)superuserContains the password of root. It may be one of:
pw: contains the encrypted password,
password: contains the password in clear.intfContains the information for the network interface, and notably the boot
protocol (BOOTPROTO) used for static,
bootp, or DHCP network configuration.
keyboardUsed to tell the disposition of the keyboard, with country code
(e.g. us, uk, de, fr, ...).
mkbootdiskSet it to:
0 if you don't want a boot disk (recommended),
1 to write a boot disk on drive fd0,
fdx to write a boot disk on drive fd<x>
(<x>=[0,1]).baseContains the list of all packages needed for base installation of Linux-Mandrake. You shouldn't modify it unless you know what you are doing.
usersContains username and password information for optional non-privileged users.
installClassThe install class chosen during install.
partitioningVarious boolean parameters to setup how the partitioning will occur:
clearall to clear existing partition table (usefull,
erase all previous partitions)
autoformat (recommended)
eraseBadPartitions
auto_allocate for auto-partitioningpartitionsIn the case that you did not choose auto_allocate you'll have to
add a section here for each partition:
mntpoint the directory where the partition will be
mounted,
type the decimal number corresponding to the partition
type chosen,
size the size in bytes of the partition.isUpgradetrue for an update, false or absent for an install
Xthe default X configuration.
default_packagesThe packages to install.
In the Unix tradition, there are two system startup schemes: the BSD scheme and the "System V" scheme, both named after the Unix system which implemented them first (resp. Berkeley Software Distribution and AT&T Unix System V). The BSD scheme is the simplest, but the System V scheme, although less easy to understand (which is what this chapter is for), is markedly more flexible to use.
initWhen the system starts, after the kernel has configured everything and
mounted the root filesystem, it starts the /sbin/init
program[18].
init is the father of all processes of the system, and it is
responsible for taking the system to the desired runlevel. We
will look at runlevels in the next section.
The init configuration file is /etc/inittab. This file
has its own manual page (man inittab), but here we will
describe only a few of the instructions.
The first line which should focus the attention is this one:
si::sysinit:/etc/rc.d/rc.sysinit
This instruction tells init that
/etc/rc.d/rc.sysinit is to be run on initialisation of the
system before anything else. To determine the default runlevel,
init then looks for the line containing the
initdefault keyword:
id:5:initdefault:
In this case, therefore, init knows that the default runlevel
is 5. It also knows that to enter level 5, it must run the following
command:
l5:5:wait:/etc/rc.d/rc 5
As you can see, the syntax for each runlevel is similar.
init is also responsible for restarting (respawn)
certain programs which only it is capable of restarting. This is the
case, for example, for all login programs which run in each of the 6
virtual terminals[19]. For the second virtual
console, this gives:
2:2345:respawn:/sbin/mingetty tty2
All the files relating to system startup are located in the
/etc/rc.d directory. Here is the list of the files:
$ ls /etc/rc.d
init.d/  rc.local*    rc0.d/  rc2.d/  rc4.d/  rc6.d/
rc*      rc.sysinit*  rc1.d/  rc3.d/  rc5.d/
To begin with, as we have seen, the rc.sysinit file is run.
This is the file responsible for setting up the basic machine
configuration: keyboard type, configuration of certain devices,
filesystem checking, etc.
Then the rc script is run, with runlevel as its argument. As
we have seen, the runlevel is a simple integer, and for each runlevel
<x> defined, there must be a corresponding rc<x>.d
directory. In a typical Linux-Mandrake installation, you might
therefore see that 6 runlevels are defined:
Let us look, for example, at the contents of directory rc5.d:
$ ls rc5.d
K15postgresql@  K60atd@      S15netfs@   S60lpd@        S90xfs@
K20nfs@         K96pcmcia@   S20random@  S60nfs@        S99linuxconf@
K20rstatd@      S05apmd@     S30syslog@  S66yppasswdd@  S99local@
K20rusersd@     S10network@  S40crond@   S75keytable@
K20rwhod@       S11portmap@  S50inet@    S85gpm@
K30sendmail@    S12ypserv@   S55named@   S85httpd@
K35smb@         S13ypbind@   S55routed@  S85sound@
As you can see, all the files in this directory are symbolic links and
and they all have a very specific form. Their general form is
<S|K><order><service_name>. The S means
Start service, and K means
Kill, stop service. The scripts are run in
ascending number order, and if two scripts have the same number,
alphabetical order applies. We can also see that each symbolic link
points to scripts located in /etc/rc.d/init.d (apart from
local), scripts which are responsible for controlling a
specific service.
When the system goes into a given runlevel, it starts by running the
K links in order: rc looks where the link is
pointing, then calls up the corresponding script with the single
argument stop. Then it runs the S scripts, still
using the same method, apart from the fact that the script is called
with the argument start.
Thus, without mentioning all the scripts, we can see that when the
system goes into runlevel 5, it first runs K15postgresql, i.e.
/etc/rc.d/init.d/postgresql stop. Then K20nfs, then
K20rstatd, until the last one; next, it runs all the
S scripts: first S05ampd, which then calls
/etc/rc.d/init.d/apmd start, and so on.
Armed with all this, you can create your own entire runlevel in a few
minutes, or prevent a service starting or stopping by deleting the
corresponding symbolic link (there are also interface programs for doing
this, notably tksysv and chkconfig. The former is a
graphical program).
The best way to understand "how it works" is to look at a
practical case, which is what we are going to do here. Suppose you have
just bought a brand new hard disk, still with no partitions on it. Your
Linux-Mandrake partition is full to bursting, and rather than
starting again from scratch, you decide to move a whole section of the
tree structure to your new hard disk. As this new disk is very big, you
decide to move your biggest directory to it: /usr. But first, a
bit of theory.
As we already mentioned in the Install guide, every hard disk is divided into several partitions, and each of these partitions contains a filesystem. While Windows gives a letter to each of these filesystems (or actually, only to those it recognizes), Linux has a unique tree structure of files, and each filesystem is mounted at one location in the tree structure.
Just as Windows needs a "C: drive", Linux has
to be able to mount the root of its file tree (/) somewhere, in
fact on a partition which contains the root filesystem. Once
the root is mounted, you can mount other filesystems in the tree
structure, at different mount points in the tree structure. Any
directory below the root one can act as a mount point.
This allows great flexibility in configuration. In the case of a
web server, for example, it is common to dedicate a whole
partition to the directory which hosts the web server data. The
directory which contains them is generally /home/httpd, which
will therefore act as the mounting point for the partition. You can see
in figures 56.1 and 19.2 the situation of
the system before and after mounting the filesystem.


As you can imagine, this offers a number of advantages: the tree structure will always be the same, whether if extends over a single filesystem or several dozens[20], and it is always possible to move a bulk key part of the tree structure physically to another partition when space becomes lacking, which is what we are going to do here.
There are two things you need to know about mount points:
Regarding the principles referred to above and as far as we are
concerned in this section, there are two things to note: a hard disk is
divided into partitions and each of these partitions hosts a filesystem.
Now, at present, your brand new hard disk has neither, so that is where
you have to start, beginning with the partitioning. For that you must be
root.
First, you have to know the "name" of your hard disk, i.e.
what file designates it. Suppose you set it up as a slave on your
primary IDE interface, it will then be /dev/hdb[21].
mount and umount commandsNow that the filesystem has been created, you can mount the partition.
Initially, it will of course be empty. The command to mount filesystems
is the mount command, and its syntax is as follows:
mount [options] <-t type> [-mount options] <device> <mounting point>
In this case, we want to mount our partition on /mnt (or any
other mount point you have chosen -- don't forget that it must
exist); the command for mounting our newly created partition is as
follows:
$ mount -t ext2 /dev/hdb1 /mnt
The -t option is used to specify what type of filesystem the
partition is supposed to host. Among the filesystems you will encounter
most frequently, are ext2 (the Linux filesystem),
vfat (for all DOS/Windows partitions: FAT
12, 16 or 32) and iso9660 (CDROM filesystem).
The -o option is used to specify one or more mounting options.
These options depend on the filesystem used. Refer to the
mount(8) manual page for more details.
Now that you have mounted your new partition, you need to copy the whole
directory /usr into it:
$ (cd /usr && tar cf - .) | (cd /mnt && tar xpvf -)
Now that the files have been copied, we can unmount our partition. To do
this the command is umount. The syntax is simple:
umount <mounting point|device>
So, to unmount our new partition, we can type:
$ umount /mnt
or else:
$ umount /dev/hdb1
As this partition is going to "become" our /usr
directory, we need to tell the system. To do this, we fill in:
/etc/fstab fileThe /etc/fstab file makes it possible to automate mounting of
certain filesystems, especially at system startup. It contains a series
of lines describing the filesystems, their mount points and other
options. Here is an example of a /etc/fstab file:
/dev/hda1   /           ext2    defaults        1 1
/dev/hda5   /home       ext2    defaults        1 2
/dev/hda6   swap        swap    defaults        0 0
/dev/fd0    /mnt/floppy auto    sync,user,noauto,nosuid,nodev,unhide 0 0
/dev/cdrom  /mnt/cdrom  auto    user,noauto,nosuid,exec,nodev,ro 0 0
none        /proc       proc    defaults        0 0
none        /dev/pts    devpts  mode=0622       0 0
A line contains, in order:
dump utility backup flag,
fsck
(FileSystem ChecK).Surprise, surprise, there is always an entry for the root filesystem.
The swap partitions are special since they are not visible in
the tree structure, and the mount point field for these partitions
contains the keyword swap. We will return to /proc in
greater detail.
Let's get back to the subject. You have moved the whole /usr
hierarchy to /dev/hdb1 and so you want this partition to be
mounted at boot time. In that case you need to add an entry to the
file:
/dev/hdb1 /usr ext2 defaults 1 2
Now the partition will be mounted at each boot. It will also be checked if necessary.
There are two special options: noauto and user. The
noauto option specifies that the filesystem should not be
mounted at startup but is to be mounted explicitly. The user
option specifies that any user can mount and unmount the filesystem. As
you can see, these two options are logically used for the CDROM drive
and floppy drive. There are other options, and /etc/fstab even
has its own manual page: fstab(5).
Last but not least of the advantages of this file is that it simplifies
the mount command syntax. To mount a filesystem referenced in
it, you can either reference the mount point or the device. So, to
mount a floppy disk, you can type:
$ mount /mnt/floppy
or:
$ mount /dev/fd0
To finish with our example of moving a partition: we have copied the
/usr hierarchy and completed /etc/fstab so that the new
partition is mounted at startup. But for the moment the old /usr
files are still there! We therefore need to delete them to free up space
(which was, after all, our initial aim). To do this, then, you need to:
/usr directory (i.e. the
"old" one, since the "new" one is not yet mounted):
rm -Rf /usr/*;
/usr: mount /usrand you are finished.
Along with filesystem mounting and source compilation, this is undoubtedly the subject which causes the most problems for beginners. Compiling a new kernel is not generally necessary, since the kernels installed by Linux-Mandrake contain support for a significant number of devices, but...
It may be, why not, that you want to do it, for no other reason than to see "what it does". Apart from making your PC and your coffee machine work a bit harder than usual, not a lot. However, the aim of this chapter is that your coffee machine should still work after compilation.
There are also valid reasons. For example, you have read that the kernel you are using has a security bug, a bug which is corrected in a more recent version; or else, a new kernel includes support for a device you need. You have the choice of waiting for upgrades or else compiling a new kernel yourself, and opt for the second solution.
Whatever you do, stock up with coffee.
The main kernel source host site is ftp.kernel.org, but it has a
large number of mirrors, all named ftp.xx.kernel.org, where
xx represents the country's ISO code. Following the
official announcement of the availability of the kernel, you should
allow two hours for all the mirrors to be supplied.
On all these FTP servers, the sources are in the directory
/pub/linux/kernel. Next, go to the directory with the series
that interests you: it will undoubtedly be v2.2. There is
nothing to prevent you trying version 2.3 kernels, but remember that
these are experimental kernels. The file containing the kernel sources
is called linux-<kernel.version>.tar.gz, e.g.
linux-2.2.11.tar.gz.
There are also patches for application to kernel sources to upgrade it
incrementally: thus, if you already have kernel sources version 2.2.11
and want to update to kernel 2.2.13, you do not need to download all the
sources, but can simply download the patches
patch-2.2.12.gz and patch-2.2.13.gz. As a general rule,
this is a good idea, since sources currently take up more than 12
MB.
Kernel sources should be placed in /usr/src. So you should go
into this directory then unpack the sources there:
$ cd /usr/src
$ mv linux linux.old
$ tar xzf /path/to/linux-2.2.11.tar.gz
The command mv linux linux.old is required: this is because
you may already have sources of another version of the kernel. This
command will ensure that you do not overwrite them. Once the archive is
unpacked, you have a linux directory with the sources of the new
kernel.
Now, the patches. We will assume that you do want to patch from
version 2.2.11 to 2.2.13 and have downloaded the patches needed to do
this: go to the newly created linux directory, then apply the
patches:
$ cd linux
$ gzip -dc /path/to/patch-2.2.12.gz | patch -p1 #
$ gzip -dc /path/to/patch-2.2.13.gz | patch -p1
$ cd ..
Generally speaking, moving from a version 2.2.x to a version 2.2.y
requires you to apply all the patches numbered 2.2.x+1, 2.2.x+2, ...,
2.2.y in order . To "descend" from 2.2.y to 2.2.x, repeat
exactly the same procedure but applying the patches in reverse order and
with option -R from patch (R stands for
Reverse). So, to go back from kernel 2.2.13 to kernel 2.2.11,
you would do:
$ gzip -dc /path/to/patch-2.2.13.gz | patch -p1 -R
$ gzip -dc /path/to/patch-2.2.12.gz | patch -p1 -R
Next, for the sake of cleanness (and so that you know where you are),
you can rename linux to reflect the kernel version and create a
symbolic link:
$ mv linux linux-2.2.11
$ ln -s linux-2.2.11 linux
It is now time to move on to configuration. For this you have to be in the source directory:
$ cd linux
To configure the kernel you have the choice between:
make xconfig for a graphical interface,
make menuconfig for an interface based on
ncurses, or
make config for the most rudimentary interface, line by
line, section by section.We will go through configuration section by section, but you can skip
sections and jump to the ones that interest you if you are using
menuconfig or xconfig. The choice for options is
'y' for Yes (functionality hard compiled into the
kernel), 'm' for Module (functionality compiled as a
module), or 'n' for No (do not include in the
kernel).
For xconfig, you will have guessed what the
Main Menu, Next and
Prev buttons are for. For menuconfig, use
the Enter key to select a section, and change options with
'y', 'm' or 'n' to change its status or else press the
Enter key and make your choice for the multiple choice options.
Exit will take you out of a section and out of
configuration if you are in the main menu. And obviously, there is
Help.
So here is a somewhat rough list of the options and the choices recommended for those options, gilded with explanations when necessary. The options not covered here are left to your discretion. Leaving them "as is" is generally a good idea.
'y'
PPro/6x86MX if your
processor is an Intel Pentium Pro,
Pentium II, Celeron or above, or a Cyrix 6x86 or
\techCHARACTERUNDERSCOREcyrixCHARACTERUNDERSCOREmii.
'n'
'y'. Even if your processor does not support them, it does not
matter.
'y' only if your machine is multi-processor!
'y'
'n'
'y'
'y' -- even
if you are not on a network! You will at least need it for
loopback interface.
'y' -- unless you
have no PCI bus on your machine.
'y'
'y'
'n' -- unless you
have this kind of bus (e.g. IBM PS/2 machines).
'n'
-- or else you must be filthy rich!
'y'
'y'
'y'
'm'
'y'
'm'
'y' or 'm',
your choice.
'y'
only if you answered 'y' to the Parallel port
support option. Otherwise, you must answer 'm' and add the line
alias parport_lowlevel parport_pc to the configuration file
/etc/conf.modules.
'n'
'y', if your motherboard supports it.
'n'
'n'
'n'
'y'
'y'
'y'
'y'
'n' if your PC
is on local time, 'y' if it is on GMT.
'n' (but read help!)
'y' -- but
you should realize that all this option does is question the
BIOS PNP on the configuration of the PNP boards if there
are any (remember that PNP has no sense for PCI devices).
'm' si
if you have parallel port devices, otherwise 'n'
'm'
'y'
'n'
'y'. If you have IDE disks but start on
a SCSI disk, you can answer 'm'
'm' if
you have an IDE CDROM drive.
'y' or
'm'
'y' or 'm' if you have, for example, an IDE ZIP drive.
'm' if you
have an IDE writer, otherwise 'n'
'y'
'y'
'n'
'y'
'm'
'n'
'n'
-- unless you want to try out RAID. If so, see
RAID-HOWTO.
'n'
'n' -- what,
you still have disks like this? :)
'm' if
you have this sort of devices, 'n' otherwise. If you answer 'm',
you will then need to select what types of devices you want to support
and what protocols. Refer to kernel help to find out more. There are no
generic solutions on this point, except to compile everything into
modules:)
'm'
'y'
'n'
'm'
'n', unless you want
to do IP masquerading (several machines behind one Internet
connection) or else simply a firewall, in which case you should answer
'y'.
'y' --
otherwise X will not work.
'y'
'n'
'y'
here it means you know what you are doing -- otherwise, answer
'n'
'y', otherwise 'n'. For
masquerading, you will also need to answer 'y' to
IP: always defragment (required for masquerading),
IP: masquerading and IP: ICMP
masquerading
'n',
unless the machine is actually a dedicated router.
'y' if you are
on a network -- see also help on this subject.
'y'
'n', unless you are connected via a very high throughput interface
(gigabit Ethernet, FDDI, etc.)
'y' if you have one (or
more) SCSI adapter(s) and device(s), a parallel port ZIP drive or
an IDE writer, 'n' otherwise. Choose 'y' for
SCSI disk support if you boot on a SCSI
disk, and not 'm'! Also say 'm' to SCSI
generic support if you have a CD writer (SCSI or IDE), and
answer appropriately for other types of device. When the moment comes
to determine what your SCSI adaptor(s) is (are), refer to file
/etc/conf.modules: Linux-Mandrake installation will have
established which drivers to use.
'n'
'n'
'n'
'm' only if you have an old generation ZIP!
'm'
here.
'y' if you have a
network device, or if you want to connect to the Internet by
modem, 'n' otherwise.
'm'
'y' if you have
one or more Ethernet cards. Then select the appropriate
driver(s) for your Ethernet card(s).
'y' or
'm' if you want to connect to the Internet via a modem.
'n'
'y' or 'm' if
you have infrared devices on your PC. If so, answer 'y' or
'm' to the different options proposed: IrLAN
protocol if you have an infrared transmitter/receiver to communicate
with other PCs with a similar interface (Ethernet emulation),
IrCOMM protocol if you have an infrared device
emulating a serial port, IrLPT protocol for
infrared devices emulating a parallel port. Say 'y' to
IrDA protocol options, 'y' to
Cache last LSAP, 'n' to
Fast RRs (but see help on this subject), 'n' to
Debug information, 'n' to
IrLAP compression unless you want to try it (see
help), 'y' or 'm' to IrTTY (uses Linux
serial driver) and IrPORT (IrDA serial driver);
then comes the support for the different infrared chips, choose the ones
you have (refer to the documentation on your hardware).
'y' if you have an
internal ISDN adapter. If you connect to the
Internet using this type of connection, also answer 'y' to
Support synchronous PPP. You will have to ask your
Internet Service Provider if it supports Van
Jacobson compression to answer appropriately the option
Use VJ-compression with synchronous PPP. Answer
'n' to Support generic MP (RFC 1717) (but see
help), 'n' to Support audio via ISDN
(but see help) and to Support ISDN diversion
services. Then comes the choice of driver for your ISDN card: refer
to your hardware documentation.
'n', unless you have a CDROM driver with a proprietary interface.
Very rare these days.
'y'
'y'
'y'
'n'
'n'
'n'
'y' -- leave
the option Maximum number of Unix98 PTYs in use
(0-2048) at its default value, 256.
'm' if you have
a parallel port printer. In this case, also say 'y' to
Support IEEE1284 status readback.
'y' here,
then 'y' or 'm' to the appropriate mouse type. Refer to help for
each of these options. As indicated in help, for any type of strange
mouse which is neither serial, nor PS/2, refer to
Busmouse-HOWTO. In particular, be careful with laptops.
'y' if you have this
type of non SCSI tape drive.
'n'
'n'
'y'
'y'. Then answer 'y' or
'm', as preferred, to the options that apply to your device. Here
again, your hardware documentation will be useful.
'y' or 'm' if you
have a joystick and want to use it. Then you must choose the driver
which matches your joystick. Refer to help and your hardware
documentation.
'y' if you
have a tape drive connected to the floppy disk controller. Then refer to
help for the different options.
'n' -- if you
answer 'y' here, it means you know what you're talking about
:)
'n'
'y' or 'm',
unless you have no desire at all to access MS-DOS/Windows floppy
disks or partitions from Linux.
'm'
'n'
'm'
-- includes FAT32 support.
'm'
'y'
'y'
'y'
'y'
'y' if your
machine is an NFS client. Otherwise, 'n'.
'y' if your machine
is to act as an NFS server.
'y' if you want to mount partitions from a file server
running Windows (9x or NT), otherwise 'n'.
This option is not necessary if you are making an SMB
server.
'm'
'm'
'm'
'm'
'y'
'y'. The framebuffer gives
you virtual consoles which are much more eye candy as well as a pretty
logo on startup :) However, it does not prevent you using a
X server. Say 'y' also to Support for
frame buffer devices (EXPERIMENTAL), 'y' to
VESA VGA graphics console.
'm' here if you
have a sound card, and refer to your /etc/conf.modules to find
out which driver to use. This assumes that you have already configured
your sound card, with sndconfig.
'n'And voilα! Configuration is finally over. Save your configuration and quit.
The configuration file is /usr/src/linux/.config. In general, it
is a very good idea to make a backup copy! Preferably, put this copy in
the personal directory of user root. As the configuration
changes very little between kernel revisions (i.e. between two versions
2.2.x or 2.3.x or... kernels), you can use it again to configure your
future kernels.
Next, time for compilation.
Small point to begin with: if you are recompiling a kernel with exactly
the same version as the one already present on your system, the latter's
modules must be deleted first. For example, if you are recompiling
2.2.10, you must delete directory /lib/modules/2.2.10.
Compiling the kernel and modules, and installing the modules is done in a single line:
$ make dep && make bzImage && make modules &&
  make modules_install
If you are asking what this famous && is for, here is the
explanation: a && b first runs a, and runs
b if and only if a was completed
successfully. By extension, you can imagine what the above command line
does: if one of the commands fails, the subsequent commands will not be
run. Another thing that failure means is that there is a bug in the
kernel! If that happens, tell us...
One more thing: no, compiling a new kernel will not invalidate the old
one! If compilation fails here, it does not mean that your system will
no longer start. To prevent your system from booting, you have to do
something really stupid -- which, honestly, will not happen if
you follow the instructions in this chapter to the letter :)
With your kernel now successfully compiled, all you need to do now is install it. Again for the sake of cleanness and to identify your kernels unambiguously, it is preferable to maintain a certain discipline in naming. Let us assume that you are installing a 2.2.13 kernel. Here, the types of commands are as follows:
$ cp arch/i386/boot/bzImage /boot/vmlinuz-2.2.13
$ cp System.map /boot/System.map-2.2.13
After this, you still have to update the file /etc/lilo.conf.
Obviously, retain the possibility of starting your current kernel! This
is what a typical lilo.conf looks like, after you have installed
your Linux-Mandrake distribution and before modification:
boot=/dev/hda
map=/boot/map
install=/boot/boot.b
prompt
timeout=50
image=/boot/vmlinuz-2.2.9-19mdk
        label=linux
        root=/dev/hda1
        read-only
other=/dev/hda2
        label=dos
        table=/dev/hda
Warning: This exemple assumes that you are using LILO as the main loader! If you are using System Commander, theboot=directive will be different, and you will probably have noothersection.
A lilo.conf file consists of a main section, followed by a
section for starting each operating system. In the example of the file
above, the main section is made up of the following directives:
boot=/dev/hda
map=/boot/map
install=/boot/boot.b
prompt
timeout=50
The boot= directive tells LILO where to install its
boot sector; in this case, it is the MBR (Master
Boot Record) of the first IDE hard
disk. If you want to make a LILO floppy disk, you simply replace
/dev/hda with /dev/fd0 :) The prompt
directive asks LILO to show the prompt on startup and to
start the procedure after 5 seconds (timeout=50). If you
remove the directive timeout=, LILO will wait until
you have typed something.
Then comes a linux section:
image=/boot/vmlinuz-2.2.9-19mdk
        label=linux
        root=/dev/hda1
        read-only
A linux section always begins with the directive image=,
followed by the full path to a valid Linux kernel. Like any
section, it contains a label= directive as a unique
identifier. The root= directive tells LILO which
partition hosts the root filesystem for this Linux
system. It may be different for you. The read-only directive
orders LILO to mount this root filesystem as read-only
on startup: if this directive is not there, you will get a warning
message.
Then comes the Windows section:
image=/boot/vmlinuz-2.2.9-19mdk
        label=linux
        root=/dev/hda1
        read-only
In fact, a section beginning with other= is used by
LILO to start any operating system other than Linux: the
argument of this directive is the location of this system's boot sector,
and in this case it is a Windows system. To find the boot
sector, located at the beginning of the partition hosting this other
system, Linux also needs to know the location of the partitions
table which will enable it to locate the partition in question, which is
done by the table= directive. The label= directive,
as with a linux section, identifies the system.
Before adding our linux section, we will kill two birds with
one stone :) Let's compose a message to be displayed on startup
before the LILO prompt appears, to explain how to use
LILO:
$ cat >/boot/message <<EOF
> Welcome , this is  LILO (LInux LOader).
> press the TAB key for a list of boot images .
> You have:
> * exp : start of Linux-Mandrake  with your new kernel
> * linux : original Linux-Mandrake  kernel
> * dos : Windows
> Pressing ENTER without entering an image name  will start
> the first image in the list, i.e. exp .
> EOF
$
And voilα! To display this message at boot up, you simply add the directive:
message=/boot/message
in the main section of lilo.conf. Now, you need to add the
Linux section in order to start on the new kernel. In this
example, it will be placed at the top, but nothing prevents you putting
it somewhere else:
image=/boot/vmlinuz-2.2.13
        label=exp
        root=/dev/hda1
        read-only
If you compiled your kernel with the framebuffer, you will probably want
to use it: in this case, you need to add a directive to the section
which tells it what resolution you want to start in. The list of modes
is available in the file
/usr/src/linux/Documentation/fb/vesafb.txt (only in the case of
the VESA framebuffer! Otherwise, refer to the corresponding file).
For the 800x600 mode in 32 bits[22], the mode number is 0x315, so you need to
add the directive:
vga=0x315
to our new LILO section. So this is what our lilo.conf
looks like after modification, decorated with a few additional comments
(all the lines beginning with #), which will be ignored by
LILO:
#
# Main section
#
boot=/dev/hda
map=/boot/map
install=/boot/boot.b
# Our prompt message
message=/boot/message
# Show prompt...
prompt
# ... wait 5 seconds
timeout=50
#
# Our new kernel: default image
#
image=/boot/vmlinuz-2.2.13
        label=exp
        root=/dev/hda1
        read-only
# If the VESA framebuffer is used:
        vga=0x315
#
# The original kernel
#
image=/boot/vmlinuz-2.2.9-19mdk
        label=linux
        root=/dev/hda1
        read-only
#
# Windows Section
#
other=/dev/hda2
        label=dos
        table=/dev/hda
Don't forget to adapt the file to your configuration! The Linux
root filesystem here is /dev/hda1 but it may well be
somewhere else on your system, and the same thing applies for
Windows. Now that the file has been modified appropriately, you
must tell LILO to change the boot sector:
$ lilo
Added exp *
Added linux
Added dos
$
In this way, you can compile as many kernels as you want, by adding as many Linux sections as necessary. All you need to do now is restart to test your new kernel.
I am often asked how to install free software from sources. Compiling software by oneself is really easy because most of the steps to follow are the same whatever the software to install is.
The aim of this document is to guide the beginner step by step, by trying to avoid the pitfall of incantatory, and by explaining to him the meaning of each move. Yet, I assume that the reader has a minimal knowledge of Unix (
lsormkdirfor instance).This guide is only a guide, not a reference manual. That is why several links are given at the end so as to answer the remaining questions. This guide can probably be improved, so I will thanksfully receive remarks or corrections on its contents.
What makes the difference between free software and proprietary software is the access to the sources of the software[23]. That means that free software is distributed as archives of source files. It may disconcert beginners, because users of free software must compile sources by themselves before they can use the software.
Nowadays, there are compiled versions of most of the existing free software. The user in a hurry just has to install binaries. Yet, some free software are not distributed under this form, or the earlier versions are not yet distributed under binary form. Furthermore, if you use an exotic operating system or an exotic architecture, a lot of software will not be compiled for you. More, compiling software by oneself allows to keep only the interesting options or to extend the functionalities of the software by adding extensions in order to obtain a software that fits exactly one's needs.
To build a free software, you need:
tar),
Compiling a free software does not generally present a lot of problems, but if you are not used to it, the smallest snag can throw you into a difficult position. The aim of this document is precisely to show you how to escape from such a situation.
In order to translate a source code into a binary file, a compilation must be done (usually from C or C++ sources, which are the most widespread languages among the (Unix) free software community). Some free software is written in languages which do not require compilation (for instance Perl or the shell, but they still require to be configured.
C compilation is logically done by a C compiler that is
usually GCC, the free compiler written by the GNU project (at
URL http://www.gnu.org/). Compiling a whole software package
is a complex task, which goes through the successive compilation of
different source files (it is easier for the programmer to put the
different parts of his work in separate files, for various reasons). In
order to make it easier, these repetitive operations are made by a
utility named make.
To understand how compilation works (and so, to be able to solve possible problems), one has to know its four steps. Its object is to little by little convert a text written in a language that is comprehensible by a trained human being (i.e. C language), towards a language that is comprehensible by a machine (or a very trained human being and even so, in few cases). GCC executes four programs one after the other, each of which takes on one step:
#include)
or defining a macro (#define). At the end of this
stage, a pure C code is generated.
.o file is generated.
.o) and the associated
libraries, and produces an executable file.A correctly structured free software distribution always has the same organization:
INSTALL file, which describes the installation
procedure.
README file, which contains general information related
to the program (short description, author, URL where to fetch it,
related documentation, useful links, etc). If the INSTALL file
is missing, the README file usually contains a brief installation
procedure.
COPYING file, which contains the license or
describes the distribution conditions of the software. Sometimes a
LICENCE file replaces it.
CONTRIB or CREDITS file, which contains a
list of people related to the software (active
participation, pertinent comments, third-party programs, etc).
CHANGES file (or less frequently, a NEWS
file), which contains last improvements and bugfixes.
Makefile file (see the section 147.0),
which allows to compile the software (it is a
necessary file for make. This file often does not exist at
the beginning and is generated during configuration process.
configure or Imakefile file, which
allows one to generate a new file Makefile,
src.
doc.
tar.gz archiveThe standard[24] of compression under Unix systems is the gzip format, developed by the GNU project, and considered as one of the best general compressing tools.
gzip is often associated with a utility named tar. tar is a survivor of antediluvian times, when computerists stored their data on tapes. Nowadays, floppy disks and CDROM have replaced tapes, but tar is still being used to create archives. All the files in a directory can be appended in a single file for instance. This file can then be easily compressed with gzip.
This is the reason why much free software is available as tar
archives, compressed with gzip. So, their extensions are
.tar.gz (or also .tgz to shorten).
To decompress this archive, gzip and then tar can be used. But the GNU version of tar (gtar) allows to use gzip "on-the-fly", and to uncompress an archive file without hardly noticing it (and without the need for the extra disk space).
The use of tar is incantatory:
tar <file options> <.tar.gz file> [<files>]
The <files> option is not compulsory. If it is omitted,
processing will be made on the whole archive. This argument does not
need to be specified to extract the contents of a .tar.gz
archive.
For instance:
$ tar xvfz guile-1.3.tar.gz
-rw-r--r-- 442/1002      10555 1998-10-20 07:31 guile-1.3/Makefile.in
-rw-rw-rw- 442/1002       6668 1998-10-20 06:59 guile-1.3/README
-rw-rw-rw- 442/1002       2283 1998-02-01 22:05 guile-1.3/AUTHORS
-rw-rw-rw- 442/1002      17989 1997-05-27 00:36 guile-1.3/COPYING
-rw-rw-rw- 442/1002      28545 1998-10-20 07:05 guile-1.3/ChangeLog
-rw-rw-rw- 442/1002       9364 1997-10-25 08:34 guile-1.3/INSTALL
-rw-rw-rw- 442/1002       1223 1998-10-20 06:34 guile-1.3/Makefile.am
-rw-rw-rw- 442/1002      98432 1998-10-20 07:30 guile-1.3/NEWS
-rw-rw-rw- 442/1002       1388 1998-10-20 06:19 guile-1.3/THANKS
-rw-rw-rw- 442/1002       1151 1998-08-16 21:45 guile-1.3/TODO
...
Among the options of tar:
v makes tar verbose. That means it
displays all the files it finds in the archive on the screen. If this
option is omitted, the processing will be silent.
f is a compulsory option. Without it, tar
tries to use a tape instead of an archive file (i.e., the
/dev/rmt0 device).
z allows to treat a "gziped" archive (with a
.gz extension). If this option is forgotten, tar will
produce an error. Conversely, this option must not be used with an
uncompressed archive.
x: it allows to extract files from the archive.
t: it lists the contents of the archive.
c: it allows to create an archive. That implies
to destruct its current contents. You may use it to backup your
personal files, for instance.
c: it allows to add files at the end of the
archive. It cannot be used with a compressed archive.A compression format named bzip2 tends to replace gzip.
bzip2 produces shortest archives than gzip does, but is
not yet a standard. Since little ago, .tar.bz2 extensions can
be found.
bzip2 is used like gzip by means of the tar
command. The only thing to do is to replace the letter z by
the letter y. For instance:
$ tar xvfy foo.tar.bz2
Some distributions use or used to use the option I instead:
$ tar xvfI foo.tar.bz2
Another way (which seems to be more portable, but is longer to type!):
$ tar --use-compress-program=bzip2 -xvf foo.tar.bz2
bzip2 must be installed and included in your 'PATH'
environment variable before you run tar.
Now that you are ready to uncompress the archive, do not forget to do
it as administrator (root). You will need to do things that
a single user is not allowed to do, and even if you can perform some of
them as a regular user, it is simpler to just be root the whole
time.
The first step is to be in the /usr/local/src directory, and
to copy the archive there. Thanks to it, you will always be able to
find the archive if you lose the installed software. If you do not
have a lot of space on your disk, save the archive on a floppy disk
after having installed the software. You can also delete it but be
sure that you can find it on the Web whenever you need it.
Normally, decompressing a tar archive should create a new
directory (you can check that beforehand thanks to the t
option). Go then in that directory, you are now ready to proceed
further.
Unix systems (of which GNU/Linux et FreeBSD are examples) are secured systems. That means that normal users cannot either make operations that may endanger the system (format a disk, for instance) or alter other users' files. In practice and in particular, it immunizes the system against viruses.
On the other hand, root can do everything, even running a
malicious program. To dispose of the source code is a guarantee of
security faced to viruses, but you can be paranoiac[25].
The idea is to create a user dedicated to administration
(free or admin for example) by using the
adduser command. This user must be allowed to write in the
following directories: /usr/local/src, /usr/local/bin and
/usr/local/lib, as well as all the sub-tree of
/usr/man (he also may need to be able to copy files elsewhere).
I recommend to you to make this user owner of the necessary directories,
or to create a group for him and to make the directories writable for
the group.
Once these precautions are taken, you can follow the instructions in the section 84.0.
A purely technical interest of the fact you dispose of the sources is the porting of the software. A free software developed for a Unix system can be used on all of the existing Unix systems (whether they are free or proprietary), with however some changes. That requires to configure the software just before compiling it.
Several configuration systems exist, you have to use the one the author of the software wants (sometimes, several are needed). Usually, you can:
configure exists in the parent directory of the
distribution.
Imakefile exists in the parent directory of the
distribution.
install.sh)
according to the contents of the INSTALL file (or the
README file)Autoconf is used to correctly configure a software. It creates
the files required by the compilation (for instance, Makefile for
instance), and sometimes changes directly the sources (for instance by
using a config.h.in file).
The principle of Autoconf is simple:
configure.in,
following a precise syntax.
configure from the configure.in file. This
script makes the tests required when the program is configured.
An example of the use of Autoconf:
$ ./configure
loading cache ./config.cache
checking for gcc... gcc
checking whether the C compiler (gcc  ) works... yes
checking whether the C compiler (gcc  ) is a cross-compiler... no
checking whether we are using GNU C... yes
checking whether gcc accepts -g... yes
checking for main in -lX11... yes
checking for main in -lXpm... yes
checking for main in -lguile... yes
checking for main in -lm... yes
checking for main in -lncurses... yes
checking how to run the C preprocessor... gcc -E
checking for X... libraries /usr/X11R6/lib, headers /usr/X11R6/include
checking for ANSI C header files... yes
checking for unistd.h... yes
checking for working const... yes
updating cache ./config.cache
creating ./config.status
creating lib/Makefile
creating src/Makefile
creating Makefile
To have a better control of what configure generates, some
options may be added by the way of the command line or environment
variables. Example:
$ ./configure --with-gcc --prefix=/opt/GNU
or (with Bash):
$ export CC=`which gcc`
$ export CFLAGS=-O2
$ ./configure --with-gcc
or:
$ CC=gcc CFLAGS=-O2 ./configure
Typically, it is an error of type configure: error: Cannot find
library guile (most of the errors of the configure script).
That means that the configure script was not able to find a
library (the guile library in the example). The principle is
that the configure script compiles a short test program, which
uses this library. If it does not succeed in compiling this program, it
will not be able to compile the software. Then an error occurs.
config.log file, which contains a track of all the steps of
the configuration. The C compiler is clear enough with its error
messages. That will help you in solving the issue.
configure again. An efficient way to check it is to
search for the file that contains the symbols of the library, which is
always lib<name>.so. For instance,
$ find / -name 'libguile*'
or else:
$ locate libguile
/usr/lib,
/lib,
/usr/X11R6/lib (or among those specified by the
environment variable 'LD_LIBRARY_PATH', explained
page 189.0.
Check that this file is a library by typing file libguile.so.
/usr/include or
/usr/local/include or /usr/X11R6/include). If
you do not know which headers you need, check that you have
installed the development version of the required library (for
instance, gtk+-devel instead of libgtk).
The development version of the
library provides the "include" files necessary for the
compilation of a software using this library.
configure script needs some space for temporary files). Use
the command df -k to display the partitions of your system,
and mind the full or nearly full partitions.If you do not understand the error message stored in the
config.log file, do not hesitate to ask for help from the
free software community (see section 231.0).
Furthermore, check whether configure answers by 100% of
No or whether it answers No while you are sure that
a library exists. For instance, it would be very strange that there is
no curses library on your system). In that case, the
'LD_LIBRARY_PATH' variable is probably wrong!
Imake allows to configure a free software by creating a
Makefile file from simple rules. These rules determine which
files need to be compiled to build the binary file, and Imake
generates the corresponding Makefile. These rules are
specified in a file named Imakefile.
What makes the interest of Imake is that it uses information site-dependent (architecture-dependent). It is quite handy for applications using X Window System. But Imake is used for many other applications.
The easiest use of Imake is to go into the main directory of
the decompressed archive, and then to run the xmkmf script,
which calls the imake program:
$ xmkmf -a
imake -DUseInstalled -I/usr/X11R6/lib/X11/config
make Makefiles
If the site is not correctly installed, recompile and install X11R6!
Read the INSTALL or README files for more information.
Usually, you have to run a file of type install.sh or
configure.sh. Then, either the installation script is
non-interactive (and determines itself what it needs) or it asks you
information on your system (paths, for instance).
If you do not manage to determine the file you have to run, you can type
./ (under Bash), and than press twice the TAB key
(tabulation key). Bash automatically (in its default
configuration) completes by a possible executable file from the
directory (therefore, a possible configuration script). If several
files may be executed, it gives you a list. You just have to choose the
right file.
A particular case is the installation of Perl modules (but not only). The installation of such modules is made by the execution of a configuration script, which is written in Perl. The command to execute is usually:
$ perl Makefile.PL
Some free software distributions are badly organized, especially during
the first stages of development (but the user is warned!). They
sometimes require to change "by hand" some configuration files.
Usually, these files are a Makefile file (see
section 147.0) and a config.h file (this name is only
conventional).
I advise against these manipulations except for users who know what they are doing. This requires a real knowledge and some motivation to succeed. But practice makes perfect.
Now that the software is correctly configured, it only remains to be compiled. This stage is usually easy, and does not set serious problems.
The favorite tool of the free software community to compile sources is
make. It has two interests:
Actions that must be executed to obtain a compiled version of the
sources are stored in a file often named Makefile or
GNUMakefile. Actually, when make is called, it reads
this file -- if it exists -- in the current directory.
If not, the file may be specified by using the option -f with
make.
make operates in accordance with a system of
dependencies. So compiling a binary file
("target") requires to go through several stages
("dependencies"). For instance, to create the (imaginary)
glloq binary file, the main.o and init.o object
files (intermediate files of the compilation) must be compiled and then
linked. These object files are also targets, whose dependencies are the
source files.
This text is only a minimal introduction to survive in the merciless
world of make. If you want to learn more, I advise you to go to
website of APRIL
(http://www.april.org/groupes/doc/), where you can find
more detailed documentation about make. For an exhaustive
documentation, refer to Managing Projects with Make, 2nd
edition, O'Reilly, by Andrew Oram and
Steve Talbott.
Usually, the use of make follows several conventions. For instance:
make install compiles the program (but not always), and
provides the installation of the required files at the right place on
the file system. Some files are not always correctly installed
(man, info), they must be copied by the user himself.
Sometimes, make install has to be executed again in
sub-directories. Usually, this happens with modules developed by third
parties).
make clean clears all the temporary files created by
the compilation, and also the executable file in most cases.The first stage is to compile the program, and therefore to type (imaginary example):
$ make
gcc -c glloq.c -o glloq.o
gcc -c init.c -o init.o
gcc -c main.c -o main.o
gcc -lgtk -lgdk -lglib -lXext -lX11 -lm glloq.o init.o main.o -o glloq
Excellent, the binary file is correctly compiled. We are ready to go to the next stage, which is the installation of the files of the distribution (binary files, data files, etc). See section 210.0.
If you are curious enough to look in the Makefile file, you
will find known commands (rm, mv, cp, etc),
but also strange strings, looking like '$(CFLAGS)'.
They are variables, that means strings that are usually
set at the beginning of the Makefile file, and then replaced by
the value they are associated with. It is quite useful when you want to
use the same compilation options several times in a row.
For instance, to print the string "foo" on the screen
using make all:
TEST = foo
all:
        echo $(TEST)
Most of the time, the following variables are set:
'CC': this is the compiler. Usually, it is
cc, which is in most of free systems synonymous with
gcc. When in doubt, put here gcc.
'LD': this is the program used to ensure the final
compilation stage (see section 42.0).
By default, this is ld.
'CFLAGS': these are the additional arguments that are
given to the compiler during the first compilation stages. Among
them:
-I<path>: specifies to the compiler where
to search some additional headers (eg:
-I/usr/X11R6/include allows to include the headers that
are in directory /usr/X11R6/include).
-D<symbol>: defines an additional symbol,
useful for programs whose compilations depend on the defined
symbols (ex: use the string.h file if
'HAVE_STRING_H' is defined).There are often compilation lines like:
$(CC) $(CFLAGS) -c foo.c -o foo.o
'LDFLAGS' (or 'LFLAGS'): these are arguments used
during the last compilation stage. Among them:
-L<path>: specifies an additional path
where to search for libraries (eg: -L/usr/X11R6/lib).
-l<library>: specifies an additional
library to use during the last compilation stage.Do not panic, it can happen to anyone. Among the most common causes:
glloq.c:16: decl.h: No such file or directory:
The compiler did not manage to find the corresponding header. Yet, the software configuration step should have anticipated this error. How to solve this problem:
/usr/include,
/usr/local/include, /usr/X11R6/include or one of
their sub-directories. If not, look for it on the whole disk
(with find or locate), and if you still do not find
it, check that you have installed the library corresponding to
this header. You can find examples of the find and
locate commands in their respective manual pages.
less
<path>/<file>.h
to test this)
/usr/local/include or
/usr/X11R6/include, you have sometimes to add a new
argument to the compiler. Open the corresponding
Makefile (be careful to open the right file, those in the
directory where the compilation fails[26]) with your favorite text editor (Emacs,
VI, etc). Look for the faulty line, and add the string
-I<path> -- where <path> is the path where
the header in question can be found --
just after the call of the compiler
(gcc, or sometimes $(CC)). If you do not
know where to add this option, add it at the beginning of the
file, after CFLAGS=<something> or after
CC=<something>.
glloq.c:28: `struct foo' undeclared (first use this
function)
:
The structures are special data types that all programs use. A lot of them are defined by the system in headers. That means that the problem is certainly caused by a lacking or misused header. The correct procedure for solving the problem is:
grep in order to see whether the
structure is defined in one of the headers.
For instance, when you are in the root of the distribution:
$ find . -name '*.h'| xargs grep 'struct foo' | less
Many lines may appear on the screen (each time that a function
using this type of structure is defined for instance). If it
exists, pick out the line where the structure is defined by
looking at the header file obtained by the use of
grep.
The definition of a structure is:
struct foo {
      <contents of the structure>
};
Check if it corresponds to what you have. If so, that means
that the header is not included in the faulty .c file.
There are two solutions:
#include "<filename>.h" at
the beginning of the faulty .c file.
/usr/include,
/usr/X11R6/include, or /usr/local/include).
But this time, use the line
#include <<filename>.h>.
INSTALL or
README file which are the libraries used by the
program and their required versions). If the version that
the program needs is not the one installed on your system,
update this library.
configure ran, for instance) for your architecture.parse error:
It is a problem that is quite complicated to solve, because it often is an error that appears at a certain line, but after that the compiler has met it. Sometimes, it is simply a data type that is not defined. If you meet an error message like:
main.c:1: parse error before `glloq_t
main.c:1: warning: data definition has no type or storage class
then the problem is that the glloq_t type is not defined.
The solution to solve the problem is more or less the same that in
the previous problem.
Note: there may be aparse errorin the oldcurseslibraries if my memory serves me right.
no space left on device:
The problem is easy to solve: there is not enough space on the
disk to generate a binary file from the source file. The solution
consists in making free space on the partition that contains the
install directory (delete temporary files or sources, uninstall
the programs you do not use). If you have uncompressed it in
/tmp, rather do that in /usr/local/src, which
avoids needlessly saturating the /tmp partition. Check
furthermore whether there are core> files on your disk.
If so, delete them or make them get deleted if they belong to
another user.
/usr/bin/ld: cannot open -lglloq: No such file or
directory
:
That clearly means that the ld program (used by
gcc during the last compilation stage) does not manage to
find a library. To include a library, ld searches for a file
whose name is in the arguments of type -l<library>. This
file is lib<library>.so. If ld
does not manage to find it, it produces an error message. To
solve the problem, follow the steps bellow:
locate command. Usually, the graphic libraries can be
found in
/usr/X11R6/lib. For instance:
$ locate libglloq
If it is unrewarding, you can make a search with the find
command (eg: find /usr -name libglloq.so*). If you
can not find the library, you will have to install it.
ld: the /etc/ld.conf file specifies
where to find these libraries. Add the incriminate directory at
the end (you may have to reboot your computer for this to be taken
into account). You also can
add this directory by changing the contents of the environment
variable 'LD_LIBRARY_PATH'. For instance, if the
directory to add is /usr/X11R6/lib, type: export
LD_LIBRARY_PATH=$LD_LIBRARY_PATH:/usr/X11R6/lib
(if your shell is Bash).
file command). If it is a
symbolic link, check that the link is good and does not point at
an non-existent file (for instance, with nm
libglloq.so). The permissions may be wrong (if you use
another account than root and if the library is
protected against read for example).glloq.c(.text+0x34): undefined reference to
`glloq_init':
It is a matter of a symbol that was not solved during the last compilation stage. Usually, it is a library problem. There may be several causes:
gtk, it belongs to the gtk
library. If the name of the library is hardly identifiable
(frobnicate_foobar), you may list the symbols of a
library with the nm command. For example,
$ nm libglloq.so
0000000000109df0 d glloq_message_func
000000000010a984 b glloq_msg
0000000000008a58 t glloq_nearest_pow
0000000000109dd8 d glloq_free_list
0000000000109cf8 d glloq_mem_chunk
Adding the -o option to nm allows to print the
library name on each line, which make the searches easier.
Let's imagine that we search for the symbol bulgroz_max, a
barbarous solution is to make a search like:
$ nm /usr/lib/lib*.so | grep bulgroz_max
$ nm /usr/X11R6/lib/lib*.so | grep bulgroz_max
$ nm /usr/local/lib/lib*.so | grep bulgroz_max
/usr/local/lib/libfrobnicate.so:000000000004d848 T bulgroz_max
Wonderful! The symbol bulgroz_max is defined in the
frobnicate library (the capital letter T is
before its name). Then, you only have to add the string
-lfrobnicate in the compilation line by editing the
Makefile file: add it at the end of the line where
'LDFLAGS' or 'LFGLAGS' (or 'CC' at worst)
are defined, or on the line corresponding at the creation of the
final binary file.
README or INSTALL files of the distribution to
know which version must be used.
nm -o *.o to know which one it is and add the
corresponding .o file on the compilation line if it is
missing.
Segmentation fault (core dumped):
Sometimes, the compiler hangs lamentably and produces this error message. I have no advise except asking you to install a more recent version of your compiler.
/tmp
Compilation needs temporary workspace during the different stages;
if it does not have space, it fails. So, you have to clean the
partition, but be careful some programs being executed
(X server, pipes, etc) can hang if some files are deleted.
You must know what you are doing! If /tmp is part of a
partition that does not only contain it (for example the root), search
and delete some possible core files.
make/configure in infinite recursion
It is often a problem of time in your system. Indeed, make needs to know the date in the computer and the date of the files it checks. It compares the dates and uses the result to know whether the target is more recent than the dependence.
Some date problems may induce make to endlessly build
itself (or to build and build again a sub-tree in infinite
recursion). In such a case, the use of touch (whose
consequence is to put the files in argument at the current time)
usually solves the problem.
For instance:
$ touch *
Or also (more barbarous, but efficient):
$ find . | xargs touch
Now that all is compiled, you have to copy the built files to an
appropriate place (usually in one of the sub-directories of
/usr/local).
make can usually perform this task. A special target is the
target install. So, using make install
allows to install the required files.
Usually, the procedure is described in the INSTALL or
README file. But sometimes, the developer has forgotten to
provide one. In that case, you must install everything by yourself.
Copy then:
/usr/local/bin directory
lib*.so files) in the
/usr/local/lib directory
*.h files) in the
/usr/local/include directory (be careful not to delete the originals)
/usr/local/share. If
you do not know the installation procedure, you can try to run the
programs without copying the data files, and to put them at the
right place when it asks them to you (in an error message like
Cannot open /usr/local/share/glloq/data.db
for example).
man files are usually put in one of the
sub-directories of /usr/local/man. Usually, these files
are in troff (or groff) format, and their extension
is a figure. Their name is the name of a command (for instance,
echo.1). If the figure is n, copy the file in
/usr/local/man/man<n>.
info files are put in the directory
/usr/info or /usr/local/infoHere you are finished! Congratulations! You now are ready to compile the whole of your operating system.
If you just have installed a free software, GNU tar for
instance, and if, when you execute it, another software is started or
it does not work like it did when you tested it directly from the
src directory, it is a 'PATH' problem, which finds the
programs in a directory before the one where you have installed the
new software. Check by executing type -a <program>.
The solution is to put the installation directory higher in the
'PATH' and/or to delete/rename the files that are executed
whereas they were not asked to, and/or rename your new programs
(into gtar in this example) so that there is no more confusion.
You can also make an alias if the shell allows it (for instance, say that
tar means /usr/local/bin/gtar).
Several documentation sources:
/usr/doc/HOWTO (not always, there are sometimes elsewhere;
check that out with the command locate HOWTO),
man <command>
to get documentation on the command <command>,
If you have bought an "official" Linux-Mandrake distribution
, you can ask the technical support for information on your system. I
think that the technical support has other things to do than help all
the users to install additional software, but some of them offer a
'x' days-installation help. Perhaps they can spend some time
on compilation problems?
You can also rely on help from the free software community:
comp.os.linux.* answer
all the questions about GNU/Linux. Newsgroups matching
comp.os.bsd.*
deal with BSD systems. There may be other newsgroups dealing with
other Unix systems. Remember to read them for some time prior
to writing to them.
#linux channel on most of the IRC network, or
#linuxhelp on IRCNET.
To find free software, a lot of links may help you:
sunsite.unc.edu or one of its
mirrors
http://www.freshmeat.net/ is probably the most complete site,
http://www.linux-france.org/ contains a lot of
links to software working with GNU/Linux. Most of them work of
course with other free Unix platforms,
http://www.gnu.org/software/ for an exhaustive
list of all of GNU software. Of course, all of them are free
and most are licensed under the GPL.http://www.altavista.com/ and make a request like:
+<software> +download or "download software".Copyright (c) 1999 Benjamin Drieu,
association APRIL (which website is http://www.april.org/).
This document is free documentation; you can redistribute it and/or modify it under the terms of the GNU General Public License as published by the Free Software Foundation; either version 2 of the License, or (at your option) any later version.
This work is distributed in the hope that it will be useful, but without any warranty; without even the implied warranty of merchantability or fitness for a particular purpose. See the GNU General Public License for more details.
You will find the GNU General Public License at address
http://www.gnu.org/copyleft/gpl.html; you can also get a copy of
it by writing to the Free Software Foundation, Inc., 675 Mass Ave,
Cambridge, MA 02139, USA.
The purpose of this chapter is to introduce a small number of command
line tools which may prove useful for everyday use. Of course, you may
skip this chapter if you only intend to use a graphical environment, but
a quick glance may change your opinion :)
There is not really any organisation in this chapter. Utilities are listed as they come, from the most commonly used ones to the most arcane ones. Each command will be illustrated by an example, but it is left as an exercise to you to find more useful uses of them.
grep: General Regular Expression ParserOkay, the name is not very intuitive, neither is its acronym, but its use is simple: looking for a pattern given as an argument in one or more files. Its syntax is:
grep [options] <pattern> [one or more file(s)]
If several files are mentioned, their name will precede each matching
line displayed in the result. Use the -h option to not display
these names; use the -l option to get nothing but the matching
filenames. It can be useful, especially in long argument lists, to
browse the files with a shell loop and use the grep
<pattern> <filename> /dev/null trick.
The pattern is a regular expression, even though most of the time it consists of a simple word. The most frequently used options are the following:
-i: Make a case insensitive search.
-v: Invert search: display lines which do not match the
pattern.
-n: Display the line number for each line found.
-w: Tells grep that the pattern should match a
whole word.Here's an example of how to use it:
$ cat victim
Hello dad
Hi daddy
So long dad
  # Search for the string "hi", no matter the case
$ grep -i hi victim
Hi daddy
  # Search for "dad" as a whole word, and print the
  #   line number in front of each match
$ grep -nw dad victim
1:Hello dad
3:So long dad
  # We want all lines not beginning with "H" to match
$ grep -v "^H" victim
So long dad
$
In case you want to use grep in a pipe, you don't have to
specify the filename as, by default, it takes its input from the
standard input. Similarly, by default, it prints the results on
the standard output, so you can pipe the output of a
grep to yet another program without fear. Example :
$ cat /usr/doc/HOWTO/Parallel-Processing-HOWTO | \
  grep -n thread | less
find: find files according to certain criteriafind is a long-standing Unix utility. Its role is to
recursively scan one or more directories and find files which match a
certain set of criteria in these directories. Even though it is very
useful, its syntax is truly arcane, and using it requires a little
use. The general syntax is:
find [options] [directories] [criterion] [action]
If you do not specify any directory, find will search the
current directory. If you do not specify the criterion, this is
equivalent to "true", thus all files will be found. The
options, criteria and actions are so numerous that we will only mention
a few of each here. Let's start with options:
-xdev: Do not search on directories located on other
filesystems.
-mindepth <n>: Descend at least <n> levels below
the specified directory before searching for files.
-maxdepth <n>: Search for files which are located
at most n levels below the specified directory.
-follow: Follow symbolic links if they link to
directories. By default, find does not follow them.
-daystart: When using tests related to time (see below),
take the beginning of current day as a timestamp instead of the default
(24 hours before current time).A criterion can be one or more of several atomic tests; some useful tests are:
-type <type>: Search for a given type of file;
<type> can be one of: f (regular file), d
(directory), l (symbolic link), s (socket),
b (block mode file), c (character mode file) or
p (named pipe).
-name <pattern>: Find files which names match the given
<pattern>. With this option, <pattern> is treated as a
shell globbing pattern (see chapter 35.0).
-iname <pattern>: Like -name, but ignore
case.
-atime <n>, -amin <n>: Find
files which have last been accessed <n> days ago
(-atime) or <n> minutes ago (-amin). You can
also specify +<n> or -<n>, in which case the search will
be done for files accessed respectively at most or at least <n>
days/minutes ago.
-anewer <file>: Find files which have been
accessed more recently than file <file>
-ctime <n>, -cmin <n>,
-cnewer <file>: Same as for -atime,
-amin and -anewer, but applies to the last time when
the contents of the file have been modified.
-regex <pattern>: As for -name, but
pattern is treated as a regular expression.
-iregex <pattern>: As for -regex, but
ignore case.There are many other tests, refer to the man page for more details. To combine tests, you can use one of:
<c1> -a <c2>: True if both <c1>
and <c2> are true; -a is implicit, therefore you can
type <c1> <c2> <c3> ... if you want all
tests <c1>, <c2>, ... to match.
<c1> -o <c2>: True if either <c1>
or <c2> are true, or both. Note that -o has a lower
precedence than -a, therefore if you want, say, to
match files which match criteria <c1> or <c2> and match
criterion <c3>, you will have to use parentheses and write
( <c1> -o <c2> ) -a <c3>. You must
escape (disactivate) parentheses, as otherwise they will be
interpreted by the shell!
-not <c1>: Inverts test <c1>, therefore
-not <c1> is true if <c1> is false.Finally, you can specify an action for each file found. The most frequently used are:
-print: Just prints the name of each file on standard
output. This is the default action if you don't specify any.
-ls: Prints the equivalent of ls -ilds on each
file found on the standard output.
-exec <command>: Execute command
<command> on each file found. The command line <command>
must end with a ;, which you must escape so that the shell
does not interprete it; the file position is marked with
{}. See the examples of usage to figure
this out.
-ok <command>: Same as -exec but ask
confirmation for each command.Still here? OK, now let's practice a little, as it's still the best way
to figure out this monster. Let's say you want to find all directories in
/usr/share. Then you will type:
find /usr/share -type d
Suppose you have an HTTP server, all your HTML files are in
/home/httpd/html, which is also your current directory. You want
to find all files which contents have not been modified for a month. As
you got pages from several writers, some files have the html
extension and some have the htm extension. You want to link
these files in directory /home/httpd/obsolete. You will then
type:
find ( -name "*.htm" -o -name "*.html"
) -a -ctime -30 -exec ln {}
/home/httpd/obsolete ;
[27]
Okay, this one is a little complex and requires a little explanation. The criterion is this:
( -name "*.htm" -o -name "*.html" ) -a
-ctime -30
which does what we want: it finds all files which names end either by
.htm or .html (( -name "*.htm" -o
-name "*.html" )), and (-a) which have
not been modified in the last 30 days, which is roughly a month
(-ctime -30). Note the parentheses: they are necessary here,
because -a has a higher precedence. If there weren't any, all
files ending with .htm would have been found, plus all files
ending with .html and which haven't been modified for a month,
which is not what we want. Also note that parentheses are escaped from
the shell: if we had put ( .. ) instead of
( .. ),
the shell would have interpreted them and tried to execute
-name "*.htm" -o -name "*.html" in a subshell... Another
solution would have been to put parentheses between double quotes or
single quotes, but a backslash here is preferable as we only have to
isolate one character.
And finally, there is the command to be executed for each file:
-exec ln {} /home/httpd/obsolete ;
Here too, you have to escape the ; from the shell, as
otherwise the shell interprets it as a command separator. If you don't
do so, find will complain that -exec is missing an
argument.
A last example: you have a huge directory /shared/images,
with all kind of images in it. Regularly, you use the touch
command to update the times of a file named stamp in this
directory, so that you have a time reference. You want to find all
JPEG images in it which are newer than the stamp file,
and as you got images from various sources, these files have extensions
jpg, jpeg, JPG or JPEG. You also
want to avoid searching in directory old. You want to be mailed
the list of these files, and your username is john:
find /shared/images -cnewer     \
     /shared/images/stamp       \
     -a -iregex ".*\.jpe?g"     \
     -a -not -regex ".*/old/.*" \
       | mail john -s "New images"
And here you are! Of course, this command is not very useful if you have to type it each time, and you would like it to be executed regularly... You can do so:
crontab: reporting or editing your crontab filecrontab is a command which allows you to execute commands at
regular time intervals, with the added bonus that you don't have to be
logged in and that the output report is mailed to you. You can specify
the intervals in minutes, hours, days, and even months. Depending on the
options, crontab will act differently:
-l: Print your current crontab file.
-e: Edit your crontab file.
-r: Remove your current crontab file.
-u <user>: Apply one of the above options for user
<user>. Only root can do that.Let's start by editing a crontab. If you type crontab
-e, you will be in front of your favorite text editor if you have set
the 'EDITOR' or 'VISUAL' environment variable,
otherwise VI will be used. A line in a crontab file is
made of six fields. The first five fields are time intervals for
minutes, hours, days in the month, months and days in the week. The
sixth field is the command to be executed. Lines beginning with a
# are considered to be comments and will be ignored by
crond (the program which is responsible for executing
crontab files). Here is an example of crontab:
Note: in order to print this out in a readable font, we had to break up long lines. Therefore, some chunks must be typed on a single line. When the''character ends a line, this means this line has to be continued. This convention works inMakefilefiles and in the shell, as well as in other contexts.
# If you don't want to be sent mail, just comment
#   out the following line
#MAILTO=""
#
# Report every 2 days about new images at 2 pm,
#   from the example above - after that, "retouch"
#   the "stamp" file. The "%" is treated as a
#   newline, this allows you to put several
#   commands in a same line.
0 14 */2 * *  find /shared/images              \
  -cnewer /shared/images/stamp                 \
  -a -iregex ".*\.jpe?g"                       \
  -a -not -regex                               \
    ".*/old/.*"%touch /shared/images/stamp
#
# Every Christmas, play a melody :)
0 0 25 12 * mpg123 $HOME/sounds/merryxmas.mp3
#
# Every Tuesday at 5pm, print the shopping list...
0 17 * * 2 lpr $HOME/shopping-list.txt
There are several other ways to specify intervals than the ones shown in
this example. For example, you can specify a set of discrete
values separated by commas (1,14,23) or a range
(1-15), or even combine both of them (1-10,12-20),
optionally with a step (1-12,20-27/2). Now it's up to you to
find useful commands to put in it :)
at: schedule a command, but only onceYou may also want to launch a command at a given day, but not regularly.
For example, you want to be reminded an appointment, today at 6pm. You
run X, and you'd like to be notified at 5:30pm, for example,
that you must go. at is what you want here:
$ at 5:30pm
  # You're now in front of the "at" prompt
at> xmessage "Time to go now! Appointment at 6pm"
  # Type C-d to exit
at> <EOT>
$
You can specify the time in different manners:
now +<interval>: Means, well, now, plus an interval
(optionally. No interval specified means just now). The syntax for the
interval is
<n> (minutes|hours|days|weeks|months).
For example, you can specify now + 1 hour, now + 3
days and so on.
<time> <day>: Fully specify the date. The
<time> parameter is mandatory. at is very liberal in
what it accepts: you can for example type 0100,
04:20, 2am, 0530pm, 1800, or one
of three special values: noon, teatime (4pm) or
midnight. The <day> parameter is optional. You can
specify it in different manners as well: 12/20/2001 for
example, which stands for December 20th, 2001, or, the European way,
20.12.2001. You may omit the year, but then only the European
notation is accepted: 20.12. You can also specify the month in
full letters: Dec 20 or 20 Dec are both valid.at also accepts different options:
-l: Prints the list of currently queued jobs; the first
field is the job number. This is equivalent to the atq
command.
-d <n>: Remove job number <n> from the queue.
You can obtain job numbers from atq. This is equivalent to
atrm <n>.As usual, see the at(1) manpage for more options.
tar: Tape ARchiverAlthough we have already seen a use for tar in
chapter 21.0, we haven't explained how it works. This is
what this section is here for. As for find, tar is a
long standing Unix utility, and as such its sytax is a bit
special. The syntax is:
tar [options] [files...]
Now, here is a list of options. Note that all of them have an equivalent
long option, but you will have to refer to the manual page for this as
they won't be listed here. And of course, not all options will be listed
either :)
Note: the initial dash (-) of short options is not now deprecated withtar, except after a long option.
c: This option is used in order to create new archives.
x: This option is used in order to extract files from an
existing archive.
t: List files from an existing archive.
v: This will simply list the files are they are added to
an archive or extracted from an archive, or, in conjunction with the
t option (see above), it outputs a long listing of file instead
of a short one.
f <file>: Create archive with name <file>,
extract from archive <file> or list files from archive
<file>. If this parameter is not given, the default file will be
/dev/rmt0, which is generally the special file associated to a
streamer. If the file parameter is - (a dash), the
input or output (depending on whether you create an archive or extract
from one) will be associated to the standard input or standard output.
z: Tells tar that the archive to create should
be compressed with gzip, or that the archive to extract from is
compressed with gzip.
y: Same as z, but the program used for
compression is bzip2.
p: When extracting files from an archive, preserve all
file attributes, including ownership, last access time and so on. Very
useful for filesystem dumps.
r: Append the list of files given on the command line to
an existing archive. Note that the archive to which you want to append
files should not be compressed!
A: Append archives given on the command line to the one
submitted with the f option. Similarly to r, the
archives should not be compressed in order for this to work.There are many, many, many other options, you may want to refer to the
tar(1) for a whole list. See, for example, the d
option. Now, on for a little practice. Say you want to create an archive
of all images in /shared/images, compressed with bzip2,
named images.tar.bz2 and located in your home directory. You will
then type:
#
 # Note: you must be in the directory from which
 #   you want to archive files!
 #
$ cd /shared
$ tar cyf ~/images.tar.bz2 images/
As you can see, we have used three options here: c told
tar that we wanted to create an archive, y told it
that we wanted it compressed with bzip2, and f
/images.tar.bz2 told it that the archive was to be created in our home
directory, with name images.tar.bz2. We may want to check if the
archive is valid now. We can just check this out by listing its files:
#
 # Get back to our home directory
 #
$ cd
$ tar tyvf images.tar.bz2
Here, we told tar to list (t) files from archive
images.tar.bz2 (f images.tar.bz2), warned that this
archive was compressed with bzip2 (y), and that we
wanted a long listing (v). Now, say you have erased the images
directory. Fortunately, your archive is intact, and you now want to
extract it back to its original place, in /shared. But as you
don't want to break your find command for new images, you need
to preserve all file attributes:
#
 # cd to the directory where you want to extract
 #
$ cd /shared
$ tar yxpf ~/images.tar.bz2
And here you are!
Now, let's say you want to extract the directory images/cars
from the archive, and nothing else. Then you can type this:
$ tar yxf ~/images.tar.bz2 images/cars
In case you would worry about this, don't: no, if you try to back up
special files, tar will take them as what they are, special
files, and will not dump their contents. So yes, you can safely put
/dev/mem in an archive :) Oh, and it also deals correctly
with links, so do not worry for this either. For symbolic links, also
look at the h option in the manpage.
bzip2 and gzip: data compression programsYou can see that we already have talked of these two programs when
dealing with tar. Unlike WinZip under Windows,
archiving and compressing are done using two separate utilities
-- tar for archiving, and the two programs which we
will now introduce for compressing data, bzip2 and
gzip.
At first, bzip2 has been written as a replacement of
gzip. Its compression ratios are generally better, but on the
other hand it is more memory-greedy. The reason why gzip is
still here is that it is still more widespread than bzip2.
Maybe bzip2 will eventually replace gzip, but maybe
not.
Both commands have a similar syntax:
gzip [options] [file(s)]
If no filename is given, both gzip and bzip2 will
wait for data from the standard input and send the result to the
standard output. Therefore, you can use both programs in pipes. Both
programs also have a set of common options:
-1, ..., -9: Set the compression ratio. The
higher the number, the better the compression, but better also means
slower: "There's no such thing as a free lunch".
-d: Uncompress file(s). This is equivalent to using
gunzip or bunzip2.
-c: Dump the result of compression/decompression of files
given on the command line to the standard output.Watch out! By default, both gzip and bzip2 erase the
file(s) that they have compressed (or uncompressed) if you don't use the
-c option. You can avoid it with bzip2 by using the
-k option, but gzip has no such option!
Now some examples. Let's say you want to compress all files ending with
.txt in the current directory using bzip2, you will
then use:
$ bzip2 -9 *.txt
Let's say you want to share your images archive with someone, but he
hasn't got bzip2, only gzip. You don't need to
uncompress the archive and recompress it, you can just uncompress to the
standard output, use a pipe, compress from standard input and redirect
the output to the new archive:
bzip2 -dc images.tar.bz2 | gzip -9 >images.tar.gz
And here you are. You could have typed bzcat instead of
bzip2 -dc. There is an equivalent for gzip but its
name is zcat, not gzcat. You also have
bzless (resp. zless) if you want to view compressed
file directly, without having to uncompress them first. As an exercise,
try and find the command you would have to type in order to view
compressed files without uncompressing them, and without using
bzless or zless :)
There are so many commands that a comprehensive book about them would be
the size of an encyclopedia. This chapter hasn't even covered a tenth of
the subject, yet you can do much which what you learnt here. If you
wish, you may read some manual pages: sort(1),
sed(1), zip(1) (yes, that's what you think:
you can extract or make ZIP archives with Linux),
convert(1), and so on. The best way to get accustomed to
these tools is to practice and experiment with them, and you will
probably find a lot of uses to them, even quite unexpected ones. Have
fun! :)
Although using the new DrakX graphical installation is the recommended (and easiest) way to install Linux-Mandrake, a text-based installation option is also available.
The text-based install requires you to create a bootable floppy-disk if you are unable to boot directly from the CDROM. Instructions for creating a bootable floppy are contained in the Install guide.
When you run the program from a disk, you should obtain the screen displayed in figure 275.1.
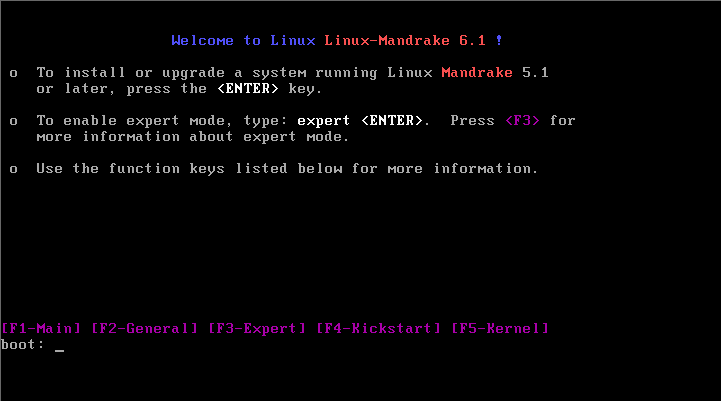
Simply press Enter. The introduction screen then appears, like it
is in figure 23.2.
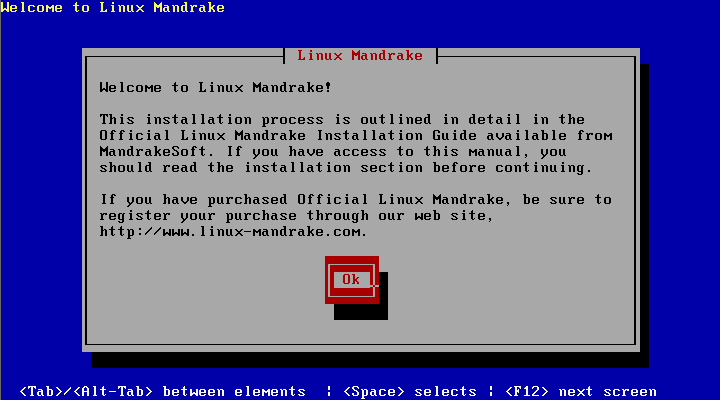
Press Enter again: the installation itself should then start to
run.
Before going any further, it will be useful for you to learn some keyboard shortcuts so that you can manage the text interface. That way, you will not have to remember them all the time throughout this manual:
TAB key will circulate throughout the various items on a
screen (text fields, list of choices);
Enter will simulate pressing the selected button.
If no button is highlighted, pressing this key will be the same as
pressing the button labeled OK.Installation begins as with DrakX: you have to select the default language for the system. This will also be the language for installation, and this choice is displayed figure 23.3.
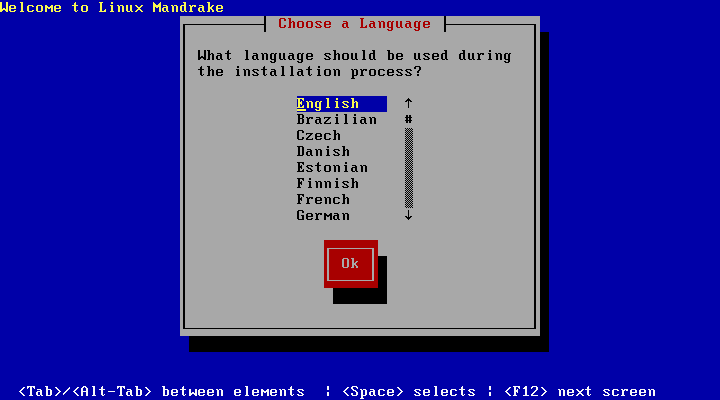
Select the language you want and then validate (OK). Then comes the type of keyboard you have (figure 23.4).
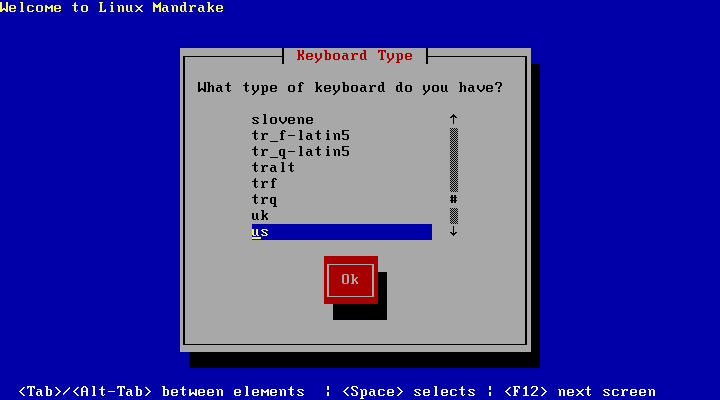
Press OK again to validate.
You will then be asked for the type of media the distribution files are located on. The usual choice is CDROM as shown in figure 23.5.

After this, the installation program will ask you to insert the Linux-Mandrake CD (if you have not already done so), then validate.
After initializing the CDROM, you will be asked to choose between installing and upgrading. If you are updating a previous version of Linux-Mandrake choose the Upgrade option. To install a new system, choose Install (figure 23.6).
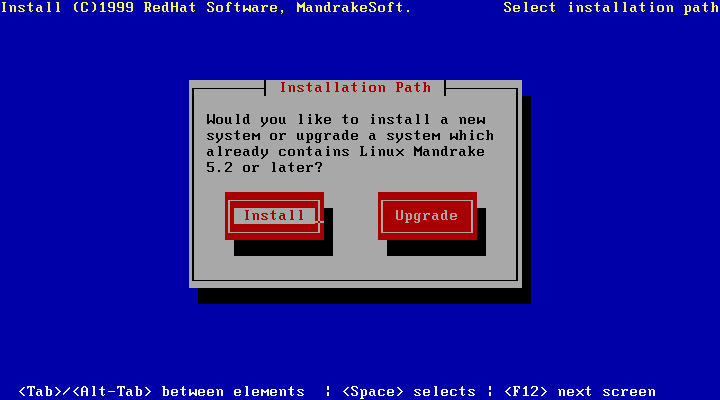
The program will then ask (as shown in figure 23.7) for the installation class desired. These are the options:
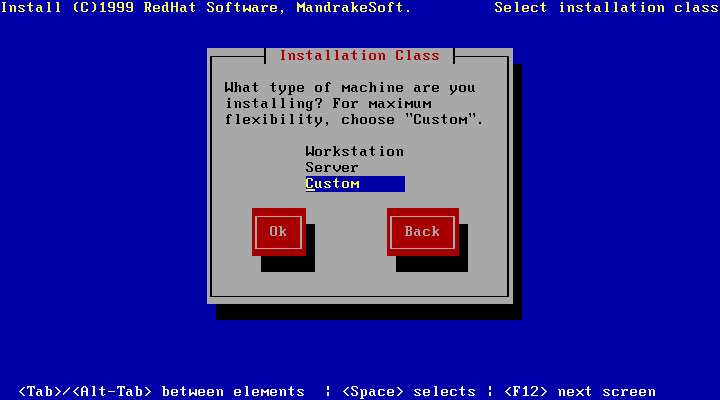
The installation program will then ask you if you have a SCSI card, as in figure 23.8.
If you reply Yes, a search for a PCI adapter will be carried out. If such a card is found, the corresponding driver will be installed. If, on the other hand, you have an ISA card or a PCI card which is not known to the installation program, you will have to tell the installation program which driver to use, as in figure 23.9.
After selecting the driver, the program will ask for parameters for the driver. You can decide not to submit any: the driver will then try to find the adapter itself. Autodetection rarely fails, but if it does, do not forget the information you found in the Install guide: it will again be useful to you here.
To continue with the Custom installation, select Disk Druid from the next screen as shown in figure 23.10. If you have already partitioned the hard drive, the Disk Druid program will let you specify mount points for the partitions. If you still need to create or modify partitions you may also perform that here.
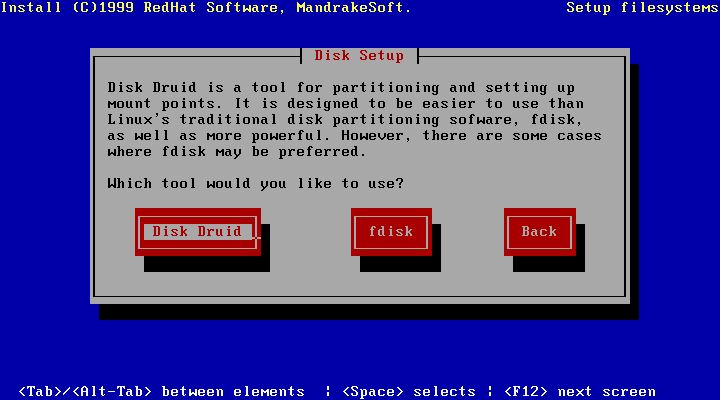
You will then see the display of figure 23.11.
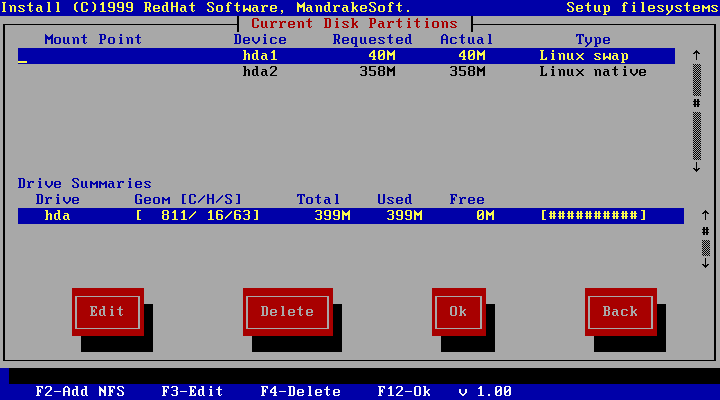
The graphic in figure 23.12 shows the minimum
partitions and types needed for installation. To navigate through this
window use the TAB and cursor keys.
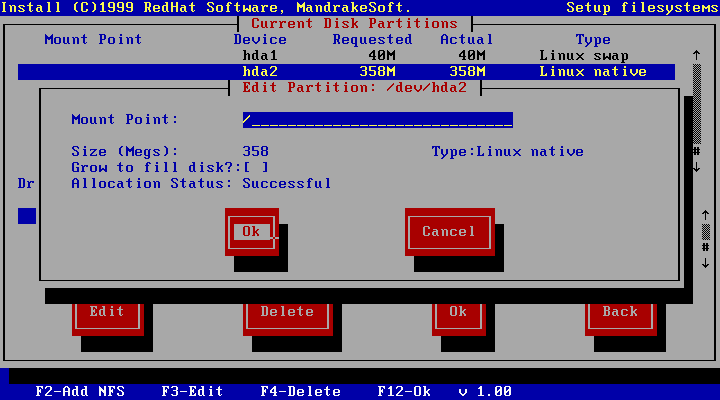
Then press Enter. If you want to find out more about the mount
points, refer to the Reference manual.
Then use the TAB key to move to the OK button, then
validate.
Now that the disk has been partitioned and the mount points allocated, the installation program will format these partitions, which means it will write a filesystem on the partitions. Firstly, the swap space is formatted (figure 23.13).
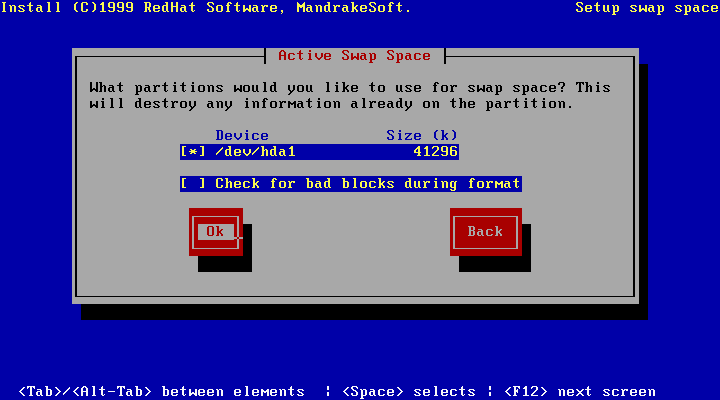
Selecting Check for bad blocks during format is recommended for older, error-prone hard drives; any bad blocks detected will be marked "unusable". Note that enabling this option will dramatically add time to the process. Then comes the formatting of the Linux data partitions (if you have several), as displayed in figure 23.14.
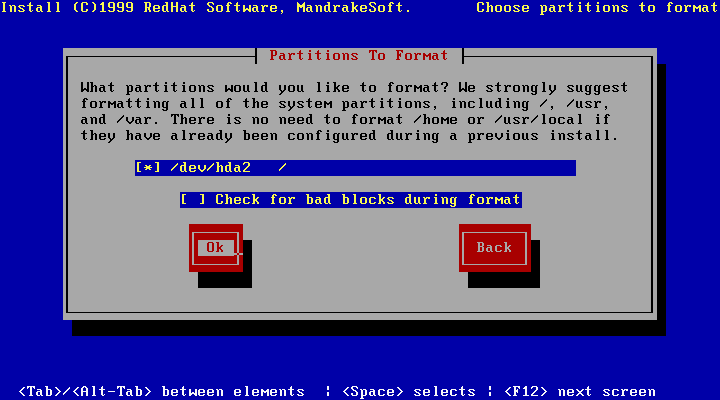
Here too, the procedure and options are the same. If you have several partitions to format, scroll down the list and select each of the partitions that you wish to format, using the spacebar.
Next you will be asked to choose the software packages to be installed on your machine.
You may select entire groups of software from this list; or, by checking Select packages individually, you will be given the opportunity to choose individual applications (figure 23.15).

If you have asked to select the packages individually, you will see the window of figure 23.16.

All the groups are organized as a tree, and in each branch you will find
the applications attached to this group. A + in front of a group
means that the tree below this group has been collapsed, a - means
that it has been expanded, and that you can see each of the packages
below this group. You can press the spacebar to open or close a group.
A group marked with a o means that a few packages in this group
are currently selected, but not all.
A group marked with a * means that all the packages in this group
are currently selected. A space means that no application has been
selected.
You can select or deselect a package using the spacebar. If you want to
obtain information on a package, you simply have to highlight it and
press F1.
After you have made your choices select the Done button and
press Return. The partitions you selected are then formatted and
the packages are now installed on your system.
After package selection, the installation program will try to detect your mouse. You will then see a message similar to the one in figure 23.17.
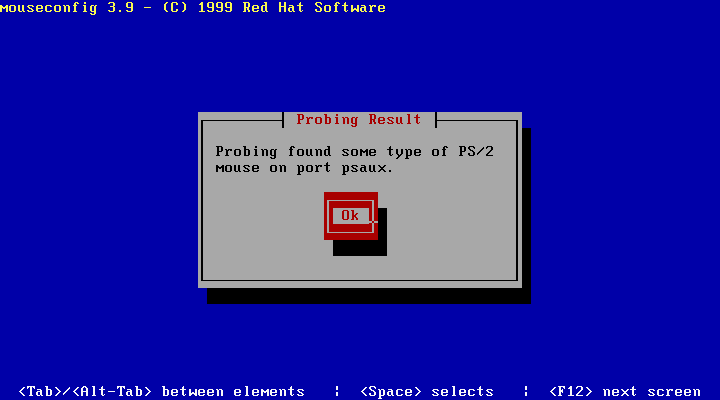
This is a PS/2 mouse. If you have a serial mouse, the message looks like this:
Probing found some type of serial mouse on port ttyS0
In this example, the serial port ttyS0 is the equivalent of
the DOS COM1. Press Enter to validate and the program will
ask you the exact sort of mouse you have: it selects a generic type by
default, but this may not be the one you want
(figure 23.18).

Look through the list and see if it contains one of the types of mouse corresponding to yours. If you have no idea, choose a generic mouse with two or three buttons.
Warning: Many Linux applications depend on a three button mouse. If you have a two button mouse it is possible to emulate a third by selecting Emulate three buttons from this window. To use this "third" button, press both mouse buttons at the same time.
This screen enables you to connect up to an existing local network (by Ethernet, not an Internet connection by modem). If you are not on a network, choose No.
If you answer Yes, the installation program will look for a network card. If it finds one, it will install the driver. If it doesn't find one, a list of drivers will be displayed from which you will have to choose one. Here you may apply any information received from a Windows installation about your network card: just as when you configured an SCSI adapter, you will have to give the parameters to the driver so that it can find the card if autodetection fails.
Once the network card has been configured, you will have to configure its IP address (figure 23.19).

Normally, you will have a static IP address, unless you were part of an existing network and you were given a different method by the administrator. A static IP address is configured as in figure 23.20.
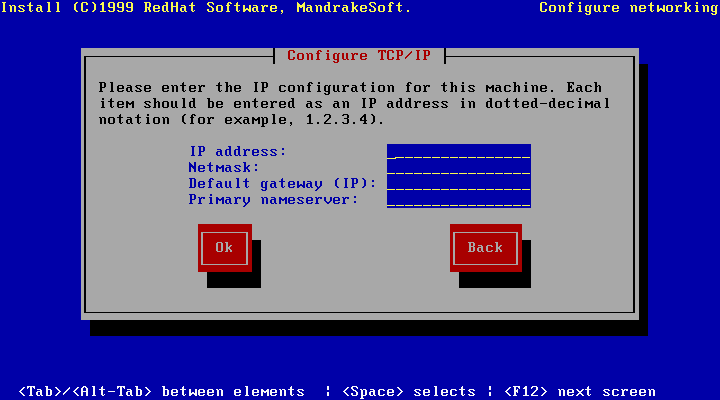
If you are part of an existing network, the network administrator will also have specified the parameters. If you are in a private network, do not forget to take a private network address class!
Similarly, do not enter a default gateway or name server (unless you have configured one) if your network is not connected to the Internet (don't forget that Internet connections by modem do not come under this section). Then you will have to configure the name of your machine (figure 23.21).
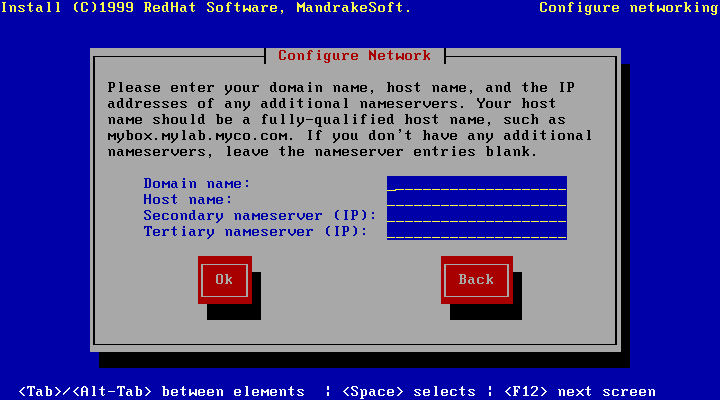
Choose whichever you like if you are on a private network. Otherwise, here too, the network administrator will have given you the name of the machine.
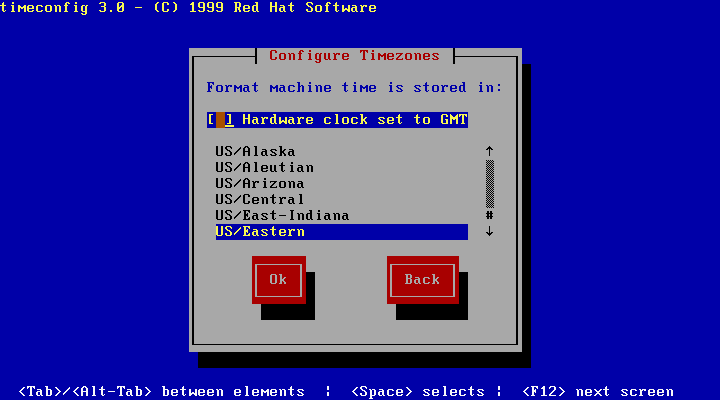
This tab is used to specify your time zone. Choose yours from the list displayed (figure 23.22).
Unless you know otherwise, do not select the Hardware clock set to GMT option; this would mean that your BIOS uses GMT time which isn't likely considering Windows does not support GMT.
During the startup process, a certain number of services will be started
automatically. From the screen of figure 23.23 you can
choose which services to enable during startup. If you're not sure, it's
okay to leave the default selections. To view descriptions, select a
service using the cursor keys and hit F1.
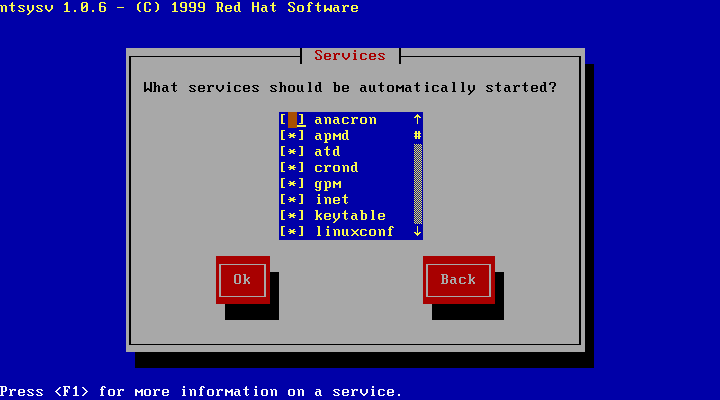
If you do not know to what these services correspond, leave the screen as it is.
If you want to configure a printer, pay attention to the screen of figure 23.24.

A printer is configured in exactly the same as in the case of DrakX. You may refer to that section in the Install guide for more information.
root passwordNext you'll be prompted to enter a password for the root
account. You will have to type it twice to ensure that you haven't made
a mistake, and you must type it blindly, in the two boxes of
figure 23.25.
root passwordThe root password is a crucial part of the security of your
system. root is the account normally held by a system
administrator who has the power to modify all system settings. Choose
your root password carefully!
You'll then be asked to add a non-privileged user to the system. This is
the account you will use to login for normal, everyday activity. It is
strongly advised that you not normally use the root account as
it is very easy to make a mistake that will harm the entire system.

First you will have to choose a login name: this is the name under which the user will log into the system. The user's real name is not mandatory. You will then have to choose a password for this new user, and here too you will have to type it in twice, blindly, to ensure that you have not made a mistake. If you want a different shell from Bash, choose one from the list offered.
Here you have to decide on the user authentication mechanisms for the machine (figure 23.27).
The default choices are generally what you need. However, if you are part of an existing network, you may have to use NIS. Ask your network administrator in this case.
The program will then ask you, as in figure 23.28, if you want to create a boot disk.
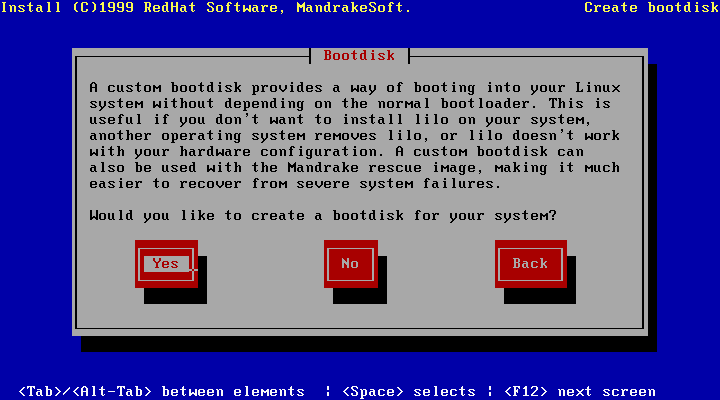
You should answer Yes for various reasons:
You will need to insert a disk which, if it is not empty, must not contain data which you may need...
You can now install the Linux boot loader, LILO.
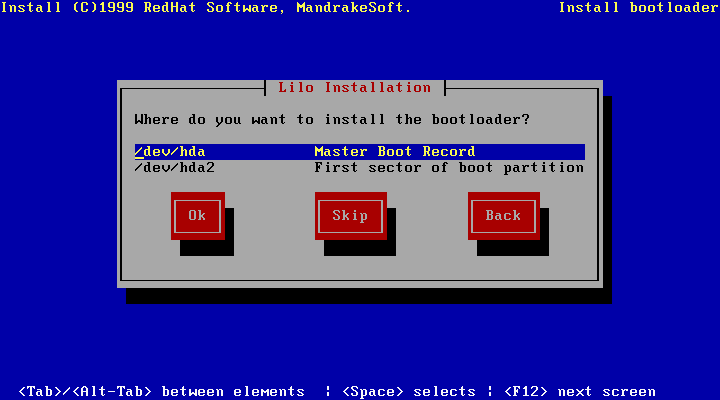
If you want to use LILO instead, reply Master Boot Record: this will name the boot sector. The program will then ask you to send the options to LILO where necessary, but you shouldn't need to (figure 23.30).
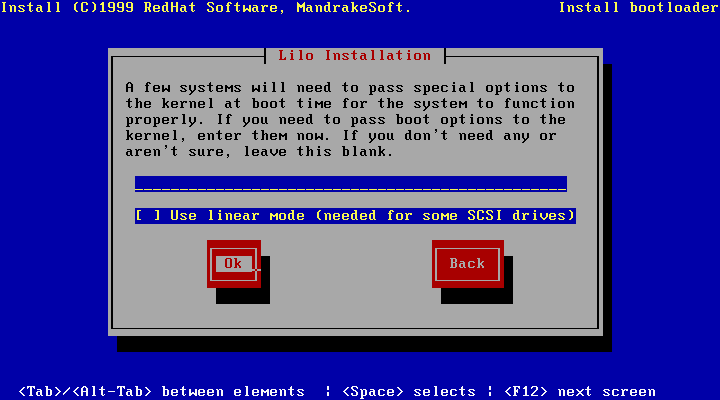
You now have to configure X Window System, the heart of the Linux graphical interface. If you have a recent card, it should normally be detected automatically. Otherwise, you will have to choose it from a list.
Next you have to choose a monitor. Here, too, you will be given a list of choices. If your monitor is not in it, choose Custom in the screen of figure 23.31.
You will then have to choose between several typical configurations: choose the one which corresponds to yours. But be careful not to choose one which is too high -- it could damage your system.
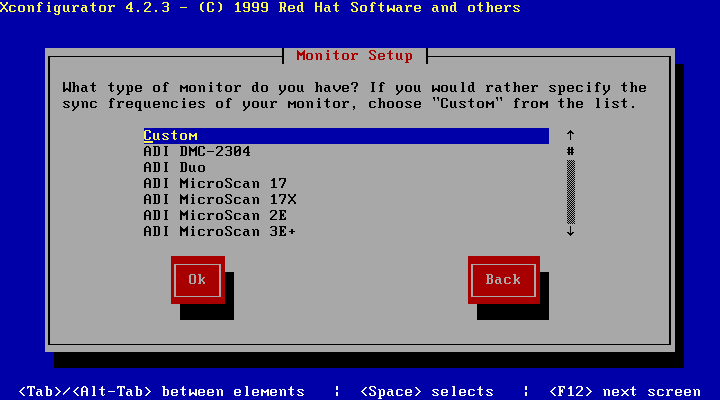
In some cases, you will also have to enter the amount of video memory on the card. The installation program will then start X to try to find the available video modes, and will suggest a default mode which you can accept or not. Finally, after the mode choices, X will start up and you will be able to judge the result.
System installation is now completed, and you now simply have to read
through the rest of the manual :)
alias at
the prompt.
:)
'i', 'I', 'a', 'A', 's', 'S', 'o',
'O', 'c', 'C', ...
iso9660
(used by CDROMs) and so on.
Esc (or Ctrl-[).
man command.
The first thing one should (learn how to) read when hearing of a command
he doesn't know :)
type/subtype describing the
contents of a file attached in an e-mail. This allows MIME-aware mail
clients to define actions depending on the type of the file.
NULL.
less.
sed,
awk, grep, perl among others.
protocol://server.name[:port]/path/to/resource.
When only a
machine name is given and the protocol is http://, it defaults to
retrieving the file index.html on the server.
atime), i.e. the last date when the file was
opened for read or write; the last date when the inode attributes were
modified (mtime); and finally, the last date when the contents
of the file were modified (ctime)..gif" rather than "GIF images". However,
once again, files under Unix only have an extension by
convention: extensions in no way define a file type. A file ending with
.gif could perfectly well be a JPEG image, an application
file, a text file or any other type.:)'HOME'
environment variable and the 'home' variable are not the same.dl (delete one character forward)
is 'x'; a shortcut for dh is 'X'; dd deletes the
current line.y6w literally means:
"Yank 6 words".:)lsdev is part of the
procinfo package./sbin on a filesystem
other than the root filesystem is a very bad idea :)make[1]: Leaving
directory `/home/benj/Project/foo'). Pick out the one with
the highest number. To check that it is the good one, go to the
directory and execute make again to obtain the same
error./home/httpd and /home/httpd/obsolete be on
the same filesystem!